Categories
Uncategorized

How to Install Vinyl Plank Flooring

How to Install Vinyl Plank Flooring: Everything You Need to Know Before You Start

To install vinyl plank flooring, start by choosing durable, water-resistant planks that match your decor. Gather tools like a utility knife, measuring tape, and spacers, and prepare the area by clearing furniture and ensuring a clean, level subfloor. Follow a step-by-step installation process, deciding on a floating or glue-down method. Finally, maintain your floors with regular cleaning. For additional tips and common troubleshooting techniques, you’ll find plenty of valuable information ahead.

Choosing the Right Vinyl Plank Flooring

When you’re choosing the right vinyl plank flooring, what should you consider to confirm it meets your needs?

First, think about the vinyl plank benefits, like durability and water resistance, making it ideal for high-traffic areas or spaces prone to moisture.

Next, explore various flooring styles. Whether you prefer the classic look of hardwood or a modern tile design, there’s a vinyl option that fits your aesthetic.

Check the thickness and wear layer, as thicker planks often provide better sound insulation and longevity.

Additionally, consider the installation method—click-lock or glue-down—based on your DIY skills.

Finally, verify the colors and textures complement your existing decor, creating a cohesive look throughout your home.

Essential Tools and Materials for Installation

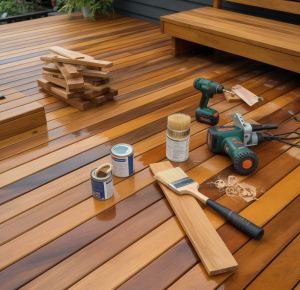
Selecting the right vinyl plank flooring sets the stage for a successful installation, but having the proper tools and materials on hand is just as important.

Start with a utility knife for cutting planks, a measuring tape for accuracy, and a square for straight cuts. You’ll also need spacers to maintain expansion gaps and a tapping block to fit the planks snugly. A pull bar helps in tight spots, while a rubber mallet guarantees you don’t damage the edges.

For installation techniques, consider using an underlayment for added comfort and sound insulation. Finally, gather adhesive if you’re opting for glue-down installation.

With the right material selection and tools, you’ll streamline the entire process, making your flooring project much easier.

Preparing Your Space for Installation

Before you start installing your vinyl plank flooring, make certain to clear the area of all furniture and obstacles.

Next, check the condition of your subfloor to guarantee it’s clean, dry, and level.

Finally, gather all necessary tools to streamline your installation process.

Clear the Area

To successfully install vinyl plank flooring, you need to clear the area where you’ll be working. Start by removing all furniture, rugs, and other items from the space. This allows you to have ample room to maneuver and guarantees a safe working environment.

Use cleaning tips like vacuuming or sweeping to remove dust and debris from the floor. If there are any adhesive residues or stains, consider using a suitable cleaner to tackle those issues.

After cleaning, think about space organization; place your tools and materials nearby for easy access during installation. This preparation not only streamlines your workflow but also helps prevent accidents, making your vinyl plank flooring project much more efficient.

Check Subfloor Condition

Since the success of your vinyl plank flooring installation hinges on a solid foundation, it’s vital to check the condition of your subfloor before proceeding.

Start by identifying the subfloor types in your space, whether it’s concrete, plywood, or OSB. Each type has specific requirements for installation.

Next, assess the subfloor moisture; a moisture meter can help you determine if levels are acceptable. Ideally, moisture content should be below 5%. If you find excessive moisture, address the source before continuing.

Also, inspect for any damage like cracks or uneven areas. Repairing these issues guarantees a smooth and lasting installation.

Taking the time to evaluate your subfloor now will save you headaches down the line.

Gather Necessary Tools

With your subfloor in good condition, it’s time to gather the necessary tools for your vinyl plank flooring installation.

Start with essential items like a utility knife, measuring tape, straight edge, and a tapping block. You’ll also need spacers, a rubber mallet, and a pull bar to guarantee a tight fit.

Prioritize tool selection based on your specific flooring type and layout. Don’t forget protective gear like knee pads and safety glasses.

Before you begin, check each tool for proper function; tool maintenance can prevent delays and guarantee quality results.

Step-by-Step Installation Process

Now that your space is prepared, it’s time to focus on the step-by-step installation process.

Start by ensuring your subfloor is clean and level, as this will set the foundation for your planks.

After that, you’ll employ specific installation techniques and finish off with trims for a polished look.

Preparing the Subfloor

Preparing your subfloor is an essential step in the vinyl plank flooring installation process. First, identify the subfloor type—whether it’s concrete, plywood, or OSB—as this will dictate your preparation approach.

Verify the surface is clean, dry, and free of debris. For concrete subfloors, check for moisture levels; a moisture barrier may be necessary for control.

For plywood or OSB, repair any damaged sections, and sand down rough areas to create a smooth surface. If your subfloor is uneven, consider using a leveling compound.

Finally, let everything dry thoroughly before proceeding. Proper preparation not only enhances the appearance of your new flooring but also guarantees its longevity and performance.

Take the time to get this right!

Plank Installation Techniques

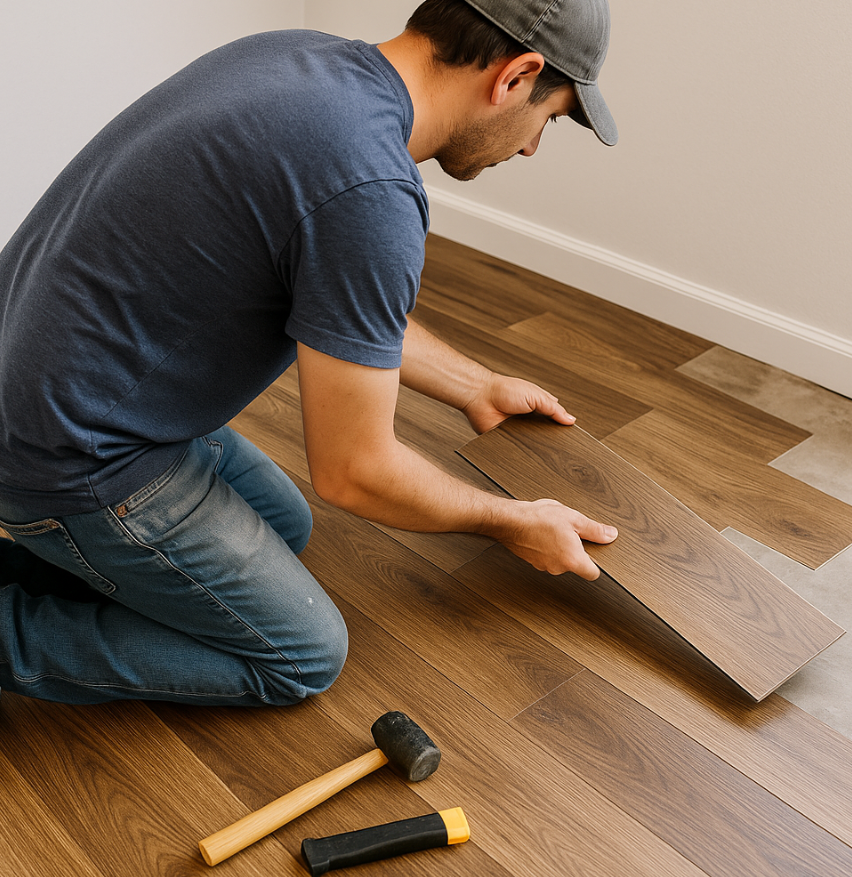
As you plunge into the installation of your vinyl plank flooring, start by laying out all your materials and tools to streamline the process.

Decide between the two main installation techniques: floating installation or glue down. For floating installation, begin by placing the first plank in the corner, ensuring it’s aligned with the wall. Continue laying planks end to end, using spacers for expansion gaps.

If you opt for the glue down method, apply adhesive evenly to the subfloor, then firmly press each plank into place, ensuring a tight fit.

Regardless of the method, stagger your seams for a natural look. Keep checking your alignment and make adjustments as needed for a professional finish.

Finishing Touches and Trims

Once you’ve successfully laid the planks, the finishing touches and trims are essential for achieving a polished look.

Start with baseboard installation; remove old baseboards if needed and measure new ones to fit snugly against the wall and flooring. Cut them to length, then secure them with finishing nails.

Next, install transition strips where your vinyl plank meets other flooring types. Cut the strips to size and attach them firmly, guaranteeing a smooth shift that prevents tripping hazards.

Make sure all gaps between the flooring and walls or other surfaces are filled for a clean finish.

Finally, inspect your work to verify everything’s aligned, and your new floor looks professional and inviting.

Tips for Maintaining Your Vinyl Plank Flooring

While vinyl plank flooring is known for its durability and low maintenance, keeping it in top shape requires some attention to detail.

Establish regular cleaning routines to prevent dirt and grime buildup. Use a soft broom or vacuum designed for hard surfaces to remove debris, followed by a damp mop with a manufacturer-recommended cleaner. Avoid harsh chemicals, as they can damage the surface.

For damage prevention, place mats at entryways to catch dirt and moisture, and use furniture pads under heavy items to prevent scratches. Additionally, avoid dragging furniture across the floor.

Troubleshooting Common Installation Issues

When you encounter issues during the installation of vinyl plank flooring, addressing them promptly can save you time and frustration.

One common mistake isn’t acclimating the planks to the room temperature, which can lead to expansion or contraction. To avoid this, let the planks sit in the room for at least 48 hours before installation.

If you notice gaps between the planks, check that the subfloor is level; uneven surfaces can cause this issue.

Additionally, if the planks aren’t locking together properly, verify you’re lining them up correctly and tapping them gently with a rubber mallet.

Following these troubleshooting tips can help you resolve problems quickly and achieve a smooth, professional-looking finish.

Categories
Uncategorized

DIY Home Improvements – Easy Weekend Projects For Every Skill Level


Do you have a weekend free and an itch to create something beautiful without committing to a month-long renovation nightmare? We all look for that perfect blend of high-impact change and low-commitment labor. That’s why we’ve compiled a list of Easy Weekend Projects For Every Skill Level, guaranteeing you can see a noticeable transformation in your home by Sunday evening. Whether you’re a complete novice looking to wield a screwdriver for the first time or a seasoned DIYer seeking a quick win, these budget-friendly and time-conscious tasks will boost your home’s aesthetic and functionality without derailing your entire schedule.

You can transform your home without a massive time commitment or extensive experience. With a variety of easy weekend projects designed for every skill level, you’ll find tasks that not only enhance your space but also boost your confidence. Whether you’re a complete novice or a seasoned DIYer, there’s something here for you to tackle. Explore practical improvements that can be completed in a weekend, making your home more functional and aesthetically pleasing.

Assessing Your Skills

Before exploring into DIY projects, it’s vital to evaluate your skill level honestly. Consider your past experiences, comfort with various tools, and familiarity with different materials. This self-assessment will help you choose projects that match your abilities and ensure a more enjoyable and productive weekend. Having a clear understanding of your skills will also aid in avoiding frustration and potential hazards.

Beginner-Friendly Projects

If you’re new to DIY, start small with tasks that require minimal tools and experience. Simple projects like painting a room, assembling furniture, or installing shelves can provide a sense of accomplishment without overwhelming you. These tasks allow you to build confidence while honing your skills.

Intermediate Challenges

Once you’re comfortable with beginner tasks, you can tackle intermediate challenges, such as refinishing furniture, tiling a backsplash, or installing a new faucet. These projects generally require more tools and techniques, including measuring, cutting, and some basic plumbing or electrical knowledge. With these skills, your DIY repertoire expands significantly.

Intermediate projects are perfect for those looking to elevate their DIY game. Refinishing a wood table, for example, revitalizes furniture with minimal cost. Tiling a backsplash not only updates your kitchen but also enhances your design skills. Engaging in these challenges pushes your boundaries, allowing for learning and growth with satisfying results.

Advanced Renovations

For seasoned DIYers, advanced renovations can include significant alterations like remodeling a bathroom or updating outdoor spaces. These projects often involve construction skills, design planning, and a solid understanding of plumbing or electrical systems. They require careful planning and a significant time investment but can dramatically transform your living space.

  1. Kitchen remodels
  2. Bathroom renovations
  3. Outdoor deck builds
  4. Full home painting
  5. Installing new flooring
Project Type Skills Required
Bathroom remodel Plumbing, tiling, electrical
Kitchen upgrade Cabinet installation, countertop fitting
Outdoor renovation Structural design, landscaping

Advanced renovations can significantly impact your home value and require a more detailed approach. Remodeling spaces like kitchens and bathrooms can be complex, involving many facets such as plumbing and electrical work that need careful consideration. Planning and budgeting are key, ensuring that you have all necessary materials and tools ready before starting. This type of project not only enhances your skill set but ultimately brings significant satisfaction and joy to your living environment.

  1. Assess what changes you want to make
  2. Create a budget for materials and tools
  3. Obtain necessary permits if required
  4. Visualize the finished product before starting
  5. Have a timeline for completion
Plan Steps Considerations
Budgeting Material and labor costs
Timeline Realistic completion estimates
Permits Local regulations

Essential Tools for DIY Success

Must-Have Tools

To kick off your DIY journey, equip yourself with a few imperative tools. A cordless drill, for example, opens up a world of possibilities, allowing you to tackle anything from hanging shelves to assembling furniture. A good set of screwdrivers, pliers, and a tape measure are indispensable for any project, while a level ensures everything you build is perfectly straight. For those who are more adventurous, a miter saw can simplify cutting angles for trim work or furniture. Investing in quality tools not only enhances performance but also makes your projects more enjoyable.

Safety Gear

Don’t overlook safety gear when venturing into DIY projects. A pair of safety goggles is imperative for protecting your eyes from dust and debris, especially when sanding or drilling. Ear protection should also be a priority when working with loud tools like saws or drills. Additionally, a sturdy pair of work gloves can safeguard your hands from cuts and blisters, giving you added confidence as you work on your home improvements. Prioritizing safety ensures you can complete your projects without unnecessary risks.

Planning Your Weekend Projects

Planning is key to executing successful DIY home improvements. Begin by identifying which areas of your home need attention and prioritize projects based on urgency and impact. Consider factors like your schedule, budget, and availability of tools and materials. A little forethought can streamline the process and maximize your enjoyment of the weekend work ahead.

Setting Realistic Goals

Assess what you can realistically achieve in a weekend. Break larger projects into smaller, manageable tasks that fit your skill level and time constraints. This approach not only reduces frustration but also allows you to appreciate your progress. Focus on accomplishing a few tasks thoroughly rather than overwhelming yourself with too many projects.

Creating a Timeline

Developing a timeline helps you structure your weekend DIY projects effectively. List each task sequentially, and estimate the time required for each one. For example, if you’re painting a room, allocate time for preparation, painting, and cleanup. A well-defined timeline keeps you organized and provides a roadmap for your weekend, ensuring each segment is approached without rushing.

When creating your timeline, factor in potential challenges such as drying times for paint or unexpected repairs. It’s wise to set aside buffer time to accommodate any disruptions that may arise. Organizing your weekend into specific time blocks can also help you maintain focus and momentum, pushing you closer to completing your goals while enjoying the process.

Popular DIY Projects

Focusing on popular DIY projects can help you choose tasks that not only enhance your home’s appeal but also match your skill level. From refreshing your interiors to sprucing up your outdoor space, these projects can be completed over a weekend and provide satisfying results. Let’s explore some options that offer both ease and impact.

Painting and Wallpapering

Painting and wallpapering are among the quickest ways to transform a room’s ambiance. You can choose a fresh coat of paint or a bold wallpaper pattern to reflect your style. Techniques like using painter’s tape for clean edges and applying multiple coats strategically can yield professional results without the cost.

Landscaping and Gardening

Enhancing your outdoor space through landscaping and gardening can add beauty and value to your property. Simple tasks like planting seasonal flowers, mulching, or creating a small herb garden can significantly improve aesthetics while allowing you to enjoy nature more fully.

When tackling landscaping, start with a plan that considers both design and maintenance. You can create raised beds for easy access and better drainage, or use native plants that require less water and care. Incorporating pathways with stones or mulch can also delineate areas, making your garden feel more organized and visually appealing.

Upcycling Furniture

Upcycling furniture gives old pieces a new life while saving money and reducing waste. Whether it’s refinishing a wooden chair or painting a worn-out dresser, you can often achieve remarkable results with minimal investment. Simple techniques such as distressing or applying new hardware can make a world of difference.

Consider furniture that complements your style for upcycling projects. For instance, transforming a vintage table with chalk paint can modernize its look. Additionally, adding stencils or decoupage techniques can customize the piece to fit your home’s decor. The result is not just a functional item, but a conversation starter that adds character to your space.

Simple Repairs and Maintenance

Simple repairs and maintenance tasks are vital for keeping your home in good condition. Tasks such as fixing leaky faucets, patching drywall, or tightening cabinet handles can be easily managed over a weekend. Completing these projects helps ensure your space remains functional and comfortable.

Regular maintenance activities, such as cleaning gutters or checking for drafts, can prevent more extensive issues down the line. You can tackle these jobs with straightforward materials, like caulk for sealing gaps or vinegar for cleaning. Committing a few hours to these tasks not only improves your home’s performance but also extends the lifespan of your fixtures and finishes.

Safety Tips for DIY Enthusiasts

Protecting Yourself

Prioritize your safety by using the right gear and understanding your tools. Wearing safety glasses protects your eyes from dust and debris, while gloves prevent cuts and abrasions. If you’re working with power tools, make sure to have hearing protection to guard against long-term damage. Understanding the functions of your tools is imperative; always read the manual, especially for unfamiliar devices. If you’re working outdoors, be aware of your surroundings and avoid electrical hazards. The most experienced DIYers still follow these vital safety practices.

  • Use safety goggles to shield your eyes.
  • Wear gloves to prevent injuries.
  • Read user manuals for unfamiliar tools.
  • Ensure your workspace is well-lit and clutter-free.
  • Have a first aid kit on hand for emergencies.

Budgeting for Home Improvements

Understanding Costs

Start by itemizing all potential expenses, including materials, tools, and any hired help. For instance, a simple kitchen backsplash can run from $300 to $1,000 depending on the tile selected. Research local prices online and adjust your budget accordingly. You might find comparable tile options at discount retailers that fit your budget better.

Prioritizing Projects

Identify which projects will provide the best return on investment. Projects like adding energy-efficient windows or landscaping can significantly boost your home’s value. Allocate more funds to these areas while scaling back on less impactful tasks.

Creating a Contingency Fund

Set aside 10-20% of your total budget for unexpected costs that may arise during the renovation process. This might cover additional supplies or repairs that you didn’t anticipate, ensuring your project stays on track financially.

Conclusion

Whether you tackle a fresh coat of paint on a piece of furniture, install floating shelves for extra storage, or upgrade your outdated lighting fixtures, these Easy Weekend Projects For Every Skill Level prove that big results don’t require big time investments. The real joy of these tasks is the quick gratification and the confidence boost they provide for tackling larger projects down the road. Gather your tools, pick one idea, and enjoy the satisfaction of completing a high-impact home improvement project before your Monday morning alarm clock rings!

Presently, DIY home improvements provide an accessible way for you to enhance your living space over the weekend, regardless of your skill level. By selecting projects that align with your abilities and interests, you can achieve satisfying results that elevate both your home’s value and your personal satisfaction. These weekend endeavors not only allow you to express creativity but also improve your confidence in tackling home repairs and upgrades. Embrace the opportunity to transform your home and enjoy the rewards that come with your hard work.