Categories
Uncategorized

Solar Panels Pros And Cons

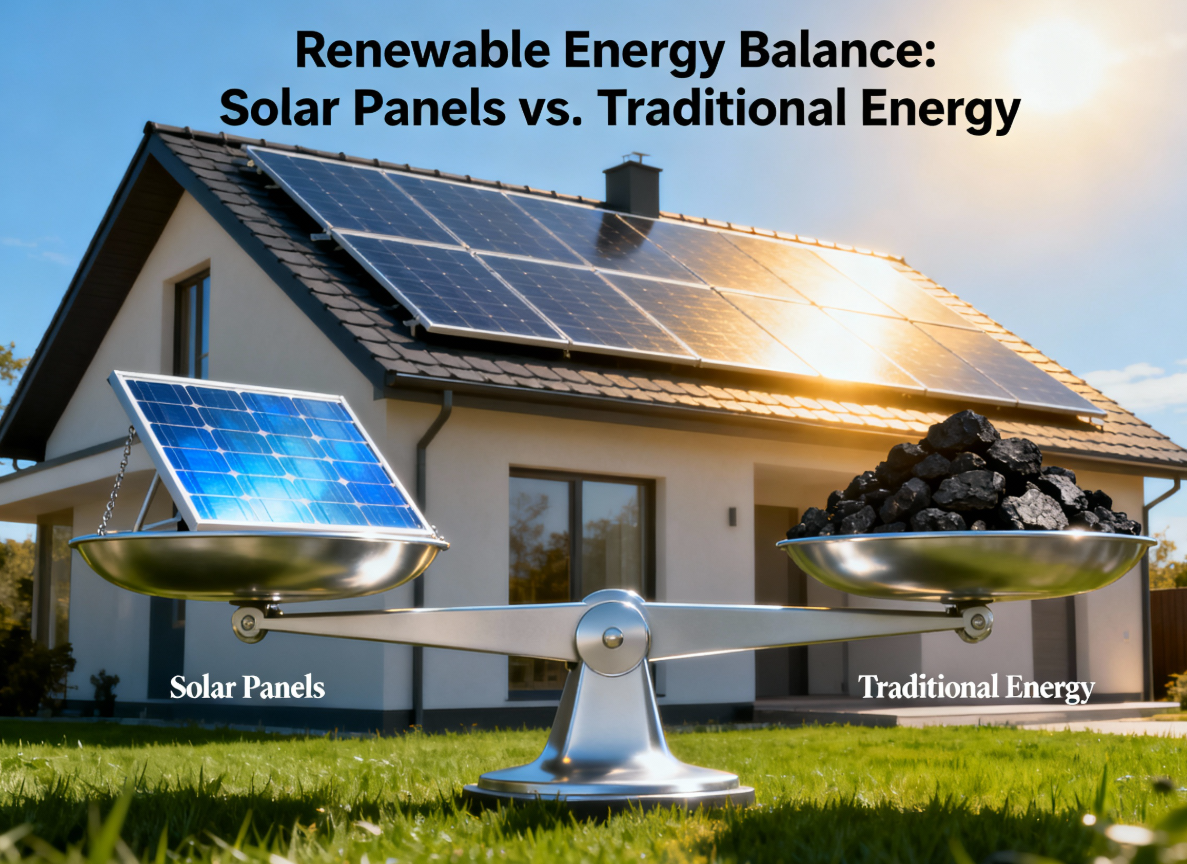
Making the decision to install a solar energy system on your home is a major financial and environmental choice. Before you sign a contract, it’s essential to thoroughly analyze the Solar Panels Pros And Cons to determine if the investment makes sense for your specific property and energy consumption habits. While the benefits—like eliminating electric bills and utilizing substantial government tax credits—are highly attractive, the initial investment, roof requirements, and system upkeep must also be carefully considered. We break down the advantages and disadvantages to give you a clear, balanced picture of solar ownership.

Solar panels come with a mix of pros and cons. You can save on electricity bills and reduce your carbon footprint, making them an eco-friendly investment. Government incentives help with initial costs, too. However, you’ll face significant upfront expenses, and energy production can be weather dependent. Space for installation might also be a challenge. Understanding these factors can help you make an informed choice about solar energy. There’s more to reflect upon, so keep exploring!

Benefits of Solar Panels

When you consider switching to solar panels, you’ll discover several compelling benefits that can enhance your lifestyle and reduce your environmental impact.

Recent solar technology advancements have greatly improved solar panel efficiency, allowing you to generate more energy from sunlight. This means you’ll rely less on traditional energy sources, making your home more sustainable.

Additionally, solar energy storage solutions enable you to store excess energy for use during peak demand, ensuring you always have power when you need it.

You might also find government solar programs that offer incentives, making the change easier and more attractive.

Keeping an eye on solar energy trends will help you stay informed about innovations that can further enrich your solar experience and lifestyle.

Cost Savings and Financial Incentives

Not only do solar panels provide significant long-term cost savings, but they also come with various financial incentives that can make the shift to renewable energy even more appealing.

By installing solar panels, you can enjoy substantial financial returns over time, as reduced electricity bills add up. Many homeowners benefit from government rebates and tax credits, which can offset the initial investment costs.

An investment analysis often shows that solar energy systems can pay for themselves in just a few years, leading to impressive long-term savings. Plus, as energy prices rise, your savings will grow, making solar panels not only an eco-friendly choice but also a smart financial decision.

Embrace the benefits and start saving today!

Environmental Impact

Installing solar panels not only boosts your financial savings but also greatly benefits the environment. By harnessing renewable energy sources, you’re contributing to significant carbon footprint reduction, which helps combat climate change.

Solar panels generate electricity without emitting harmful greenhouse gases, making them an eco-friendly choice. Technological advancements have improved their efficiency, allowing for better energy capture and reduced waste.

Additionally, integrating solar energy into your home can positively influence local ecosystems. While it’s essential to evaluate the materials used in solar panel production, the long-term benefits often outweigh these concerns.

Energy Independence

By opting for solar panels, you can achieve a greater degree of energy independence while reducing reliance on traditional power sources. This change enhances your energy security, as you tap into renewable resources that are abundant and sustainable.

With solar energy, you can work towards grid independence, minimizing your vulnerability to fluctuating energy prices and supply disruptions. Incorporating energy storage solutions, like batteries, allows you to store excess energy for later use, further increasing your autonomy.

Additionally, understanding the policy implications surrounding solar energy can help you navigate incentives and regulations that support your shift.

Ultimately, investing in solar panels not only empowers you but also contributes to a more resilient energy future.

Installation and Maintenance Considerations

While choosing to install solar panels can be a rewarding decision, it’s vital to evaluate the complexities of installation and ongoing maintenance.

The installation process involves evaluating your roof compatibility to guarantee it can support the panels. Hiring qualified technicians is essential, as their expertise can affect system performance and longevity.

Once installed, maintenance frequency typically ranges from annual checks to occasional cleaning, depending on your environment. You’ll also want to implement system monitoring to track performance and detect issues early.

Aesthetic and Property Value Effects

When considering solar panels, the impact on your home’s aesthetics and property value is essential. You’ll want to evaluate how they fit into your home design and enhance curb appeal.

Some homeowners find that solar panels can be a stylish addition, blending well with modern architecture. However, in neighborhoods where traditional aesthetics prevail, they might stand out negatively.

Proper landscaping integration can help mitigate this issue, creating a cohesive look. Plus, many buyers appreciate energy-efficient features, which can positively influence property resale value.

Ultimately, balancing your personal taste with neighborhood aesthetics can lead to a wise investment that enhances both the beauty and value of your home.

Limitations and Drawbacks of Solar Energy

Although solar energy offers numerous benefits, it also comes with several limitations and drawbacks that homeowners should consider.

One major issue is the initial investment; the cost of solar panels and installation can be significant. You’ll also need adequate space for the panels, which may not be feasible for everyone.

Additionally, solar energy relies heavily on weather conditions, making it less effective on cloudy or rainy days. This weather dependency can lead to inconsistent energy production, requiring efficient energy storage solutions to guarantee reliability.

Finally, recycling concerns regarding solar panels can pose environmental challenges at the end of their lifecycle.

Weighing these limitations against the benefits is essential for making an informed decision about solar energy for your home.

Frequently Asked Questions

How Long Do Solar Panels Typically Last Before Needing Replacement?

Imagine sunlight transforming into energy; solar panels typically last 25-30 years. Over time, efficiency degradation occurs, so consider warranty coverage and potential replacement costs. Regular maintenance guarantees your investment shines bright for years to come.

Can Solar Panels Work in Cloudy or Rainy Weather?

Yes, solar panels can work in cloudy or rainy weather. While their solar efficiency decreases, they still produce energy on cloudy days and in rainy conditions, ensuring you get some energy production regardless of the weather impact.

What Happens to Solar Panels During Severe Weather Events?

During severe weather, solar panels show impressive storm resilience. They’re designed to withstand winds up to 140 mph, resist hail damage, and handle snow accumulation, but flood risks can still affect their performance and maintenance.

Are There Solar Panel Options for Renters or Non-Homeowners?

Yes, as a renter, you can explore solar leases, community solar projects, and solar power purchase agreements. Additionally, consider portable solar options if rooftop installations aren’t feasible for your living situation.

How Do Solar Panels Affect Home Insurance Policies?

Installing solar panels can enhance your home’s value, but it may also affect your home insurance. You’ll need to discuss coverage limits, premium adjustments, and installation disclosures to address any liability concerns with your insurer.

Categories
Uncategorized

DIY Shiplap Wall Installation: Ultimate Guide

Installing a shiplap wall can transform your space with a unique touch. Start by gathering your materials and tools, and prep the wall by ensuring it’s clean and smooth. Measure and cut your shiplap boards accurately, then paint or stain them according to your design vision. Secure the boards in place, filling any gaps and nail holes for a clean finish. With some finishing touches, your shiplap wall will shine. Discover more detailed steps to perfect your project.

Tools and Materials Needed

Before you plunge into your shiplap wall project, it’s vital to gather the right tools and materials.

First, you’ll need shiplap materials, which can be wood planks or engineered options. Choose a finish that complements your style.

For important tools, grab a miter saw for precise cuts, a level to guarantee straight lines, and a nail gun for easy installation. A measuring tape is essential for accurate measurements, while a stud finder helps locate the best spots to nail your shiplap.

Don’t forget safety gear like goggles and gloves.

With these items in hand, you’ll be well-prepared to tackle your shiplap wall and achieve a stunning finish that transforms your space.

Happy building!

Preparing Your Wall

As you get ready to install your shiplap wall, it’s crucial to prepare the surface properly to guarantee a smooth and successful application.

Start with wall preparation by removing any existing décor, nails, or fixtures. Next, inspect the wall for any damage or imperfections; patch holes and sand rough areas to create a level surface.

Once the wall is prepped, focus on surface cleaning. Use a damp cloth to wipe away dust, dirt, or grease, ensuring nothing interferes with the adhesive or paint. If your wall has a glossy finish, consider lightly sanding it to promote better adhesion.

After these steps, your wall will be primed and ready for the shiplap installation, setting the stage for a beautiful transformation.

Measuring and Marking

Before you start installing your shiplap, you need to gather your measuring tools, like a tape measure and level.

Next, determine the dimensions of your wall to guarantee you have enough material.

Finally, mark level lines where your shiplap will go to keep everything straight and looking great.

Gather Necessary Tools

To successfully install a shiplap wall, you’ll need to gather a few essential measuring and marking tools.

Start with a tape measure to accurately gauge your wall dimensions and the length of your shiplap boards. A level is vital to guarantee your lines are straight, while a square helps you create clean, right angles.

Don’t forget a pencil for marking measurements on the wall and the boards. If you’re exploring different shiplap styles for your project, consider having a chalk line handy for clear, visible guidelines.

This way, you’ll have a solid foundation for your design inspiration. With the right tools in hand, you’ll set yourself up for a successful installation process.

Determine Wall Dimensions

Accurately measuring your wall dimensions is essential for a successful shiplap installation. Start by determining the total wall space you want to cover.

Use a tape measure to find the height and width of the area, noting any obstacles like windows or outlets that might affect your design considerations. It’s important to measure at multiple points to guarantee accuracy, as walls can sometimes be uneven.

Record your measurements clearly, as this will guide your material purchases and installation process. By understanding your wall dimensions, you can better visualize how the shiplap will fit into your space and make adjustments to your design if necessary.

Taking these steps now will save you time and effort later on.

Mark Level Lines

Once you’ve measured your wall dimensions, the next step is to mark level lines to guide your shiplap installation.

Start by using a level tool, like a laser level or a traditional spirit level, to guarantee accuracy. Choose a starting point, typically the floor or a reference line, and mark it.

Then, hold your level tool vertically and draw a straight line across the wall. This line will help with wall alignment as you install each shiplap board.

Continue marking lines at the height you want each row of shiplap to sit. Don’t rush; double-check your lines for accuracy.

Properly marked level lines will make your installation smoother and result in a professional-looking finish.

Cutting the Shiplap Boards

As you prepare to cut your shiplap boards, it’s essential to measure carefully to guarantee a perfect fit. Start by determining the board measurements based on your wall dimensions. Use a tape measure to get accurate lengths, and don’t forget to account for any outlets or obstacles.

When it comes to cutting techniques, a miter saw or circular saw will provide clean, straight cuts. Mark your measurements on the boards clearly, and use a square to make sure your lines are straight.

Always remember to wear safety goggles and follow proper safety protocols during cutting. After cutting, double-check your pieces against the wall before installation to make sure everything aligns perfectly.

Happy cutting!

Painting or Staining the Shiplap

Now that your shiplap boards are cut and ready, it’s time to think about how you want to finish them.

Choosing the right paint or stain can enhance the beauty of your wood, while proper prep and application techniques will guarantee a smooth and lasting result.

Let’s explore how to get your shiplap looking its best!

Choosing the Right Finish

When you’re ready to enhance your shiplap wall, deciding between paint and stain can be pivotal. Each option offers distinct benefits that align with various shiplap styles.

Paint provides a solid, uniform color and is great for achieving a bold look. It also offers a wider range of colors and finishes.

On the other hand, stain preserves the wood’s natural texture and grain, providing a more rustic appearance that enhances the shiplap’s character.

Consider your overall design vision and how each finish option complements your space. If you prefer a contemporary feel, paint might be your best bet. If you’re aiming for a cozy, farmhouse look, staining could be the way to go.

Choose wisely!

Prepping the Shiplap Surface

Properly prepping your shiplap surface is essential for achieving a smooth and long-lasting finish, whether you choose to paint or stain.

Start by selecting the right shiplap material types, such as pine, plywood, or MDF, as each requires different preparation techniques. Clear any dirt or dust from the surface using a damp cloth, and allow it to dry thoroughly.

If your shiplap is raw wood, lightly sand any rough spots to guarantee an even texture. For painted finishes, consider applying a primer to enhance adhesion and color vibrancy.

If you’re staining, use a wood conditioner to promote an even finish. Following these surface preparation techniques will set you up for success with your chosen finish.

Application Techniques Explained

Applying paint or stain to your shiplap can transform the look of your space, and getting the technique right is essential for a professional finish.

Start by choosing your desired shiplap styles; whether you go with a classic white, bold color, or natural wood stain, each requires different application techniques. If painting, use a high-quality brush or roller for an even coat, ensuring you cover any gaps.

For staining, apply with a clean cloth or brush, wiping off excess for a smooth finish. Always work in sections, and allow adequate drying time between coats.

Finally, seal your shiplap with a protective topcoat to enhance durability and maintain that fresh look for years to come.

Installing the First Board

Starting your shiplap wall installation with the first board sets the tone for the entire project, so it’s crucial to get it right.

Begin by determining your desired starting height; a good rule is about one inch above the baseboard. Verify the first board placement is level by using a level tool. If your wall isn’t perfectly straight, you may need to trim the board’s edge to fit.

Once you’ve found the right spot, mark where the top of the board will go to maintain board alignment. This will serve as your guide for the rest of the installation.

Take your time here; a well-placed first board will make the subsequent boards easier to install and align correctly.

Securing the Remaining Boards

Once you’ve secured the first board, it’s time to fasten the remaining boards to create a seamless look.

Begin by ensuring proper board alignment; this is essential for a professional finish. Place the next board against the first, checking that it’s level. Use a stud finder to locate the wall studs, as they’ll provide the best support.

You can choose different securing methods, like using finishing nails or adhesive, depending on your preference. If you’re using nails, drive them into the studs at a slight angle for added stability.

Continue this process, checking alignment after each board. Keep the gaps between the boards consistent for that classic shiplap appearance.

Happy installing!

Filling Gaps and Nail Holes

After securing your boards, you’ll likely notice some gaps and nail holes that need attention. Don’t worry; gap filling and nail hole repair are straightforward steps.

For gaps between boards, use a wood filler or caulk that matches your shiplap’s color. Apply it carefully with a putty knife, ensuring it fills the space completely. Once it’s dry, sand the area gently for a smooth finish.

For nail holes, choose a wood filler or spackling compound. Fill each hole with a small amount using your finger or a putty knife. Allow it to dry, then sand it down until it’s flush with the surface.

This will create a clean, polished look, prepping your wall for the final touches.

Finishing Touches

With gaps and nail holes now filled, you can focus on the finishing touches that will elevate your shiplap wall.

Start by painting or staining your shiplap to enhance its natural beauty or to match your decor. Once that’s done, consider adding decorative accents, like trim or molding, to give your wall a polished look.

Next, think about incorporating wall art to create a focal point. Whether it’s framed photos, canvas prints, or a gallery wall, these elements can add personality and warmth to the space.

Finally, don’t forget about lighting; strategically placed sconces or a statement pendant can highlight your new wall beautifully.

Enjoy the transformation and let your creativity shine!

Maintenance Tips for Your Shiplap Wall

To keep your shiplap wall looking its best, regular maintenance is key.

Start by using gentle cleaning techniques, like a damp cloth or a soft sponge, to wipe away dust and grime. Avoid harsh chemicals that could damage the wood finish.

If you notice any scratches or dents, don’t worry! For repair advice, simply sand down the affected area and touch it up with matching paint or stain.

Additionally, check for signs of moisture or mold, especially in humid areas. If you spot any, address it immediately to prevent further damage.

Categories
Uncategorized

Is a DIY Kitchen Reface Worth It? Refinishing vs. Replacing Cabinets

A DIY kitchen reface can be worth it if you’re looking to save money and want creative control over the design. It’s quicker and less expensive than a full remodel, letting you refresh your space with new cabinet doors and finishes. However, consider the time and skill required for a professional finish, as well as any existing damage. If you’re unsure whether to reface or replace, there’s more to explore about your options.

Understanding Kitchen Refacing

When you consider giving your kitchen a fresh look, understanding kitchen refacing is essential. This process involves replacing the cabinet doors and drawer fronts while keeping the existing frames. It’s a great way to enhance kitchen aesthetics without a full remodel.

Start with a cost analysis to see if it fits your budget. Look into material selection carefully; the right materials can greatly impact durability and appearance.

Also, factor in the time investment—refacing can often be completed in days rather than weeks. Stay updated on design trends, as they can inspire your choices and make your kitchen feel modern.

The Benefits of a DIY Kitchen Reface

Choosing to DIY your kitchen reface not only saves money but also gives you complete control over the design process. You can explore budget friendly options that suit your financial needs while creating a space that reflects your personal style.

With design versatility, you’re free to mix and match colors and finishes that mightn’t be available in pre-made products. Plus, you can utilize time saving techniques to streamline your work, completing the project more efficiently.

By opting for eco friendly materials, you’ll contribute to a sustainable environment.

Finally, engaging in a DIY project offers skill development benefits, enhancing your handyman abilities and boosting your confidence for future home improvements. This journey is as rewarding as the finished kitchen!

The Drawbacks of Refinishing Cabinets

While refinishing cabinets can transform your kitchen, it’s important to contemplate the drawbacks that come with the process.

First, consider the cost considerations; materials, tools, and supplies can add up quickly. You’ll also face a significant time investment, as prepping, painting, and drying can take days or even weeks.

If you’re not confident in your skills, the skill level required for a professional-looking finish might deter you. Additionally, the durability of the finish can be a concern; if not done correctly, it may chip or wear off over time.

Finally, potential complications like dealing with existing damage or uneven surfaces can arise, turning your DIY project into a frustrating experience.

Weigh these factors before diving in.

When to Consider Cabinet Replacement

If your cabinets show signs of severe wear or damage, it might be time to contemplate a full replacement instead of a simple refresh.

Consider your current cabinet style and whether it still fits your kitchen layout; outdated designs can detract from your space.

Budget considerations are essential, as replacement can be more expensive upfront but may offer long-term value.

If your cabinets are made from low-quality materials that don’t hold up, exploring better material options could enhance both durability and aesthetics.

Additionally, if you’re planning a significant kitchen renovation, replacing cabinets can create a cohesive look that ties everything together.

Ultimately, weigh the costs against the benefits to determine if replacement is the right choice for you.

The Advantages of Replacing Cabinets

Replacing cabinets can greatly enhance your kitchen’s functionality and aesthetic appeal.

You’ll enjoy design flexibility, allowing you to tailor your space to your specific tastes and needs. With a variety of material options available, you can choose cabinets that fit both your style and budget.

While cost considerations are important, investing in quality cabinets can lead to significant long-term value. A professional installation process guarantees that your new cabinets are securely fitted, minimizing future maintenance issues.

This means you can focus on enjoying your revamped kitchen rather than worrying about repairs. Ultimately, replacing cabinets can transform your kitchen into a more efficient and beautiful space, making it a worthwhile investment for your home.

The Disadvantages of Full Cabinet Replacement

Though upgrading your kitchen with new cabinets can be enticing, full cabinet replacement comes with several drawbacks that shouldn’t be overlooked.

First, the cost implications can be significant; you may find yourself spending more than you initially planned.

Additionally, the time investment required for removal and installation can disrupt your daily routine for weeks.

There’s also the environmental impact to evaluate, as disposing of old cabinets contributes to landfill waste.

You might encounter design limitations, especially if the new cabinets don’t match your existing kitchen layout or style.

Finally, installation challenges can arise, from ensuring proper alignment to dealing with unexpected structural issues, making the entire process more complicated than you anticipated.

Making the Right Choice for Your Kitchen

When considering a kitchen update, choosing the right approach can greatly impact both functionality and aesthetics.

First, think about your kitchen style. Do you want a modern look, or are you drawn to something more traditional?

Next, evaluate budget considerations; refinishing is often less expensive than a full replacement.

Consider your project timeline as well; DIY options may take longer, but they can save you money.

Assess your skill level—are you comfortable tackling a DIY project, or would you prefer professional help?

Finally, explore material options. High-quality finishes can elevate your kitchen’s appeal without the need for new cabinets.

Weigh these factors carefully to guarantee you make the best decision for your space.

Frequently Asked Questions

How Long Does a DIY Kitchen Reface Typically Take?

A DIY kitchen reface typically takes one to two weekends, depending on your time management and skill assessment. Effective project planning and choosing your finish options can streamline the process, while design inspiration keeps you motivated.

What Tools Are Needed for a DIY Kitchen Reface?

For a DIY kitchen reface, you’ll need sanding tools, adhesive options, paint sprayers, safety equipment, and measuring devices. Gather these essentials to guarantee a smooth and efficient refinishing process for your cabinets.

Can I Reface Cabinets Without Professional Help?

Yes, you can reface cabinets without professional help. Use DIY techniques, explore different cabinet styles, apply refinishing tips, manage your time wisely, and consider cost factors to guarantee a successful project that transforms your kitchen beautifully.

What Materials Are Best for DIY Cabinet Refinishing?

For DIY cabinet refinishing, use high-quality paint types like latex or chalk, choose wood veneers for a fresh look, select suitable primer options, and explore various finish selections and strong adhesive choices to guarantee durability.

Is There a Cost Difference Between Refinishing and Repainting Cabinets?

A quality paint job can cost 30% less than refinishing cabinets, but consider long-term value. The cost comparison hinges on paint quality, labor costs, and material choices, impacting your kitchen’s overall appeal and durability.