Categories
Uncategorized

How much does it cost to run gas central heating for 1 hour?

With energy prices constantly fluctuating, knowing how much does it cost to run gas central heating for 1 hour has become essential for budgeting homeowners. Unfortunately, there isn’t a single universal number, as the price depends heavily on two key variables: your boiler’s energy efficiency and your home’s heat loss (insulation quality and size). We will break down the simple calculation you can use to estimate the hourly cost, taking into account the output of your boiler and your current gas tariff. Understanding this formula is the first step toward reducing your energy usage and getting control over your heating bills this winter.

You may be curious about the cost of running your gas central heating for just one hour. Understanding this expense can help you manage your energy bills effectively and make informed decisions about your heating usage. In this post, we will break down the various factors that influence the cost, helping you gain a clearer picture of what it means for your budget and comfort on chilly days.

Understanding Gas Central Heating

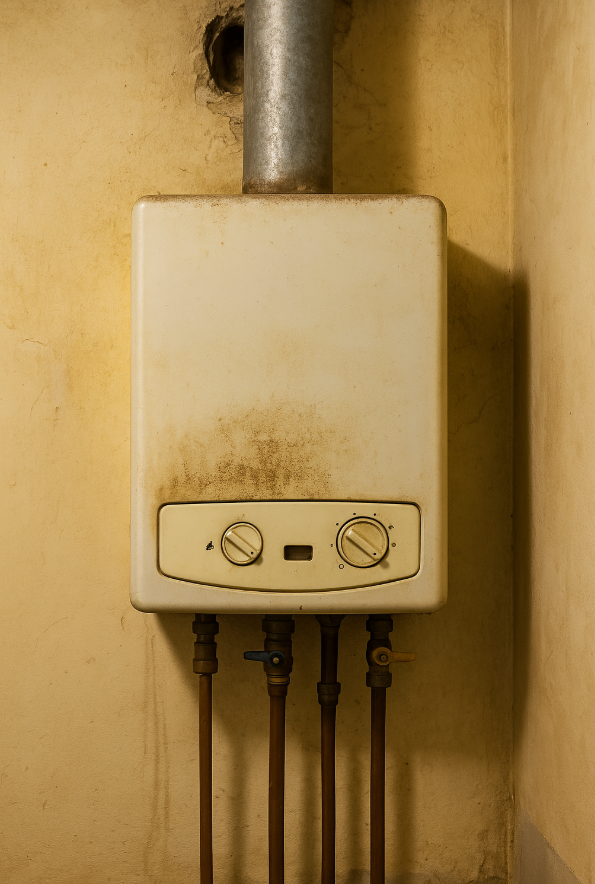
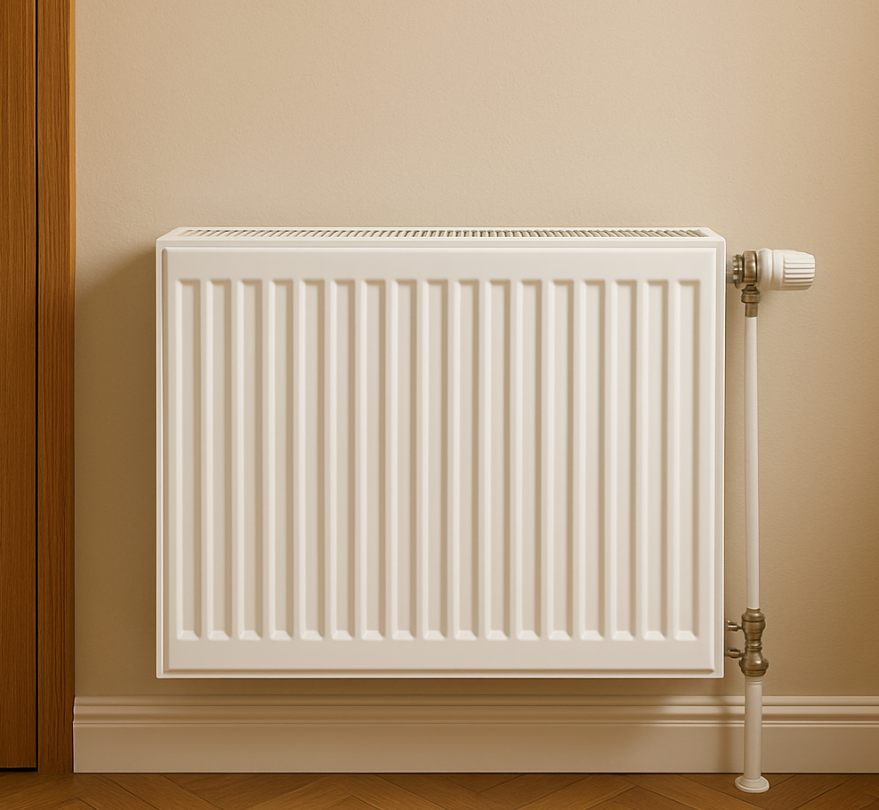
Gas central heating is a system that utilizes natural gas to heat your home through radiators or underfloor heating. By igniting gas in a boiler, hot water is circulated through pipes, providing warmth to various rooms. This method is often favored for its efficiency and relatively low operating costs compared to other heating systems.

How Gas Central Heating Works

Your gas central heating system operates by channeling natural gas to a boiler, which heats water. The hot water then travels through pipes to radiators or underfloor heating zones, radiating warmth throughout your living space. The system can be controlled via thermostats, allowing you to maintain a comfortable temperature efficiently.

Benefits of Gas Central Heating

Gas central heating offers several advantages, including lower running costs, quick heat delivery, and a reliable power source. With high efficiency rates, you can save on energy bills compared to electric heating systems. The convenience of centralized control through programmable thermostats enhances your comfort, providing warmth exactly when and where you need it.

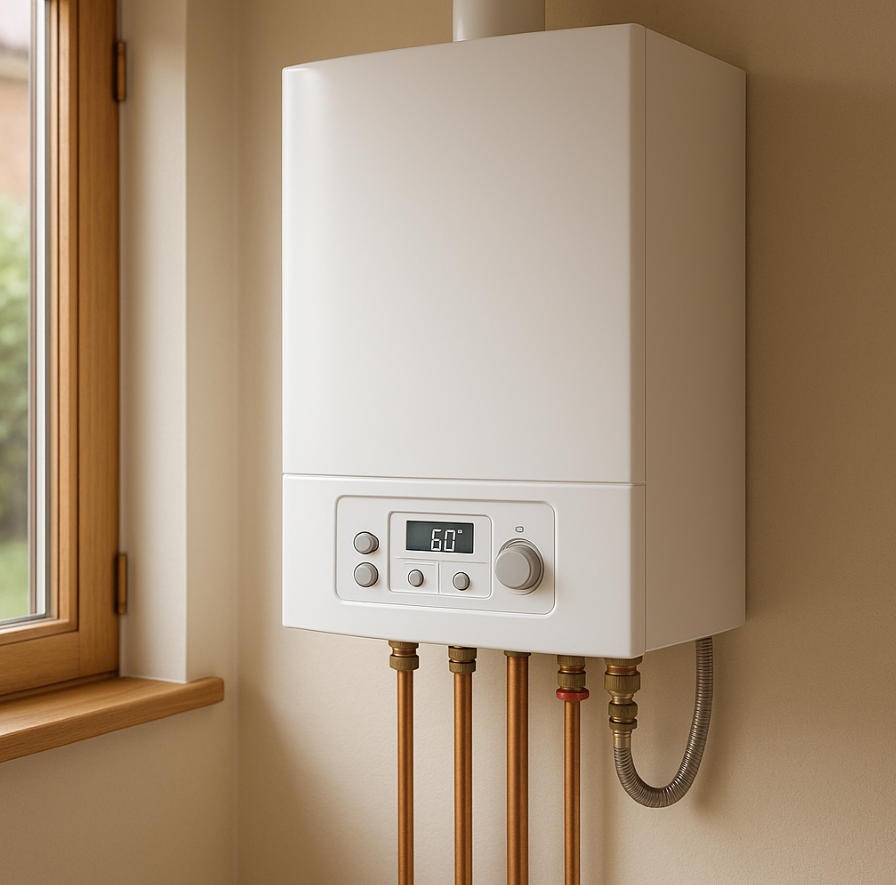
In addition to cost savings, gas central heating can significantly enhance your living experience. For instance, modern gas boilers attain efficiency ratings above 90%, meaning most of the energy consumed is converted into heat for your home. Plus, with the right maintenance, these systems can last well over a decade, minimizing replacement costs and ensuring continual comfort during colder months.

Cost Factors

Several elements influence the overall cost of running gas central heating for one hour. These factors include the efficiency of your heating system, current gas prices, and any seasonal variations in demand. Understanding these variables will help you make informed decisions about your heating usage and expenses.

  • Efficiency ratings of your boiler
  • Current market prices for natural gas
  • Your home’s insulation quality
  • Climate and weather conditions in your area

Recognizing the interplay of these factors can help you manage your heating costs more effectively.

Gas Prices

Your heating costs are heavily influenced by current gas prices, which can fluctuate due to market conditions and changes in demand. Following gas price trends can help you anticipate and budget for your heating expenses better. You can also check local suppliers or energy providers for the most competitive rates.

Efficiency of the Heating System

The efficiency of your gas central heating system plays a significant role in determining your energy costs. Systems with higher energy efficiency ratings convert a greater percentage of gas into usable heat, resulting in lower expenses. If your system operates at around 90% efficiency, you only waste 10% of your fuel. Upgrading to a more efficient boiler can lead to substantial savings over time.

Older boilers, particularly those over 15 years old, often have efficiency ratings below 80%. Upgrading to a modern condensing boiler can improve this significantly, with many achieving efficiency ratings above 90%. Such improvements mean that for every unit of gas consumed, you get substantially more heat, allowing you to lower your running time or maintain comfort at a lower cost. Proper maintenance, such as regular servicing, also ensures your system runs at peak efficiency, maximizing your investment and further reducing operating costs.

Average Costs

The average cost to run gas central heating for one hour largely depends on several factors, including the efficiency of your boiler, the price of gas in your area, and the size of your home. Typically, you can expect to pay between 8 to 15 pence per kilowatt-hour (kWh) for gas. If your boiler has a heat output of 24 kW, this translates to a cost of about 1.92 to 3.60 pounds per hour.

Cost per Hour of Operation

Your cost per hour of operation will vary based on the boiler’s efficiency and the current gas rates. For example, with an average boiler efficiency of around 85%, you could spend approximately £2 to £3.40 for one hour of heating when gas is priced at around 10 pence per kWh. Tracking your energy bills will help you estimate these costs more accurately.

Regional Variations in Costs

You’ll find significant regional variations in the cost of gas, which directly impacts your heating expenses. Generally, urban areas tend to have higher rates due to increased demand, while rural locations might benefit from lower costs. It’s imperative to check the current gas prices in your area to make an informed calculation of your heating expenses.

In the UK, for instance, gas prices can differ by as much as 20% between various regions, with London often recording the highest costs. Conversely, regions in the North East may enjoy lower prices owing to competitive suppliers and less demand. Checking local utility reports or using online energy price comparison tools can help you pinpoint these differences and identify the most cost-effective options for your heating needs.

Calculating Your Personal Costs

Understanding the costs associated with running gas central heating in your home requires assessing both your specific consumption patterns and local gas prices. By analyzing your usage, you can determine a more accurate estimate tailored to your situation, ensuring you know exactly what to expect on your energy bills.

Estimating Usage

Your heating usage depends on several factors, including the size of your home, insulation quality, and outside temperatures. To estimate your hourly usage, consider how often your heating system runs during colder months and track the hours of operation. This data allows you to calculate the overall cost based on the energy consumed in kilowatt-hours (kWh).

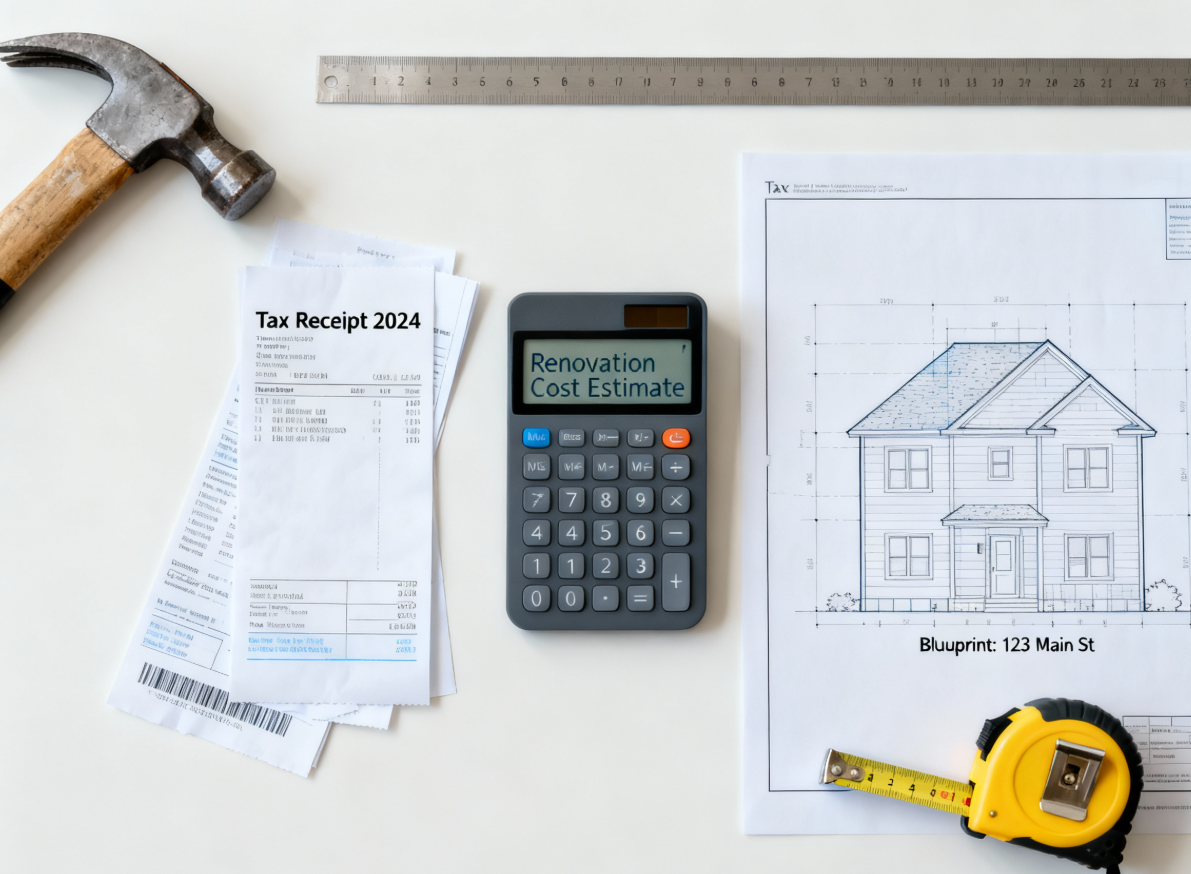
Tools for Calculation

Utilize calculators available online for a straightforward method to determine heating expenses. You can input your gas price, boiler efficiency, and estimated hours of operation to find specific estimates. This approach is particularly helpful for comparing costs with other heating methods.

Various online tools can significantly streamline your cost assessments. Many energy providers offer calculators where you can enter specific parameters, such as the boiler’s energy output and your average usage patterns. For example, if you know your gas costs $0.05 per kWh and your system uses 7 kW, you can easily find your costs for an hour’s operation. This detailed analysis aids in budgeting and managing your heating expenses effectively.

Tips for Reducing Heating Costs

By implementing a few strategic changes, you can effectively lower your heating costs. Start by investing in energy-efficient appliances and consider upgrading insulation in your home to retain heat better. Regularly check your thermostat settings and utilize programmable options to optimize heating times. Seal drafts around windows and doors to prevent heat loss. Additionally, consider using heavy curtains to trap warmth during colder months.

  • Invest in programmable thermostats.
  • Seal drafts around windows and doors.
  • Upgrade insulation.
  • Use heavy curtains or thermal blinds.

Thou can save significantly through these enhancements.

Maintenance Practices

Regular maintenance is vital for cost-effective heating. Schedule an annual inspection of your boiler or furnace to ensure optimal performance, as any inefficiencies can lead to increased energy consumption. Clean or replace filters monthly to promote better airflow and efficiency. Additionally, bleeding radiators can help remove trapped air, improving heat distribution throughout your home.

Energy-Saving Habits

Adopting energy-saving habits can lead to substantial savings on your heating bills. Simple actions such as lowering thermostat settings by just one degree can reduce your heating costs by up to 10%. Layering your clothing and using space heaters selectively in frequently used rooms can also effectively manage your home’s temperature without over-reliance on central heating. Consider limiting the use of exhaust fans and closing off rooms that you rarely use. These habits cumulatively contribute to a significant decrease in energy consumption over time, leading to lower utility bills.

Comparisons with Other Heating Methods

Heating Method Cost Per Hour
Gas Central Heating £0.10 – £0.20
Electric Heating £0.25 – £0.50
Oil Heating £0.15 – £0.30

Electric Heating

With electric heating, your costs can be significantly higher compared to gas. On average, you may spend around £0.25 to £0.50 per hour. While electric heating systems can provide immediate warmth, the overall cost-effectiveness can be less favorable, particularly in large homes or during prolonged cold spells.

Oil Heating

Oil heating generally falls in the range of £0.15 to £0.30 per hour. Though it can be an efficient option in rural areas, oil prices can fluctuate, impacting your budget. If your home lacks access to natural gas, oil heating could provide a viable alternative, offering reliable warmth during winter months.

Furthermore, oil heating systems often require a storage tank, which can affect installation and maintenance costs. Efficiency ratings of modern oil boilers have improved considerably, making them more competitive with gas. Regular servicing is vital to maintain performance, ensuring that your system runs as efficiently as possible while keeping your operating costs under control.

Conclusion

Hence, understanding the cost of running gas central heating for one hour is important for budgeting your energy expenses. On average, you can expect to spend between 10 to 15 pence per hour, depending on your boiler’s efficiency and the current gas prices in your area. By keeping an eye on your usage and optimizing your heating system, you can manage your costs effectively and ensure your home remains comfortable without overspending.

To sum up, estimating how much does it cost to run gas central heating for 1 hour requires knowing your boiler’s maximum output (in $\text{kWh}$), your gas tariff rate, and its efficiency rating. While a small, modern, highly efficient home might cost just pennies per hour, a large, older home with a low-efficiency boiler could easily cost much more. The best ways to reduce this hourly figure are to upgrade to a high-efficiency boiler, improve your home’s insulation, and utilize a smart thermostat to ensure your heating only runs when and where it is truly needed. Start by checking your latest energy bill and boiler manual to perform your personalized calculation today!

Categories
Uncategorized

Should a 20 year old boiler be replaced?

If you’re asking yourself, should a 20 year old boiler be replaced, the answer is almost certainly yes. While a well-maintained boiler can technically last two decades, it is operating at a massive disadvantage compared to modern units. At this age, your system is likely performing at a dismal 60-70% efficiency, meaning a significant portion of your energy costs is literally going straight up the flue. Beyond the mounting costs, older boilers pose increased risks for breakdowns, expensive repairs, and potential safety concerns. Read on for a full breakdown of the financial, environmental, and safety reasons to replace your aging unit now.

Replacing an old boiler can significantly impact your home’s efficiency and safety. If your boiler is 20 years old, you may be facing higher energy bills and a greater risk of breakdowns. As you consider whether to replace your boiler, it’s crucial to evaluate its performance, maintenance history, and any signs of wear. Understanding the advantages of a new system versus the costs associated with keeping an aging unit can guide your decision-making process effectively.

Understanding Boiler Lifespan

Your boiler’s lifespan is a critical factor in deciding whether to replace it. Typically, boilers are designed to last between 10 to 15 years, but with proper maintenance, some can exceed this range. Factors like usage patterns, the quality of installation, and fuel type can significantly influence how long your boiler operates effectively. If yours is approaching the end of its expected lifespan, it’s crucial to assess its condition and performance.

Average Boiler Lifespan

Most residential boilers have an average lifespan of 15 to 30 years, depending on the type. Conventional boilers often reach the 15 to 20-year mark, while modern condensing units can last upwards of 25 years when maintained regularly. If your boiler is nearing this threshold, it may be time to contemplate a replacement.

Factors Affecting Longevity

The longevity of your boiler is influenced by several factors. Regular maintenance, water quality, and usage frequency play significant roles. Additionally, the type of boiler installed and how well it was initially fitted can enhance or hinder its lifespan. Environmental conditions, such as humidity and temperature fluctuations, can also contribute. Knowing all these aspects will help you decide if a replacement is needed.

  • Regular maintenance schedules
  • Water quality and hardness
  • Usage frequency and load
  • Type and model of the boiler
  • Installation quality

Addressing the health of your heating system is vital. Basic upkeep involves annual servicing, which can prevent small issues from evolving into significant failures. If your water quality is poor or if your boiler sees heavy usage, those factors can accelerate wear and tear. Newer models may incorporate advanced technology to enhance durability, providing a more reliable solution. Knowing the impact of these factors on your boiler will ensure you can make informed decisions.

  • Age of the boiler
  • Frequency of repairs
  • Environmental exposure
  • Fuel type used
  • Energy efficiency ratings

Signs Your Boiler Needs Replacement

Recognizing the signs that your boiler requires replacement can save you from expensive repairs and comfort issues. Look for various indicators such as decreased efficiency, frequent breakdowns, and unusual noises. If your boiler shows multiple signs, it may be time to consider investing in a new model.

Decreased Efficiency

If you notice a sudden increase in your energy bills without a corresponding change in usage, your boiler may be losing efficiency. A well-functioning boiler operates at around 90% efficiency, but older models often fall short. Regularly evaluating the cost-effectiveness of your system is vital to avoid wasting money.

Frequent Repairs

Frequent repairs are a significant warning sign that your boiler may need replacing. If you find yourself calling for service multiple times a year, the costs can quickly add up. An older boiler tends to require more annual maintenance, often indicating that the unit is nearing the end of its lifespan.

Frequent repairs not only strain your budget but also disrupt your daily life. Consider the cumulative costs of these repairs compared to investing in a new boiler. For instance, if you spend over 30% of the boiler’s purchase price on repairs annually, it’s a strong signal that replacement is a more cost-effective solution in the long run.

Cost-Benefit Analysis

Analyzing the costs and benefits of replacing your 20-year-old boiler is vital for making an informed decision. Consider not only the immediate expenses associated with a new installation but also the long-term financial impacts. While upfront costs may be significant, a new boiler can lead to considerable savings on energy bills and maintenance over time. Evaluate your current boiler’s performance and repair history against the potential savings from an efficient model, making sure to factor in the comfort and reliability gains that a new unit brings.

Repair Costs vs. Replacement Costs

You may face escalating repair costs with a boiler that’s reached its 20-year milestone. Frequent repairs can add up quickly, often outpacing the cost of a new unit. A professional assessment can provide clarity on whether ongoing repairs are financially viable, or if investing in a modern, reliable system offers better long-term value. Evaluate the frequency and cost of repairs to weigh against the price of a new boiler and its warranties.

Energy Savings from New Boilers

Investing in a new boiler can yield significant energy savings. Modern boilers are designed with advanced technology that enhances their efficiency compared to older models. Many new systems operate at efficiencies of over 90%, while older boilers can slip below 70%. This means that by upgrading, you not only reduce your carbon footprint but also cut down your energy bills substantially.

For example, if your current boiler runs at an efficiency of 65% and you replace it with a new model operating at 95%, you could save around 30% on your heating costs. In practical terms, for a home that typically spends $1,500 annually on heating, this could result in savings of $450 each year. Moreover, consider the escalating energy costs over time; this cumulative savings can pay back your investment in a new boiler within a few years while ensuring optimum comfort and reliability in your home heating system.

Types of Replacement Boilers

When considering a boiler replacement, you have various options tailored to your heating needs.

  • Conventional Boilers
  • High-Efficiency Boilers
  • Combi Boilers
  • System Boilers
  • Electric Boilers

Assume that each type offers unique advantages tailored to different household requirements and energy efficiency goals.

Type Features
Conventional Boilers Traditional design, separate hot water cylinder, and a more complex installation.
High-Efficiency Boilers Utilize advanced technology to maximize gas usage, offering lower energy bills.
Combi Boilers Compact, combining heating and water in one unit, providing hot water on demand.
System Boilers Ideal for larger homes, store hot water for multiple outlets but need a water tank.
Electric Boilers Efficient without emissions, suited for smaller spaces, but higher running costs.

Conventional Boilers

Conventional boilers, historically popular, consist of a boiler unit and a separate hot water cylinder. They provide reliable heating and hot water but require more space for installation and can take longer to deliver hot water to taps. You might find that they are increasingly less energy-efficient compared to modern options, potentially impacting your energy bills.

High-Efficiency Boilers

High-efficiency boilers are designed to maximize energy use while minimizing waste. These units capture heat that would typically escape through the flue, resulting in a significant reduction in fuel consumption. You can save up to 30% on energy bills with a high-efficiency model, making it a financially wise option for homeowners.

High-efficiency boilers often come with an Energy Star rating, indicating their capability to operate at lower energy use while still delivering optimal heating performance. They may have condensing technology that allows water vapor to condense, reclaiming heat that would otherwise be lost. Installing one may qualify you for energy rebates, so it’s worth consulting your local guidelines. Also, consider your home’s size and specific heating needs when selecting the right high-efficiency model for optimal performance.

The Replacement Process

Replacing your boiler involves several steps, from planning to installation. Start by assessing your home’s heating requirements, followed by selecting the appropriate boiler type. Once you decide on equipment, gather quotes and timelines from contractors to compare. Scheduling the installation for a time that minimizes disruption is crucial. Be prepared for any additional work needed, like updating your heating system’s infrastructure, ensuring that everything functions efficiently.

Choosing a Qualified Contractor

Selecting a qualified contractor ensures a smooth replacement process. Look for licensed, insured professionals with experience in your type of boiler. Check customer reviews and ask for references to gauge their reliability. Obtaining multiple estimates allows you to evaluate price differences and included services, helping you make an informed choice.

What to Expect During Installation

During the installation, the contractor will remove the old boiler, install the new unit, and connect it to your heating system. This process may take several hours to a full day, depending on the complexity of your system. You should expect your contractor to keep the work area tidy and communicate the progress at each stage. Final adjustments and system checks will be performed to ensure optimal operation before leaving.

Installation can vary in complexity based on your existing heating infrastructure. If your system requires significant adjustments, this might extend the installation time. Expect your contractor to conduct a detailed inspection to confirm that everything is compatible with the new boiler. You may also receive guidance on any necessary system upgrades or adjustments to optimize energy efficiency, ensuring your new boiler operates effectively and meets your heating demands.

Maintenance Tips for New Boilers

Ensuring longevity and efficiency in your new boiler is crucial. Here are some tips to help you maintain your system:

  • Regularly check the pressure gauge.
  • Bleed radiators to remove trapped air.
  • Keep the boiler area clear of debris.
  • Check for leaks periodically.
  • Monitor the boiler’s performance for any unusual sounds.

Recognizing early signs of trouble can prevent costly repairs and ensure your boiler runs smoothly.

Regular Service Checks

Scheduling regular service checks enhances your boiler’s reliability and efficiency. A qualified technician can identify minor issues before they escalate into significant problems, leading to a more efficient heating system. Regular maintenance typically includes cleaning, safety checks, and adjustments, ensuring everything operates optimally for years.

Importance of Maintenance Contracts

Maintenance contracts provide peace of mind and financial predictability. By entering a contract, you ensure that your boiler receives timely inspections and necessary repairs without unexpected costs. Many contracts also offer priority service and discounts on repairs, making it an economical choice in the long run.

Investing in a maintenance contract not only safeguards your boiler but also enhances its lifespan. Typical plans cover annual servicing and offer tailored options, such as emergency repairs at no extra cost. With various plans available, from basic inspections to comprehensive coverage, you can select one that meets your heating needs and budget. This proactive approach can ultimately save you money on energy bills and unforeseen repair expenses.

To wrap up

Considering all points, if you have a 20-year-old boiler, it’s advisable to consider a replacement. Aging boilers can lead to inefficiencies, escalating energy bills, and increased repair costs. A new boiler can enhance your home’s comfort and effectiveness while also reducing your carbon footprint. Evaluating your current system’s performance, reliability, and energy efficiency against the benefits of a modern unit will guide your decision. Transitioning to a newer model may require an upfront investment, but the long-term savings and improvements in home heating often justify the decision.

In conclusion, the question should a 20 year old boiler be replaced ultimately comes down to long-term cost and peace of mind. While the upfront expense of a new A-rated condensing boiler is significant, the fuel savings—which can be up to 40% annually—will often allow the unit to pay for itself over its lifespan. Furthermore, a new installation provides the benefits of a long warranty, compatibility with smart thermostats, and crucially, modern safety features. Don’t wait for a costly winter breakdown; consult a certified HVAC professional today to evaluate your current system and get quotes for a highly efficient replacement.

Categories
Uncategorized

Which is Better, a Combi or Condensing boiler?


When shopping for a new heating system, homeowners often ask: Combi or Condensing boiler? The simple answer is that you can have both! This is because “Condensing” refers to the boiler’s mandatory, high-efficiency technology, while “Combi” refers to the type of boiler that provides instant hot water. In reality, the most efficient and popular new choice is a condensing combi boiler. We explain the crucial difference between these two terms and help you decide if a Combi boiler—or a System or Regular boiler—is the right fit for your home’s hot water needs.

Efficiency is a key factor in choosing the right boiler for your home, and understanding the differences between a combi and a condensing boiler can greatly impact your energy consumption and heating costs. You need to consider how each type fits your specific heating and hot water needs, as well as the available space in your home. In this post, you’ll learn the benefits and drawbacks of each boiler type, helping you make an informed decision that aligns with your lifestyle and budget.

Understanding Combi Boilers

Definition and Functionality

A combi boiler, short for combination boiler, merges both heating and hot water functions into a single unit. It heats water on demand, meaning there’s no need for a separate hot water tank. This design is particularly beneficial for homes with limited space, providing instant hot water directly from the mains as needed without delay.

Advantages of Combi Boilers

Combi boilers offer several advantages, most notably energy efficiency and space-saving design. They eliminate the need for bulky hot water storage tanks, which saves valuable room in your home. Additionally, their on-demand heating reduces energy waste, leading to potential savings on your energy bills.

With a combi boiler, you benefit from convenience; hot water is available instantly without waiting for a tank to refill or heat up. For instance, if you run multiple showers or taps simultaneously, a high-capacity combi can handle the demand effectively. Their compact size also allows for straightforward installation in smaller properties, making them ideal for urban dwellings or apartments, where space is a premium. Many modern combi models are designed with advanced technology to enhance energy efficiency even further, making them a smart long-term investment for your heating needs.

Understanding Condensing Boilers

Definition and Functionality

A condensing boiler operates by utilizing the heat from exhaust gases that would typically be expelled into the atmosphere. This design enables the boiler to capture and reuse this heat, significantly improving its efficiency. By condensing water vapor back into liquid, these boilers can extract up to 90% of the potential heat from the fuel, making them an energy-efficient choice for heating your home.

Advantages of Condensing Boilers

One of the primary advantages of condensing boilers is their high energy efficiency, which can lead to reduced energy bills. They typically achieve efficiency ratings of over 90%, allowing you to maximize energy use and minimize waste. Additionally, condensing boilers generally produce lower carbon emissions, contributing positively to environmental sustainability.

Moreover, you may find that many modern condensing boilers qualify for government incentives or rebates due to their eco-friendly design. They also operate quietly and can be compact, fitting well in smaller spaces, which is particularly beneficial for urban homes. The longevity of these systems, often lasting 15 years or more with proper maintenance, adds to their appeal, as you may save significantly on repairs and replacements over time.

Key Differences Between Combi and Condensing Boilers

Combi and condensing boilers each offer unique benefits that cater to different needs. A combi boiler provides on-demand hot water and heating in a single unit, making it ideal for smaller spaces. In contrast, condensing boilers are designed to maximize efficiency by reusing exhaust gases, often leading to lower energy bills and reduced carbon footprints. Understanding these differences will help you determine which option best suits your home and lifestyle.

Efficiency and Energy Use

Combi boilers are generally efficient, but condensing boilers excel when it comes to energy use, often achieving efficiencies of over 90%. They recycle heat from flue gases, meaning less energy is wasted. This can lead to significant savings on your heating bills, especially during colder months, making condensing boilers a smart choice for eco-conscious homeowners.

Installation and Space Requirements

When considering installation and space requirements, combi boilers typically require less room, as they do not need separate hot water tanks. You can install them in compact areas, such as kitchens or utility rooms. Condensing boilers, however, may occupy more space due to their design and necessity for a clear flue system. Depending on your home’s layout, this could impact your decision.

Installation involves more than just space; you must also think about the existing infrastructure. Combi boilers are often simpler to install, requiring fewer pipes and connections, which can reduce installation costs and time. Conversely, condensing boilers may need extensive adjustments to the flue system and potentially larger space for components. Consequently, understanding your current setup can greatly influence your choice, ensuring optimal performance with minimal disruption.

Cost Considerations

Initial Costs

The upfront expense of installing a combi boiler can range from £2,000 to £3,500, depending on the model and installation specifics. In contrast, a condensing boiler typically costs between £3,000 and £5,000 due to its more complex installation requirements and efficiency features. Factors such as your home’s size and existing plumbing can influence these figures, so assessing your situation is necessary for making an informed decision.

Long-term Savings

Regarding long-term savings, condensing boilers tend to have a higher efficiency rating, often exceeding 90%, which translates to lower energy bills. This can result in annual savings of £200 to £300 compared to traditional boilers. Over a decade, these savings can accumulate significantly, often offsetting the higher initial price of a condensing unit.

In addition to lower energy bills, consider the maintenance aspects. Condensing boilers are designed to be energy-efficient and require less frequent servicing, which can save you further on maintenance costs. Many users report reduced gas consumption due to the ability of condensing boilers to recover heat from exhaust gases. By tracking your usage, you may find that the improved efficiency and lower operational costs make the investment worthwhile in the long run.

Suitability for Different Homes

When choosing between a combi boiler and a condensing boiler, consider your home’s size and layout. Combi boilers work well in smaller spaces where a compact design is imperative, providing both heating and hot water from one unit. In contrast, condensing boilers suit larger homes with higher heating demands, offering the benefit of modular systems that can be expanded with multiple units without sacrificing efficiency.

Small vs. Large Households

If you live in a small household, a combi boiler could be your best option due to its space-saving design and efficiency in meeting moderate hot water needs. Conversely, large households with multiple bathrooms and high simultaneous hot water usage often require the greater capacity and flexibility of a condensing boiler, ensuring that everyone has access to hot water without delays.

Hot Water Demand Analysis

Your hot water demand is a critical factor in determining the right boiler type. For homes with a consistent need for hot water, such as multiple bathrooms in use at once, a condensing boiler is often necessary to provide sufficient flow rates. In contrast, if your hot water usage is sporadic, a combi boiler may efficiently meet your needs while saving space and costs.

To assess your hot water demand, consider the number of occupants and the frequency of hot water use in your home. For example, a household with two bathrooms may require up to 25-30 liters per minute for adequate performance, which a combi boiler might struggle to deliver during peak times. In this scenario, a condensing boiler can ensure a steady supply, efficiently meeting demand. Additionally, reviewing usage patterns, such as shower times and appliance schedules, can provide valuable insights into the specific needs of your household.

Consumer Preferences and Trends

Consumer preferences are shifting towards energy-efficient solutions, with many homeowners favoring combi boilers for their compact design and instant hot water supply. Current trends indicate a growing preference for systems that integrate smart technology, allowing for remote control and optimization of energy consumption, which leads to cost savings and environmental benefits.

Market Research Insights

Recent surveys reveal that 65% of homeowners prioritize energy efficiency when selecting a boiler, with combi boilers receiving high satisfaction ratings for their space-saving features and reliability. Notably, the condensing boiler market is gaining traction, appealing to those focused on long-term energy savings and reduced carbon footprints.

Customer Feedback and Performance

Feedback highlights that users appreciate the on-demand hot water of combi boilers, which eliminates the need for bulky storage tanks. However, some customers indicate performance issues in larger households during peak demand times, prompting consideration of condensing boilers for better handling of simultaneous heating and hot water requirements.

In analyzing customer reviews, many homeowners report satisfaction with the energy savings they experience after switching to condensing boilers. They highlight improved efficiency, particularly in modernized homes where heating demands are higher. Users often share anecdotes where annual energy bills decreased significantly, reinforcing this technology’s value in reducing overall heating costs without sacrificing performance. As such, both types of boilers have their advocates, underscoring the importance of individual needs when making a choice.

Summing up

From above, it’s clear that choosing between a combi and a condensing boiler depends on your specific heating and hot water needs. If you prioritize space and instant hot water, a combi boiler may suit your lifestyle better. However, if you need a more efficient system that can handle higher demands, particularly for larger households, a condensing boiler offers superior fuel efficiency and performance.

The choice isn’t between Combi or Condensing boiler, but rather selecting a system type (Combi, System, or Regular) that is a modern, high-efficiency Condensing model. If you have limited space and low-to-moderate hot water demand, a Combi is the perfect choice for on-demand heating. However, if you have multiple bathrooms or a large family, a System or Regular boiler with a hot water cylinder might deliver better performance. Always consult a certified Gas Safe or local equivalent engineer to properly size the boiler for your specific property and energy requirements.

Evaluate your home’s hot water usage and heating requirements to determine the best option for you.

Categories
Uncategorized

The 2025 Paint Color Trends That Will Define Your Home’s Interior


A new year and time for a new look, but what will be the 2025 paint color trends to look for?

Most homeowners will find 2025’s palette blends soothing earth tones, bold jewel accents, and sustainable neutrals to shape your rooms; this guide helps you choose durable, light-enhancing colors, pairings, and finishes to elevate flow and resale value while reflecting your lifestyle. You’ll learn which hues suit orientation, lighting, and focal points so your choices are confident and future-proof.

Overview of The 2025 Paint Color Trends

You’ll find 2025 leaning into three dominant directions: warm earth-driven palettes (terracotta, ochre, clay), verdant greens and muted botanicals, plus deep, moody anchors like indigo and warm charcoal. Designers pair tactile finishes—matte and low-sheen eggshell—with sustainable pigments, using 60/40 proportions (neutral field/colored accents) to balance boldness and resale appeal. Expect color to work with texture and light, not compete, so your selections support layered, multifunctional rooms rather than single-statement schemes.

Key Influences Shaping Color Choices

Five forces are steering palettes: biophilic design and indoor greenery, sustainability and low-VOC pigments, nostalgia for midcentury and global artisan hues, tech-driven personalization (AI palette tools), and economic factors that favor timeless, adaptable colors. You’ll notice supply-chain realities nudging pigment availability, while lighting trends—LED warmth ranges and human-centric lighting—change how your chosen shades read across morning, noon and evening.

Predictions from Industry Experts

Top designers forecast wider adoption of adaptive palettes that shift with décor: layered neutrals with two or three accent hues, and a strong move toward olive-to-moss greens paired with clay or rust. Firms like Farrow & Ball and larger manufacturers are already promoting collections that emphasize longevity and cross-room cohesion, so you’ll see curated sets meant to simplify whole-home color planning rather than isolated accent picks.

Practically, experts advise you to sample large swatches (at least 18×24 inches) and observe them in three lighting conditions before committing. In staged projects, using a 70/30 neutral-to-accent ratio and combining a matte field with a low-sheen focal wall improved buyer appeal in several recent urban listings; apply that tactic in your schemes to maintain both trend relevance and long-term versatility.

Popular Color Palettes for 2025

Warm Neutrals

Think greige, warm taupe, sun‑baked clay and soft sand—these are the go‑to neutrals in 2025. Designers report about 60% of recent renovations lean on these tones to create layered warmth. You should pair them with walnut floors, matte‑brass hardware, and textured plaster to add depth without overpowering your furniture or art.

Vibrant Accents

Jewel tones and saturated hues—emerald, teal, mustard and coral—act as focal accents. Apply them to one or two elements (island, trim, or a single wall) following an 80/20 balance so the pops don’t dominate. You can use semi‑gloss on cabinetry for durability while keeping surrounding walls in warm neutrals to maintain cohesion.

You should test a 3×4‑foot swatch at multiple times of day to see how natural light shifts hue. Try painting your kitchen island deep teal while keeping upper cabinets off‑white; use two coats of quality acrylic latex, allowing 4–6 hours between coats. Aim for accents to occupy about 30–40% of a room’s visual weight to add energy without visual chaos.

The Role of Texture in Color Trends

Texture reshapes how your chosen colors read in a room by influencing light behavior and perceived depth; rougher surfaces scatter light and soften saturated hues, while smoother, reflective surfaces intensify them. Use textured finishes like limewash, venetian plaster or woven grasscloth to add dimensionality to neutrals and deepen jewel tones without changing pigment. You can manipulate mood with as little as one accent surface—an entry wall or fireplace—so texture becomes a design tool that amplifies the 2025 palette choices.

Matte vs. Gloss Finishes

Matte (flat) sheens, typically 0–5% gloss, absorb light and hide wall flaws, making them ideal for living rooms and ceilings; you’ll get richer-looking deep colors with a matte finish. Gloss levels such as semi-gloss (40–70%) and high-gloss (70–90%) reflect light, stand up to cleaning, and suit trim, doors, kitchens and bathrooms. When you choose, match sheen to function: pick easy-clean glosses where durability matters and low-gloss surfaces where visual depth and softness matter more.

Incorporating Textured Elements

Introduce texture strategically by limiting heavy treatments to about 20–30% of wall area—an accent wall, wainscot, or band behind shelving—to avoid visual overload. Try Venetian plaster (applied in 2–3 thin layers and burnished) for a polished patina, or grasscloth wallpaper for natural warmth; pair matte charcoal walls with a woven-texture focal wall to enhance contrast. You’ll find texture harmonizes color trends without needing new pigments.

Balance scale and maintenance: larger textures read softer from afar, while tight, small-scale textures add subtle richness up close. Test samples under your lighting—daylight and a 2700K warm LED—to see shifts in hue and shadow. Install glossy trim or beadboard (commonly 36 inches high) against textured walls to bounce light and create crisp edges, and seal porous materials in humid zones to keep colors true over time.

Room-by-Room Color Recommendations

Living Room Inspiration

Lean into balanced palettes: try a muted olive accent wall (#8A9A5B) with warm beige and a 60/30/10 distribution to guide furniture and accessories. South-facing rooms handle cooler greens and blues, while north light benefits from warm terracotta or soft ochre to boost perceived warmth. For a contemporary look, combine a deep charcoal sofa with 2–3 brass accents and matte-wall paint to anchor an open-plan living area under 300–400 lux of ambient light.

Bedroom Color Ideas

Favor calming hues like muted blue-green, warm taupe, or soft clay to promote sleep; aim for wall LRV between 30–55 to balance coziness and light reflection. You can use a darker headboard wall for depth—about 1 wall in 3—paired with lighter ceiling and trim to keep the room airy. Layer in textiles in complementary tones and limit bold accents to one or two pieces for serenity.

Choose eggshell or low-sheen finishes for walls and semi-gloss for trims and doors to withstand cleaning without harsh glare. Combine 2700–3000K warm lighting and dimmers so your paint reads differently at night; studies show warmer kelvin improves sleep onset. If you have a 12×14 master, a single navy feature wall (Hale Navy-style) plus soft gray-beige all around creates a 70/30 calm-to-contrast ratio that still feels spacious.

Sustainable and Eco-Friendly Paint Options

You should favor zero- or very low‑VOC formulations (often under 5 g/L) and paints with plant‑based binders or recycled pigments; certifications like GREENGUARD Gold and Green Seal indicate third‑party testing. Choosing durable, washable finishes reduces repaint frequency and embodied carbon over time, while selecting light‑reflective pigments for sun‑exposed walls can cut cooling loads in warm climates. Look for transparent ingredient lists and performance data when comparing options.

Non-Toxic Paint Brands

You can trust brands such as ECOS Paints, AFM Safecoat, Clare, Sherwin‑Williams Harmony, and Behr Premium Plus for low‑odor, low/zero‑VOC options that carry GREENGUARD or Green Seal endorsements; zero‑VOC typically means under ~5 g/L while low‑VOC is under ~50 g/L. Many municipalities and school districts specify these lines for classrooms and healthcare settings to improve indoor air quality immediately after application.

The Importance of Sustainability in Color Choices

You should evaluate color for its Light Reflectance Value (LRV) on a 0–100 scale—whites often score 80–90, deep hues under 20—and how that affects heating, cooling, and lighting needs: high‑LRV colors increase daylighting and can lower electric lighting use, while strategic darker accents can add passive warmth in cold rooms. Also weigh pigment sourcing and durability to minimize environmental impact over the paint’s lifecycle.

You can extend sustainability by picking high‑performance finishes that last 7–15 years, reducing repaint cycles and waste; check manufacturer lifecycle data and ask for recycled‑content pigments or low‑energy production claims. Test sample swatches under your actual lighting to confirm LRV effects, and prioritize certified products (GREENGUARD Gold, Green Seal) combined with proper surface prep to maximize longevity and indoor air quality.

Tips for Choosing the Right Color for Your Space

You should prioritize room function and natural light when selecting color; use 2–3 sample swatches and note how they read at 7am, noon, and 8pm. Consider scale—darker colors shrink a 10×12 room visually, while pale warm tones open it. Test against fixed elements like floors and cabinetry. Use the checklist below to compare options. After you track shifts across the day and alongside furniture, choose the shade that consistently supports your intended mood.

  • You should test 2–3 shades per room and pick one dominant plus one accent;
  • You should paint sample squares 12×12″ or 24×24″ in at least three locations;
  • You should compare swatches against floors, cabinets, and textiles under both daylight and artificial light;
  • You should limit open-plan palettes to three colors to maintain flow across 500–1,200 sq ft living areas.

Undertones and Lighting Considerations

You should identify warm or cool undertones by comparing swatches to pure white and a neutral gray; test three samples on different walls because east-facing rooms get bluer morning light, while west-facing rooms have warmer late-afternoon light. Note manufacturer codes (e.g., Benjamin Moore 2140–60) to match undertones, and observe each sample for 48–72 hours to see subtle shifts before finalizing.

Testing Colors Before Committing

You should paint 12×12″ or 24×24″ sample squares in multiple spots—at least three—then view them at 6am, 12pm, and 6pm to note shifts; lighting changes can move a hue from neutral to greenish or mauve. Bring large swatches near sofas and countertops to check compatibility with finishes and textiles.

You should apply samples using two coats and a primer-backed test card to match final sheen; note changes under LED vs incandescent bulbs and with curtains open or closed. Record observations—date, time, and bulb type—and photograph samples at each interval; you should live with samples for 7–10 days to capture weekend and weekday lighting variations before ordering gallons.

Summing up

From above, the 2025 paint color trends — warm earthy neutrals, expressive moody hues, versatile pastels and sustainable pigments — give you a clear palette to shape mood, light and function across your rooms. Use contrast, texture and curated accents to personalize each space, balancing timeless foundations with bold focal walls so your home feels both contemporary and enduring.

Categories
Uncategorized

Are Home Improvements a Write off


It’s the first question every savvy homeowner asks before starting a big project: are home improvements a write off or not? The short answer for the average personal residence is often “no,” but the full story is far more valuable. While you generally can’t deduct the cost of a new roof or remodeled kitchen in the year you pay for it, strategic upgrades like energy-efficient improvements and medical modifications do qualify for significant tax benefits. Read on to clarify the crucial difference between an immediate deduction, a long-term capital improvement, and a direct tax credit

Home improvements can significantly enhance the value of your property, but you may wonder whether these expenses are tax-deductible. Understanding which improvements qualify as write-offs can help you maximize your tax benefits. You need to differentiate between personal and investment-related improvements to navigate the complexities of tax deductions appropriately. This post will guide you through the specifics of claiming home improvements on your taxes, ensuring you make informed financial decisions.

Understanding Home Improvements

Home improvements encompass enhancements that increase your property’s value or extend its lifespan. These modifications can range from major renovations, like a kitchen remodel, to smaller updates, such as energy-efficient windows. Effective home improvements not only uplift your living space but may also create potential tax benefits when selling your home.

Definition of Home Improvements

Home improvements refer to structural alterations or renovations that enhance the functionality, aesthetics, or efficiency of a property. These projects can include adding a new room, renovating a bathroom, or upgrading your HVAC system. Unlike simple maintenance tasks, improvements significantly upgrade your home’s overall value.

Difference Between Improvements and Repairs

Improvements and repairs serve different purposes in home maintenance. While improvements aim to enhance your home’s quality or functionality, repairs focus on fixing existing issues or wear and tear. Understanding this distinction is vital when considering tax implications, as improvements can often have more favorable write-off potential than routine repairs.

Improvements increase your property’s value or usefulness, while repairs simply restore it to its previous condition. For instance, installing a new roof is an improvement as it prolongs your home’s life and enhances its market value. In contrast, patching a leak is a repair aimed at maintaining the current state without adding value. This differentiation is crucial when calculating deductions or determining long-term benefits for your property. Thus, keeping clear records of both types of expenses is prudent for future tax considerations or resale value enhancement.

Tax Deductions and Write-Offs

Understanding the nuances of tax deductions and write-offs for home improvements is vital for maximizing your tax benefits. Certain renovations that enhance living conditions or home value can potentially qualify for deductions. It’s important to keep thorough records and receipts of all home-related expenses to substantiate these claims during tax season.

Types of Tax Deductions for Homeowners

As a homeowner, you may be eligible for various tax deductions that can ease financial burdens. These typically include:

  • Mortgage interest payments
  • Property tax payments
  • Points paid on a loan
  • Home office expenses
  • Energy-efficient home improvements

After exploring these options, evaluate which apply to your situation for optimal tax savings.

Type of Deduction Eligibility Criteria
Mortgage Interest Must be on a primary residence
Property Taxes Paid for a primary or secondary residence
Points Paid For purchase or refinancing of a mortgage
Home Office Designated office space in your home
Energy Improvements Improvements that meet IRS energy standards

Eligibility Criteria for Write-Offs

Eligibility for write-offs often hinges on the nature and purpose of the home improvement. Generally, improvements that add value to your home, prolong its life, or adapt it for new uses qualify. If you are making repairs rather than improvements, you might be more limited in what you can deduct.

For example, a new roof or upgraded plumbing can potentially qualify as write-offs, while routine maintenance like repainting might not. Factors like whether the renovation is for personal use or a rental property also influence eligibility. Additionally, you should consider local tax laws, as they can vary significantly with respect to homeowner deductions.

Home Office Deductions

When you operate a business from your home, certain home improvement expenses may qualify for deductions. This can significantly reduce your taxable income, making your home office an asset rather than a liability. Whether you’re upgrading your workspace or making necessary repairs, identifying which costs are deductible is necessary for maximizing your tax benefits.

Requirements for Deducting Home Office Improvements

To qualify for home office deductions, your space must be used regularly and exclusively for business purposes. This means the area designated as your office cannot serve dual functions, such as a guest bedroom. Additionally, the size of your designated office space relative to your home’s total size influences the deduction amount, as only the relevant portion is considered for tax purposes.

Calculating the Deduction Amount

Your home office deduction is typically calculated based on the percentage of your home that your office occupies. For example, if your home is 1,000 square feet and your office is 200 square feet, you’ll claim 20% of allowable expenses. This includes improvements that enhance your office space, such as renovations or new furniture specifically for that area.

When calculating your deduction amount, you’ll need to segregate expenses into direct and indirect categories. Direct expenses, like a new desk, are 100% deductible, while indirect costs, such as utility bills or mortgage interest, should be prorated based on the office’s square footage. Keep detailed records of all expenses and their business purpose to substantiate your claims and maximize your deductions effectively.

Selling Your Home: Capital Gains and Improvements

When you sell your home, certain improvements can significantly impact your capital gains tax. The Internal Revenue Service (IRS) allows you to adjust your home’s basis—what you originally paid—by adding the cost of eligible improvements. This can reduce the capital gains tax owed on the profit you make from the sale, making it necessary to understand how these improvements factor into your taxable income.

How Improvements Affect Capital Gains Tax

Improvements that enhance the value of your home or prolong its useful life can increase your adjusted basis, ultimately lowering your capital gains. For instance, adding a new roof or remodeling a kitchen likely adds significant value and can help mitigate your taxable gains when you sell your property. In contrast, regular maintenance expenses do not qualify for this basis adjustment.

Documenting Improvements for Tax Purposes

Accurate documentation of your home improvements is vital for tax purposes. Keep records of expenditures, including invoices, contracts, and payment receipts. These documents provide proof of your investment in the property, ensuring that you can substantiate your claims during tax filing and if audited by the IRS.

Enhancing your documentation can involve categorizing expenses by project, retaining before-and-after photos, and maintaining a detailed log of work completed. This organized approach not only allows for easier calculations when determining capital gains but also strengthens your case for qualifying improvements should you need to provide evidence of your claims to tax authorities. By being diligent with documentation, you create a solid foundation for maximizing your tax benefits when selling your home.

Common Myths About Home Improvements and Tax Deductions

Misconceptions Homeowners Have

Many homeowners mistakenly believe that all home improvement expenses automatically qualify as tax deductions. There’s a common perception that simply renovating your kitchen or adding a deck will reduce your tax burden, but this is not always the case. You may find that only certain improvements related to a home office or energy efficiency upgrades can lead to tax benefits.

Clarifying the Reality

While it’s true that certain home improvements can offer tax benefits, not all renovations will qualify for deductions. Investments intended to increase the value of your home, like a new roof or landscaping, generally don’t qualify unless you meet specific conditions. Conversely, expenses for a dedicated home office or energy-efficient upgrades can lead to significant savings on your tax return.

For example, if you use part of your home exclusively for business, renovations in that area may be deductible. Additionally, investing in energy-efficient technologies or materials can sometimes yield tax credits, providing direct financial benefits that are often overlooked. Familiarizing yourself with IRS guidelines and keeping thorough records can help clarify what qualifies, ensuring you maximize your potential write-offs while avoiding pitfalls of common misconceptions.

Practical Tips for Maximizing Write-Offs

To maximize your write-offs on home improvements, it’s vital to stay organized and informed. Consider these strategies:

  • Document all expenses associated with improvements.
  • Categorize upgrades based on potential tax benefits.
  • Keep up with tax law changes that may affect deductions.
  • Consult professionals when in doubt about eligibility.

Thou shalt not overlook the importance of thorough planning and execution when seeking write-offs.

Keeping Records and Receipts

Accurate record-keeping is vital for justifying your deductions. Retain receipts, invoices, and contracts for every improvement you make. Organizing these documents chronologically or by room will streamline the tax preparation process. When tax time arrives, having a clear record helps substantiate your claims and minimizes the risk of errors or audits.

Consulting with Tax Professionals

Enlisting the expertise of tax professionals can provide tailored advice specific to your situation. These experts stay updated on ever-changing tax laws and can identify deductions you might overlook. During consultations, you can discuss your home’s unique improvements and determine which may yield the most substantial tax benefits. Investing in professional guidance often pays off through maximized write-offs.

Effective collaboration with tax professionals not only clarifies the complexities of write-offs but also ensures compliance with IRS regulations. They can help you assess your property’s depreciation, energy-efficient upgrades, and specific improvements that qualify for tax credits. By leveraging their knowledge, you can enhance your strategy for home improvement deductions and safeguard against potential pitfalls.

Summing up

To wrap up, understanding whether home improvements can be a write-off is vital for maximizing your tax benefits. Generally, if your upgrades enhance your home’s value or are made for rental properties, they may be deductible. To ensure you’re taking full advantage of these potential write-offs, keep detailed records of your expenses and consult a tax professional for personalized advice related to your specific situation. This proactive approach can help you effectively manage your finances while potentially reducing your taxable income.

To summarize the central question, are home improvements a write off: routine repairs are not deductible, but capital improvements increase your home’s tax basis, which reduces your tax liability when you sell the home for a profit. Furthermore, don’t overlook immediate tax relief available for specific projects, such as the Energy Efficient Home Improvement Credit or medically necessary modifications. The key takeaway is documentation: keep every receipt and invoice for every upgrade you make. Before filing, consult with a qualified tax professional to ensure you correctly leverage every credit or deduction your home improvements qualify for.

Categories
Uncategorized

10 Finished Basement Ideas on a Budget

10 Finished Basement Ideas on a Budget: Transforming Your Space for Under $1,000

Transform your finished basement into a functional haven for under $1,000 with these budget-friendly ideas. Create a cozy family room with comfortable seating and ambient lighting. Set up a productive home office with natural light and light colors. Design a fun entertainment area complete with a large sectional sofa and a budget projector. Consider adding a craft space, a home gym, or a game room. Get creative with storage solutions, and you’ll find plenty of inspiration ahead.

Create a Cozy Family Room

When you’re creating a cozy family room in your basement, comfortable seating is key.

Think about adding a plush sofa or some inviting armchairs that make everyone want to gather.

With the right seating, you’ll transform your space into the perfect spot for relaxation and family bonding.

Comfortable Seating Options

Creating a cozy family room in your finished basement starts with the right seating options. Look for a comfortable sofa that fits your style and budget; a sectional can provide ample space for everyone.

Add a couple of oversized chairs or bean bags for a relaxed vibe. Don’t forget about multifunctional furniture, like ottomans with storage, which can save space and keep things tidy.

If you’re on a tight budget, consider thrift stores or online marketplaces for gently used pieces. Layer soft throw blankets and plush cushions to enhance comfort.

Finally, arrange your seating to promote conversation and connection, making your basement the perfect spot for family movie nights or game days.

Design a Productive Home Office

To create a productive home office in your finished basement, start by maximizing natural light.

Position your desk near windows or use light-colored decor to brighten the space. This not only boosts your mood but also enhances focus and creativity while you work.

Maximize Natural Light

How can you turn your finished basement into a bright and inviting home office? Start by choosing a light color palette for the walls and furniture. This not only reflects light but also creates an airy feel.

If possible, install larger windows or opt for glass-block windows to let in more natural light. Incorporate mirrors strategically to bounce light around the room.

Consider adding skylights if your basement allows for it. If you can’t change the windows, use light-filtering curtains that provide privacy while letting sunlight in.

Finally, enhance the lighting with LED bulbs that mimic daylight. By maximizing natural light, you’ll create a workspace that feels open, energizing, and conducive to productivity.

Set Up a Fun Entertainment Area

Transforming your finished basement into a fun entertainment area can be both exciting and budget-friendly.

Start by choosing a theme, whether it’s a cozy movie nook or a vibrant game room. A large, comfy sectional sofa can be a great investment, while accent pillows add personality without breaking the bank.

Consider a budget-friendly projector for movie nights or a flat-screen TV for gaming. Use wall-mounted shelves to display games, movies, or books, keeping the space organized.

Add ambient lighting with string lights or floor lamps to create a welcoming atmosphere.

Don’t forget a small fridge stocked with your favorite snacks and beverages for easy access.

With a little creativity, you’ll have a fantastic entertainment area everyone will love!

Build a Craft or Hobby Space

If you’re looking to release your creativity, building a craft or hobby space in your finished basement can be a rewarding project.

Start by designating a specific area, ensuring it has ample lighting and ventilation. Use affordable materials like plywood for tables and pegboards for organizing supplies.

Consider repurposing furniture, such as an old desk or shelving units, to save money. Stock up on storage bins to keep your materials tidy and accessible.

Personalize the space with inspiring decor or a bulletin board for ideas. Whether you’re painting, knitting, or working on DIY projects, having a dedicated area will help you focus and enjoy your hobbies.

With a little creativity and planning, your craft corner can thrive without breaking the bank.

Establish a Home Gym

Creating a home gym in your finished basement can be a smart way to stay fit without breaking the bank.

Start by identifying essential equipment that fits your space and workout style.

With a little planning, you can set up an effective gym that encourages you to stay active.

Essential Equipment Checklist

Establishing a home gym in your finished basement can be a game-changer for your fitness routine, and having the right equipment is essential.

Start with a set of dumbbells or adjustable weights; they’re versatile and take up minimal space. A sturdy exercise mat is vital for floor workouts, stretching, or yoga.

Consider a resistance band set for strength training and flexibility exercises. If cardio is your focus, a jump rope or an affordable stationary bike can do wonders.

Finally, don’t forget a foam roller for recovery. With these essentials, you’ll create a functional gym without breaking the bank, allowing you to stay committed to your fitness goals right at home.

Develop a Kids’ Playroom

While you might think a kids’ playroom requires a hefty budget, transforming your finished basement into a vibrant space for play can be both affordable and rewarding.

Start by clearing out any clutter and painting the walls in bright, cheerful colors. Use inexpensive area rugs to define play zones and add comfort.

Consider repurposing old furniture, like bookshelves for toy storage or a small table for crafts. Invest in some cushions or bean bags for seating; they’re cozy and budget-friendly.

You can also create a chalkboard wall with chalkboard paint for endless creativity.

Don’t forget to involve your kids in the design process—they’ll love seeing their ideas come to life, making the space even more special for them.

Create a Guest Bedroom

How can you turn your finished basement into a cozy guest bedroom without breaking the bank? Start by selecting a warm color palette for the walls; soft neutrals create an inviting atmosphere.

Consider investing in a comfortable bed, like a budget-friendly futon or a quality air mattress. Add cozy bedding to enhance comfort.

Next, incorporate functional furniture like nightstands and a small dresser from thrift stores or online marketplaces.

Don’t forget lighting! Use a mix of ambient and task lighting to create a warm glow.

Personal touches, like artwork or plants, can make the space feel homey.

Finally, guarantee your guests have privacy with simple room dividers if needed. Your basement can become a charming retreat with just a few thoughtful updates!

Install a Wet Bar or Mini Kitchen

Creating a cozy guest bedroom sets the stage for entertaining, but enhancing your finished basement with a wet bar or mini kitchen takes it to the next level.

You don’t need to break the bank to achieve this upgrade. Start by selecting a compact bar cart or a small cabinet to hold your drinks and glassware. Add a mini fridge to keep beverages chilled.

Consider installing a simple countertop for extra prep space. You could even incorporate a wine rack or shelving for easy access to your favorite drinks.

For a touch of style, add some bar stools and ambient lighting. With a few budget-friendly choices, you’ll create an inviting spot where friends and family can gather and enjoy their time together.

Add a Game Room

Adding a game room to your finished basement transforms the space into a fun retreat for family and friends. You don’t need to break the bank to create an inviting atmosphere.

Start by choosing a few key games—perhaps a pool table, a foosball table, or a dartboard. If space is tight, opt for multi-game tables or classic board games that encourage interaction.

Consider comfortable seating like bean bags or a small sectional to keep everyone cozy. Add some vibrant wall art or posters to set the mood.

Lighting can make a huge difference, so include some fun string lights or a stylish lamp. With a little creativity and effort, you’ll have a game room that everyone will love!

Transform Into a Media Room

If you want to enjoy movie nights or binge-watch your favorite shows without leaving home, transforming your finished basement into a media room is the perfect solution.

Start by investing in a quality projector or a large-screen TV, which can be found for budget-friendly prices. Arrange comfortable seating, like a sectional sofa or bean bags, to create a cozy atmosphere.

Don’t forget good lighting; consider dimmable LED lights or blackout curtains to enhance the viewing experience. For sound, a budget-friendly soundbar can greatly improve audio quality.

Finally, add personal touches like movie posters or themed decor to make the space truly yours. With a little creativity, you can create a fantastic media room without breaking the bank!

Use Creative Storage Solutions

Since finished basements often face storage challenges, using creative storage solutions can maximize your space while keeping it organized.

Start by incorporating multifunctional furniture, like ottomans or benches with hidden compartments. Wall-mounted shelves can also free up floor space and display your favorite items.

Consider using clear bins for easy visibility and labeling, which helps you find things quickly. Pegboards are fantastic for tools and smaller items, keeping them accessible yet tidy.

If you have underutilized corners, install corner shelves or a tall bookcase to take advantage of vertical space.

Finally, don’t forget about utilizing the area under stairs for additional storage, whether it’s a small closet or custom shelving.

Get creative, and you’ll make the most of your basement!