An old, sticky, or brassy doorknob can instantly date a room and even make accessing a space frustrating. Fortunately, learning How to Replace a Doorknob is one of the easiest, fastest, and most satisfying DIY projects you can complete. Whether you are swapping a basic passage handle for a privacy lock or simply refreshing outdated hardware for a modern look, this task requires nothing more than a few basic tools and about 15 minutes of your time. If you can handle a screwdriver, you can tackle this project. Follow our simple, step-by-step instructions to achieve a beautiful, functional update today!
Upgrading your doorknob can dramatically improve your space’s look and feel without breaking the bank. This simple DIY project requires just a few tools and a bit of your time. By following five straightforward steps, you can achieve a polished and functional result that elevates your home’s entrance. Ready to tackle this easy upgrade? Let’s explore how to get started.
Gather Your Tools and Materials
Before you plunge into replacing your doorknob, it’s essential to gather the right tools and materials.
Start with your tool selection: you’ll need a screwdriver, a new doorknob, and possibly a drill. A flathead and Phillips screwdriver will cover most types of doorknobs.
Next, consider material types. Choose a doorknob that matches your style, whether it’s brass, stainless steel, or a more modern finish. If you’re looking for durability, opt for metal over plastic.
Having the right tools and materials won’t only streamline the process but also guarantee your new doorknob enhances the look and feel of your space.
With everything ready, you’ll feel confident in your ability to complete this upgrade successfully.
Remove the Old Doorknob
With your tools and materials at the ready, it’s time to remove the old doorknob.
Start by identifying the knob type—either a passage, privacy, or dummy knob. Most have visible screws on the side or back. Use a screwdriver to unscrew these, employing appropriate removal techniques.
If you can’t see screws, look for a small pinhole; this often hides a release mechanism. Insert a paperclip or similar tool to push the pin and release the knob.
Once you’ve removed the knob, take off the faceplate and latch mechanism by unscrewing them as well. This step is essential for a smooth installation of your new doorknob, ensuring everything aligns perfectly for your door.
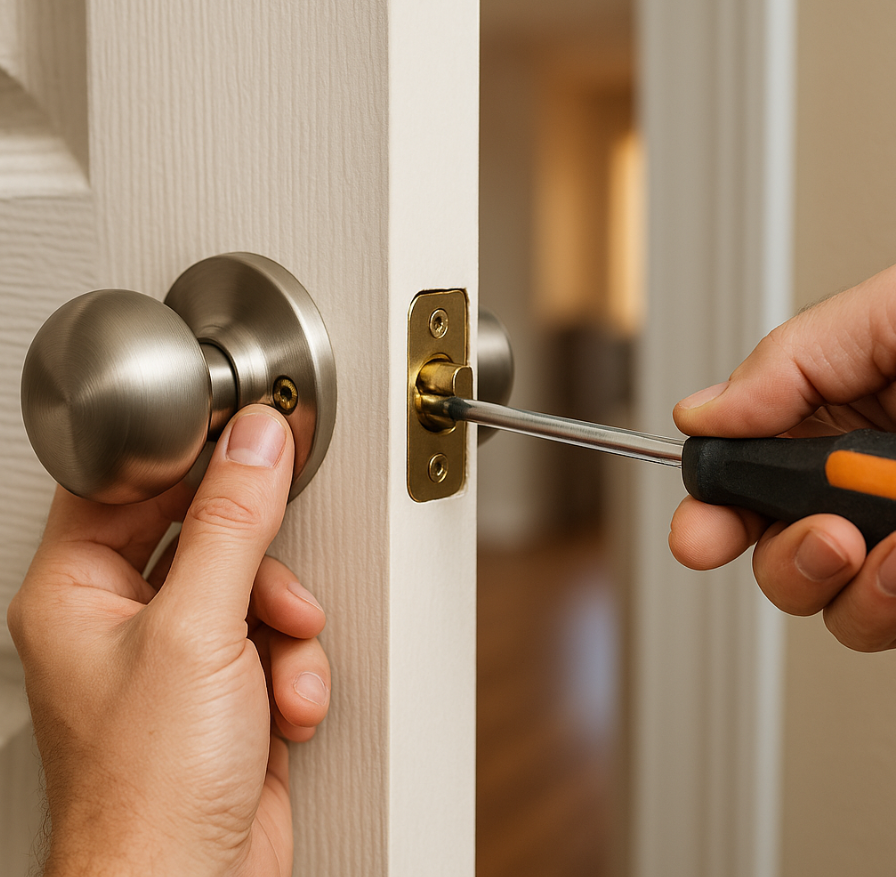
Install the New Doorknob
Now it’s time to install your new doorknob. First, align the doorknob components with the holes in the door. Depending on the doorknob styles you’ve chosen, you may need specific installation techniques.
Insert the spindle through the latch and attach the exterior knob, ensuring it fits snugly. Next, secure the interior knob, aligning it with the spindle and tightening any screws. Be careful not to overtighten, as this can damage the doorknob.
If your knob has a locking mechanism, make sure it’s positioned correctly. Finally, check that everything feels secure and functions smoothly.
With your new doorknob in place, you’ll enjoy a refreshed look that enhances your home’s style and functionality.
Test the Functionality
After securing your new doorknob, it’s time to test the functionality to confirm everything works as it should.
Start by turning the doorknob to guarantee it rotates smoothly without any resistance. Next, check the doorknob alignment by closing the door and observing if it latches correctly. If it doesn’t catch, you might need to adjust the strike plate or the doorknob itself.
Give the knob a gentle push to see if it locks and releases easily. Pay attention to any unusual sounds; these could indicate misalignment.
Finally, verify the door opens and closes without sticking. Effective functionality testing will help you enjoy your upgraded doorknob, making your space feel more welcoming and secure.
Final Touches and Cleanup
Once you’ve confirmed your new doorknob functions properly, it’s time to focus on the final touches and cleanup.
Start with a final inspection to guarantee everything is secure; check screws and alignment one last time.
If you’ve got any decorative accents, like a matching plate or trim, now’s the moment to install those for a polished look.
Wipe down the area around the doorknob to remove fingerprints or dust, guaranteeing it looks as good as it works.
Don’t forget to dispose of any packaging and old hardware responsibly.
With these steps, you’ll not only enjoy a functional door but also create an inviting atmosphere that reflects your personal style and care for your space.