Categories
Uncategorized

DIY Shiplap Wall Installation: Ultimate Guide

Installing a shiplap wall can transform your space with a unique touch. Start by gathering your materials and tools, and prep the wall by ensuring it’s clean and smooth. Measure and cut your shiplap boards accurately, then paint or stain them according to your design vision. Secure the boards in place, filling any gaps and nail holes for a clean finish. With some finishing touches, your shiplap wall will shine. Discover more detailed steps to perfect your project.

Tools and Materials Needed

Before you plunge into your shiplap wall project, it’s vital to gather the right tools and materials.

First, you’ll need shiplap materials, which can be wood planks or engineered options. Choose a finish that complements your style.

For important tools, grab a miter saw for precise cuts, a level to guarantee straight lines, and a nail gun for easy installation. A measuring tape is essential for accurate measurements, while a stud finder helps locate the best spots to nail your shiplap.

Don’t forget safety gear like goggles and gloves.

With these items in hand, you’ll be well-prepared to tackle your shiplap wall and achieve a stunning finish that transforms your space.

Happy building!

Preparing Your Wall

As you get ready to install your shiplap wall, it’s crucial to prepare the surface properly to guarantee a smooth and successful application.

Start with wall preparation by removing any existing décor, nails, or fixtures. Next, inspect the wall for any damage or imperfections; patch holes and sand rough areas to create a level surface.

Once the wall is prepped, focus on surface cleaning. Use a damp cloth to wipe away dust, dirt, or grease, ensuring nothing interferes with the adhesive or paint. If your wall has a glossy finish, consider lightly sanding it to promote better adhesion.

After these steps, your wall will be primed and ready for the shiplap installation, setting the stage for a beautiful transformation.

Measuring and Marking

Before you start installing your shiplap, you need to gather your measuring tools, like a tape measure and level.

Next, determine the dimensions of your wall to guarantee you have enough material.

Finally, mark level lines where your shiplap will go to keep everything straight and looking great.

Gather Necessary Tools

To successfully install a shiplap wall, you’ll need to gather a few essential measuring and marking tools.

Start with a tape measure to accurately gauge your wall dimensions and the length of your shiplap boards. A level is vital to guarantee your lines are straight, while a square helps you create clean, right angles.

Don’t forget a pencil for marking measurements on the wall and the boards. If you’re exploring different shiplap styles for your project, consider having a chalk line handy for clear, visible guidelines.

This way, you’ll have a solid foundation for your design inspiration. With the right tools in hand, you’ll set yourself up for a successful installation process.

Determine Wall Dimensions

Accurately measuring your wall dimensions is essential for a successful shiplap installation. Start by determining the total wall space you want to cover.

Use a tape measure to find the height and width of the area, noting any obstacles like windows or outlets that might affect your design considerations. It’s important to measure at multiple points to guarantee accuracy, as walls can sometimes be uneven.

Record your measurements clearly, as this will guide your material purchases and installation process. By understanding your wall dimensions, you can better visualize how the shiplap will fit into your space and make adjustments to your design if necessary.

Taking these steps now will save you time and effort later on.

Mark Level Lines

Once you’ve measured your wall dimensions, the next step is to mark level lines to guide your shiplap installation.

Start by using a level tool, like a laser level or a traditional spirit level, to guarantee accuracy. Choose a starting point, typically the floor or a reference line, and mark it.

Then, hold your level tool vertically and draw a straight line across the wall. This line will help with wall alignment as you install each shiplap board.

Continue marking lines at the height you want each row of shiplap to sit. Don’t rush; double-check your lines for accuracy.

Properly marked level lines will make your installation smoother and result in a professional-looking finish.

Cutting the Shiplap Boards

As you prepare to cut your shiplap boards, it’s essential to measure carefully to guarantee a perfect fit. Start by determining the board measurements based on your wall dimensions. Use a tape measure to get accurate lengths, and don’t forget to account for any outlets or obstacles.

When it comes to cutting techniques, a miter saw or circular saw will provide clean, straight cuts. Mark your measurements on the boards clearly, and use a square to make sure your lines are straight.

Always remember to wear safety goggles and follow proper safety protocols during cutting. After cutting, double-check your pieces against the wall before installation to make sure everything aligns perfectly.

Happy cutting!

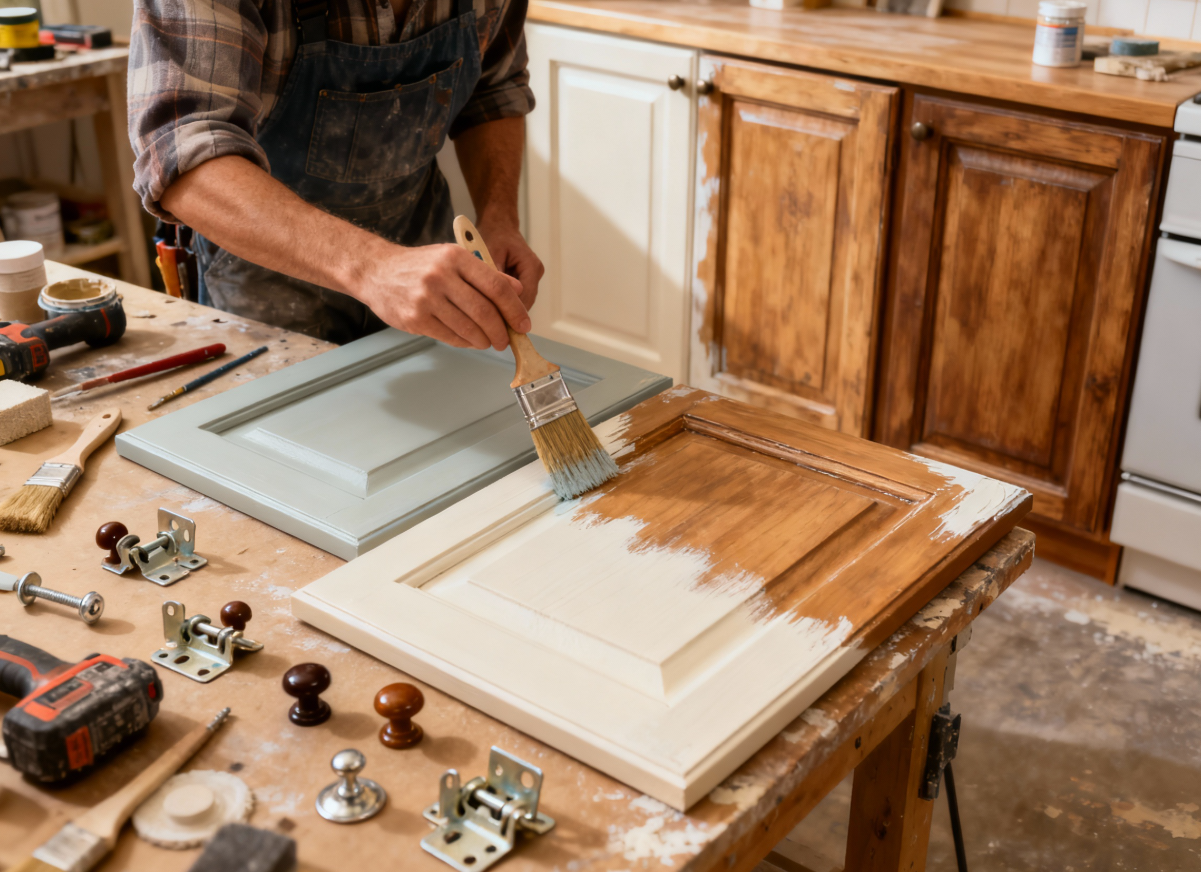
Painting or Staining the Shiplap

Now that your shiplap boards are cut and ready, it’s time to think about how you want to finish them.

Choosing the right paint or stain can enhance the beauty of your wood, while proper prep and application techniques will guarantee a smooth and lasting result.

Let’s explore how to get your shiplap looking its best!

Choosing the Right Finish

When you’re ready to enhance your shiplap wall, deciding between paint and stain can be pivotal. Each option offers distinct benefits that align with various shiplap styles.

Paint provides a solid, uniform color and is great for achieving a bold look. It also offers a wider range of colors and finishes.

On the other hand, stain preserves the wood’s natural texture and grain, providing a more rustic appearance that enhances the shiplap’s character.

Consider your overall design vision and how each finish option complements your space. If you prefer a contemporary feel, paint might be your best bet. If you’re aiming for a cozy, farmhouse look, staining could be the way to go.

Choose wisely!

Prepping the Shiplap Surface

Properly prepping your shiplap surface is essential for achieving a smooth and long-lasting finish, whether you choose to paint or stain.

Start by selecting the right shiplap material types, such as pine, plywood, or MDF, as each requires different preparation techniques. Clear any dirt or dust from the surface using a damp cloth, and allow it to dry thoroughly.

If your shiplap is raw wood, lightly sand any rough spots to guarantee an even texture. For painted finishes, consider applying a primer to enhance adhesion and color vibrancy.

If you’re staining, use a wood conditioner to promote an even finish. Following these surface preparation techniques will set you up for success with your chosen finish.

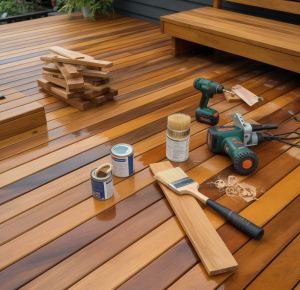
Application Techniques Explained

Applying paint or stain to your shiplap can transform the look of your space, and getting the technique right is essential for a professional finish.

Start by choosing your desired shiplap styles; whether you go with a classic white, bold color, or natural wood stain, each requires different application techniques. If painting, use a high-quality brush or roller for an even coat, ensuring you cover any gaps.

For staining, apply with a clean cloth or brush, wiping off excess for a smooth finish. Always work in sections, and allow adequate drying time between coats.

Finally, seal your shiplap with a protective topcoat to enhance durability and maintain that fresh look for years to come.

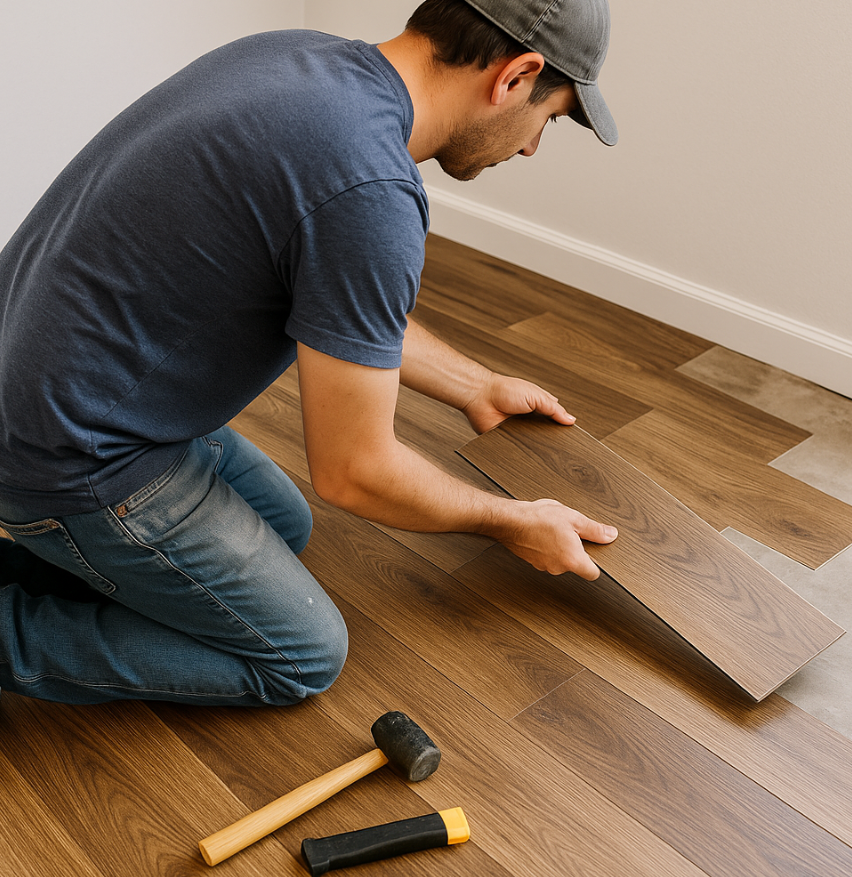
Installing the First Board

Starting your shiplap wall installation with the first board sets the tone for the entire project, so it’s crucial to get it right.

Begin by determining your desired starting height; a good rule is about one inch above the baseboard. Verify the first board placement is level by using a level tool. If your wall isn’t perfectly straight, you may need to trim the board’s edge to fit.

Once you’ve found the right spot, mark where the top of the board will go to maintain board alignment. This will serve as your guide for the rest of the installation.

Take your time here; a well-placed first board will make the subsequent boards easier to install and align correctly.

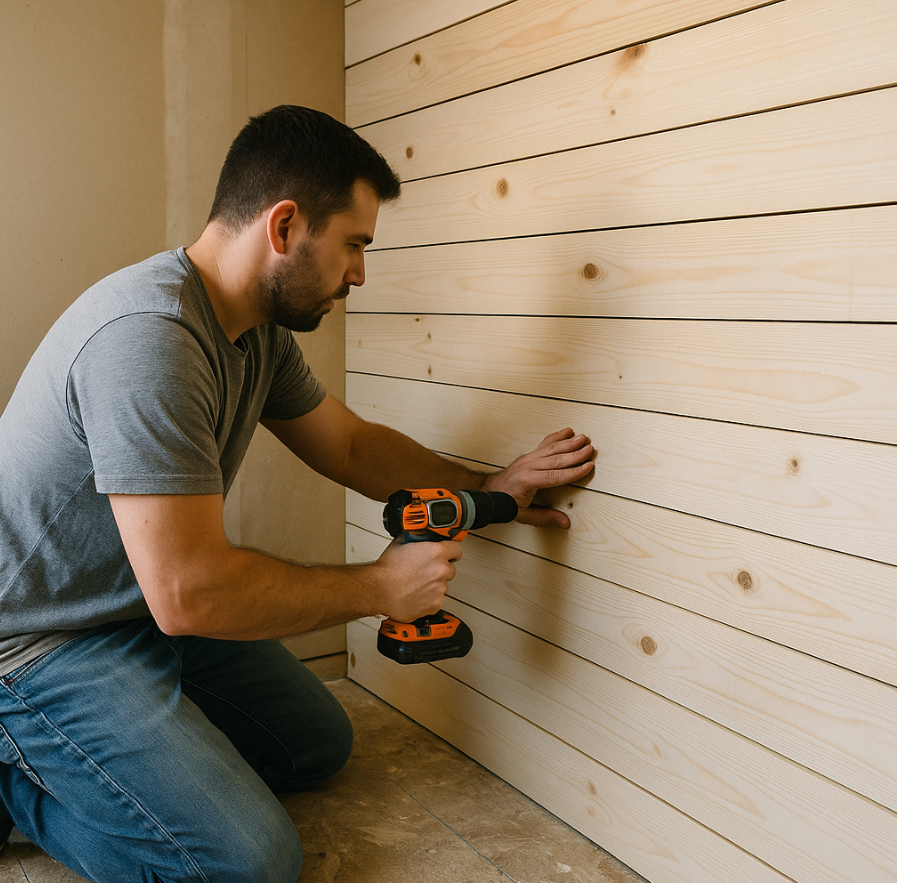
Securing the Remaining Boards

Once you’ve secured the first board, it’s time to fasten the remaining boards to create a seamless look.

Begin by ensuring proper board alignment; this is essential for a professional finish. Place the next board against the first, checking that it’s level. Use a stud finder to locate the wall studs, as they’ll provide the best support.

You can choose different securing methods, like using finishing nails or adhesive, depending on your preference. If you’re using nails, drive them into the studs at a slight angle for added stability.

Continue this process, checking alignment after each board. Keep the gaps between the boards consistent for that classic shiplap appearance.

Happy installing!

Filling Gaps and Nail Holes

After securing your boards, you’ll likely notice some gaps and nail holes that need attention. Don’t worry; gap filling and nail hole repair are straightforward steps.

For gaps between boards, use a wood filler or caulk that matches your shiplap’s color. Apply it carefully with a putty knife, ensuring it fills the space completely. Once it’s dry, sand the area gently for a smooth finish.

For nail holes, choose a wood filler or spackling compound. Fill each hole with a small amount using your finger or a putty knife. Allow it to dry, then sand it down until it’s flush with the surface.

This will create a clean, polished look, prepping your wall for the final touches.

Finishing Touches

With gaps and nail holes now filled, you can focus on the finishing touches that will elevate your shiplap wall.

Start by painting or staining your shiplap to enhance its natural beauty or to match your decor. Once that’s done, consider adding decorative accents, like trim or molding, to give your wall a polished look.

Next, think about incorporating wall art to create a focal point. Whether it’s framed photos, canvas prints, or a gallery wall, these elements can add personality and warmth to the space.

Finally, don’t forget about lighting; strategically placed sconces or a statement pendant can highlight your new wall beautifully.

Enjoy the transformation and let your creativity shine!

Maintenance Tips for Your Shiplap Wall

To keep your shiplap wall looking its best, regular maintenance is key.

Start by using gentle cleaning techniques, like a damp cloth or a soft sponge, to wipe away dust and grime. Avoid harsh chemicals that could damage the wood finish.

If you notice any scratches or dents, don’t worry! For repair advice, simply sand down the affected area and touch it up with matching paint or stain.

Additionally, check for signs of moisture or mold, especially in humid areas. If you spot any, address it immediately to prevent further damage.

Categories
Uncategorized

Is a DIY Kitchen Reface Worth It? Refinishing vs. Replacing Cabinets

A DIY kitchen reface can be worth it if you’re looking to save money and want creative control over the design. It’s quicker and less expensive than a full remodel, letting you refresh your space with new cabinet doors and finishes. However, consider the time and skill required for a professional finish, as well as any existing damage. If you’re unsure whether to reface or replace, there’s more to explore about your options.

Understanding Kitchen Refacing

When you consider giving your kitchen a fresh look, understanding kitchen refacing is essential. This process involves replacing the cabinet doors and drawer fronts while keeping the existing frames. It’s a great way to enhance kitchen aesthetics without a full remodel.

Start with a cost analysis to see if it fits your budget. Look into material selection carefully; the right materials can greatly impact durability and appearance.

Also, factor in the time investment—refacing can often be completed in days rather than weeks. Stay updated on design trends, as they can inspire your choices and make your kitchen feel modern.

The Benefits of a DIY Kitchen Reface

Choosing to DIY your kitchen reface not only saves money but also gives you complete control over the design process. You can explore budget friendly options that suit your financial needs while creating a space that reflects your personal style.

With design versatility, you’re free to mix and match colors and finishes that mightn’t be available in pre-made products. Plus, you can utilize time saving techniques to streamline your work, completing the project more efficiently.

By opting for eco friendly materials, you’ll contribute to a sustainable environment.

Finally, engaging in a DIY project offers skill development benefits, enhancing your handyman abilities and boosting your confidence for future home improvements. This journey is as rewarding as the finished kitchen!

The Drawbacks of Refinishing Cabinets

While refinishing cabinets can transform your kitchen, it’s important to contemplate the drawbacks that come with the process.

First, consider the cost considerations; materials, tools, and supplies can add up quickly. You’ll also face a significant time investment, as prepping, painting, and drying can take days or even weeks.

If you’re not confident in your skills, the skill level required for a professional-looking finish might deter you. Additionally, the durability of the finish can be a concern; if not done correctly, it may chip or wear off over time.

Finally, potential complications like dealing with existing damage or uneven surfaces can arise, turning your DIY project into a frustrating experience.

Weigh these factors before diving in.

When to Consider Cabinet Replacement

If your cabinets show signs of severe wear or damage, it might be time to contemplate a full replacement instead of a simple refresh.

Consider your current cabinet style and whether it still fits your kitchen layout; outdated designs can detract from your space.

Budget considerations are essential, as replacement can be more expensive upfront but may offer long-term value.

If your cabinets are made from low-quality materials that don’t hold up, exploring better material options could enhance both durability and aesthetics.

Additionally, if you’re planning a significant kitchen renovation, replacing cabinets can create a cohesive look that ties everything together.

Ultimately, weigh the costs against the benefits to determine if replacement is the right choice for you.

The Advantages of Replacing Cabinets

Replacing cabinets can greatly enhance your kitchen’s functionality and aesthetic appeal.

You’ll enjoy design flexibility, allowing you to tailor your space to your specific tastes and needs. With a variety of material options available, you can choose cabinets that fit both your style and budget.

While cost considerations are important, investing in quality cabinets can lead to significant long-term value. A professional installation process guarantees that your new cabinets are securely fitted, minimizing future maintenance issues.

This means you can focus on enjoying your revamped kitchen rather than worrying about repairs. Ultimately, replacing cabinets can transform your kitchen into a more efficient and beautiful space, making it a worthwhile investment for your home.

The Disadvantages of Full Cabinet Replacement

Though upgrading your kitchen with new cabinets can be enticing, full cabinet replacement comes with several drawbacks that shouldn’t be overlooked.

First, the cost implications can be significant; you may find yourself spending more than you initially planned.

Additionally, the time investment required for removal and installation can disrupt your daily routine for weeks.

There’s also the environmental impact to evaluate, as disposing of old cabinets contributes to landfill waste.

You might encounter design limitations, especially if the new cabinets don’t match your existing kitchen layout or style.

Finally, installation challenges can arise, from ensuring proper alignment to dealing with unexpected structural issues, making the entire process more complicated than you anticipated.

Making the Right Choice for Your Kitchen

When considering a kitchen update, choosing the right approach can greatly impact both functionality and aesthetics.

First, think about your kitchen style. Do you want a modern look, or are you drawn to something more traditional?

Next, evaluate budget considerations; refinishing is often less expensive than a full replacement.

Consider your project timeline as well; DIY options may take longer, but they can save you money.

Assess your skill level—are you comfortable tackling a DIY project, or would you prefer professional help?

Finally, explore material options. High-quality finishes can elevate your kitchen’s appeal without the need for new cabinets.

Weigh these factors carefully to guarantee you make the best decision for your space.

Frequently Asked Questions

How Long Does a DIY Kitchen Reface Typically Take?

A DIY kitchen reface typically takes one to two weekends, depending on your time management and skill assessment. Effective project planning and choosing your finish options can streamline the process, while design inspiration keeps you motivated.

What Tools Are Needed for a DIY Kitchen Reface?

For a DIY kitchen reface, you’ll need sanding tools, adhesive options, paint sprayers, safety equipment, and measuring devices. Gather these essentials to guarantee a smooth and efficient refinishing process for your cabinets.

Can I Reface Cabinets Without Professional Help?

Yes, you can reface cabinets without professional help. Use DIY techniques, explore different cabinet styles, apply refinishing tips, manage your time wisely, and consider cost factors to guarantee a successful project that transforms your kitchen beautifully.

What Materials Are Best for DIY Cabinet Refinishing?

For DIY cabinet refinishing, use high-quality paint types like latex or chalk, choose wood veneers for a fresh look, select suitable primer options, and explore various finish selections and strong adhesive choices to guarantee durability.

Is There a Cost Difference Between Refinishing and Repainting Cabinets?

A quality paint job can cost 30% less than refinishing cabinets, but consider long-term value. The cost comparison hinges on paint quality, labor costs, and material choices, impacting your kitchen’s overall appeal and durability.

Categories
Uncategorized

How to Install Vinyl Plank Flooring

How to Install Vinyl Plank Flooring: Everything You Need to Know Before You Start

To install vinyl plank flooring, start by choosing durable, water-resistant planks that match your decor. Gather tools like a utility knife, measuring tape, and spacers, and prepare the area by clearing furniture and ensuring a clean, level subfloor. Follow a step-by-step installation process, deciding on a floating or glue-down method. Finally, maintain your floors with regular cleaning. For additional tips and common troubleshooting techniques, you’ll find plenty of valuable information ahead.

Choosing the Right Vinyl Plank Flooring

When you’re choosing the right vinyl plank flooring, what should you consider to confirm it meets your needs?

First, think about the vinyl plank benefits, like durability and water resistance, making it ideal for high-traffic areas or spaces prone to moisture.

Next, explore various flooring styles. Whether you prefer the classic look of hardwood or a modern tile design, there’s a vinyl option that fits your aesthetic.

Check the thickness and wear layer, as thicker planks often provide better sound insulation and longevity.

Additionally, consider the installation method—click-lock or glue-down—based on your DIY skills.

Finally, verify the colors and textures complement your existing decor, creating a cohesive look throughout your home.

Essential Tools and Materials for Installation

Selecting the right vinyl plank flooring sets the stage for a successful installation, but having the proper tools and materials on hand is just as important.

Start with a utility knife for cutting planks, a measuring tape for accuracy, and a square for straight cuts. You’ll also need spacers to maintain expansion gaps and a tapping block to fit the planks snugly. A pull bar helps in tight spots, while a rubber mallet guarantees you don’t damage the edges.

For installation techniques, consider using an underlayment for added comfort and sound insulation. Finally, gather adhesive if you’re opting for glue-down installation.

With the right material selection and tools, you’ll streamline the entire process, making your flooring project much easier.

Preparing Your Space for Installation

Before you start installing your vinyl plank flooring, make certain to clear the area of all furniture and obstacles.

Next, check the condition of your subfloor to guarantee it’s clean, dry, and level.

Finally, gather all necessary tools to streamline your installation process.

Clear the Area

To successfully install vinyl plank flooring, you need to clear the area where you’ll be working. Start by removing all furniture, rugs, and other items from the space. This allows you to have ample room to maneuver and guarantees a safe working environment.

Use cleaning tips like vacuuming or sweeping to remove dust and debris from the floor. If there are any adhesive residues or stains, consider using a suitable cleaner to tackle those issues.

After cleaning, think about space organization; place your tools and materials nearby for easy access during installation. This preparation not only streamlines your workflow but also helps prevent accidents, making your vinyl plank flooring project much more efficient.

Check Subfloor Condition

Since the success of your vinyl plank flooring installation hinges on a solid foundation, it’s vital to check the condition of your subfloor before proceeding.

Start by identifying the subfloor types in your space, whether it’s concrete, plywood, or OSB. Each type has specific requirements for installation.

Next, assess the subfloor moisture; a moisture meter can help you determine if levels are acceptable. Ideally, moisture content should be below 5%. If you find excessive moisture, address the source before continuing.

Also, inspect for any damage like cracks or uneven areas. Repairing these issues guarantees a smooth and lasting installation.

Taking the time to evaluate your subfloor now will save you headaches down the line.

Gather Necessary Tools

With your subfloor in good condition, it’s time to gather the necessary tools for your vinyl plank flooring installation.

Start with essential items like a utility knife, measuring tape, straight edge, and a tapping block. You’ll also need spacers, a rubber mallet, and a pull bar to guarantee a tight fit.

Prioritize tool selection based on your specific flooring type and layout. Don’t forget protective gear like knee pads and safety glasses.

Before you begin, check each tool for proper function; tool maintenance can prevent delays and guarantee quality results.

Step-by-Step Installation Process

Now that your space is prepared, it’s time to focus on the step-by-step installation process.

Start by ensuring your subfloor is clean and level, as this will set the foundation for your planks.

After that, you’ll employ specific installation techniques and finish off with trims for a polished look.

Preparing the Subfloor

Preparing your subfloor is an essential step in the vinyl plank flooring installation process. First, identify the subfloor type—whether it’s concrete, plywood, or OSB—as this will dictate your preparation approach.

Verify the surface is clean, dry, and free of debris. For concrete subfloors, check for moisture levels; a moisture barrier may be necessary for control.

For plywood or OSB, repair any damaged sections, and sand down rough areas to create a smooth surface. If your subfloor is uneven, consider using a leveling compound.

Finally, let everything dry thoroughly before proceeding. Proper preparation not only enhances the appearance of your new flooring but also guarantees its longevity and performance.

Take the time to get this right!

Plank Installation Techniques

As you plunge into the installation of your vinyl plank flooring, start by laying out all your materials and tools to streamline the process.

Decide between the two main installation techniques: floating installation or glue down. For floating installation, begin by placing the first plank in the corner, ensuring it’s aligned with the wall. Continue laying planks end to end, using spacers for expansion gaps.

If you opt for the glue down method, apply adhesive evenly to the subfloor, then firmly press each plank into place, ensuring a tight fit.

Regardless of the method, stagger your seams for a natural look. Keep checking your alignment and make adjustments as needed for a professional finish.

Finishing Touches and Trims

Once you’ve successfully laid the planks, the finishing touches and trims are essential for achieving a polished look.

Start with baseboard installation; remove old baseboards if needed and measure new ones to fit snugly against the wall and flooring. Cut them to length, then secure them with finishing nails.

Next, install transition strips where your vinyl plank meets other flooring types. Cut the strips to size and attach them firmly, guaranteeing a smooth shift that prevents tripping hazards.

Make sure all gaps between the flooring and walls or other surfaces are filled for a clean finish.

Finally, inspect your work to verify everything’s aligned, and your new floor looks professional and inviting.

Tips for Maintaining Your Vinyl Plank Flooring

While vinyl plank flooring is known for its durability and low maintenance, keeping it in top shape requires some attention to detail.

Establish regular cleaning routines to prevent dirt and grime buildup. Use a soft broom or vacuum designed for hard surfaces to remove debris, followed by a damp mop with a manufacturer-recommended cleaner. Avoid harsh chemicals, as they can damage the surface.

For damage prevention, place mats at entryways to catch dirt and moisture, and use furniture pads under heavy items to prevent scratches. Additionally, avoid dragging furniture across the floor.

Troubleshooting Common Installation Issues

When you encounter issues during the installation of vinyl plank flooring, addressing them promptly can save you time and frustration.

One common mistake isn’t acclimating the planks to the room temperature, which can lead to expansion or contraction. To avoid this, let the planks sit in the room for at least 48 hours before installation.

If you notice gaps between the planks, check that the subfloor is level; uneven surfaces can cause this issue.

Additionally, if the planks aren’t locking together properly, verify you’re lining them up correctly and tapping them gently with a rubber mallet.

Following these troubleshooting tips can help you resolve problems quickly and achieve a smooth, professional-looking finish.

Categories
Uncategorized

DIY Home Improvements – Easy Weekend Projects For Every Skill Level


Do you have a weekend free and an itch to create something beautiful without committing to a month-long renovation nightmare? We all look for that perfect blend of high-impact change and low-commitment labor. That’s why we’ve compiled a list of Easy Weekend Projects For Every Skill Level, guaranteeing you can see a noticeable transformation in your home by Sunday evening. Whether you’re a complete novice looking to wield a screwdriver for the first time or a seasoned DIYer seeking a quick win, these budget-friendly and time-conscious tasks will boost your home’s aesthetic and functionality without derailing your entire schedule.

You can transform your home without a massive time commitment or extensive experience. With a variety of easy weekend projects designed for every skill level, you’ll find tasks that not only enhance your space but also boost your confidence. Whether you’re a complete novice or a seasoned DIYer, there’s something here for you to tackle. Explore practical improvements that can be completed in a weekend, making your home more functional and aesthetically pleasing.

Assessing Your Skills

Before exploring into DIY projects, it’s vital to evaluate your skill level honestly. Consider your past experiences, comfort with various tools, and familiarity with different materials. This self-assessment will help you choose projects that match your abilities and ensure a more enjoyable and productive weekend. Having a clear understanding of your skills will also aid in avoiding frustration and potential hazards.

Beginner-Friendly Projects

If you’re new to DIY, start small with tasks that require minimal tools and experience. Simple projects like painting a room, assembling furniture, or installing shelves can provide a sense of accomplishment without overwhelming you. These tasks allow you to build confidence while honing your skills.

Intermediate Challenges

Once you’re comfortable with beginner tasks, you can tackle intermediate challenges, such as refinishing furniture, tiling a backsplash, or installing a new faucet. These projects generally require more tools and techniques, including measuring, cutting, and some basic plumbing or electrical knowledge. With these skills, your DIY repertoire expands significantly.

Intermediate projects are perfect for those looking to elevate their DIY game. Refinishing a wood table, for example, revitalizes furniture with minimal cost. Tiling a backsplash not only updates your kitchen but also enhances your design skills. Engaging in these challenges pushes your boundaries, allowing for learning and growth with satisfying results.

Advanced Renovations

For seasoned DIYers, advanced renovations can include significant alterations like remodeling a bathroom or updating outdoor spaces. These projects often involve construction skills, design planning, and a solid understanding of plumbing or electrical systems. They require careful planning and a significant time investment but can dramatically transform your living space.

  1. Kitchen remodels
  2. Bathroom renovations
  3. Outdoor deck builds
  4. Full home painting
  5. Installing new flooring
Project Type Skills Required
Bathroom remodel Plumbing, tiling, electrical
Kitchen upgrade Cabinet installation, countertop fitting
Outdoor renovation Structural design, landscaping

Advanced renovations can significantly impact your home value and require a more detailed approach. Remodeling spaces like kitchens and bathrooms can be complex, involving many facets such as plumbing and electrical work that need careful consideration. Planning and budgeting are key, ensuring that you have all necessary materials and tools ready before starting. This type of project not only enhances your skill set but ultimately brings significant satisfaction and joy to your living environment.

  1. Assess what changes you want to make
  2. Create a budget for materials and tools
  3. Obtain necessary permits if required
  4. Visualize the finished product before starting
  5. Have a timeline for completion
Plan Steps Considerations
Budgeting Material and labor costs
Timeline Realistic completion estimates
Permits Local regulations

Essential Tools for DIY Success

Must-Have Tools

To kick off your DIY journey, equip yourself with a few imperative tools. A cordless drill, for example, opens up a world of possibilities, allowing you to tackle anything from hanging shelves to assembling furniture. A good set of screwdrivers, pliers, and a tape measure are indispensable for any project, while a level ensures everything you build is perfectly straight. For those who are more adventurous, a miter saw can simplify cutting angles for trim work or furniture. Investing in quality tools not only enhances performance but also makes your projects more enjoyable.

Safety Gear

Don’t overlook safety gear when venturing into DIY projects. A pair of safety goggles is imperative for protecting your eyes from dust and debris, especially when sanding or drilling. Ear protection should also be a priority when working with loud tools like saws or drills. Additionally, a sturdy pair of work gloves can safeguard your hands from cuts and blisters, giving you added confidence as you work on your home improvements. Prioritizing safety ensures you can complete your projects without unnecessary risks.

Planning Your Weekend Projects

Planning is key to executing successful DIY home improvements. Begin by identifying which areas of your home need attention and prioritize projects based on urgency and impact. Consider factors like your schedule, budget, and availability of tools and materials. A little forethought can streamline the process and maximize your enjoyment of the weekend work ahead.

Setting Realistic Goals

Assess what you can realistically achieve in a weekend. Break larger projects into smaller, manageable tasks that fit your skill level and time constraints. This approach not only reduces frustration but also allows you to appreciate your progress. Focus on accomplishing a few tasks thoroughly rather than overwhelming yourself with too many projects.

Creating a Timeline

Developing a timeline helps you structure your weekend DIY projects effectively. List each task sequentially, and estimate the time required for each one. For example, if you’re painting a room, allocate time for preparation, painting, and cleanup. A well-defined timeline keeps you organized and provides a roadmap for your weekend, ensuring each segment is approached without rushing.

When creating your timeline, factor in potential challenges such as drying times for paint or unexpected repairs. It’s wise to set aside buffer time to accommodate any disruptions that may arise. Organizing your weekend into specific time blocks can also help you maintain focus and momentum, pushing you closer to completing your goals while enjoying the process.

Popular DIY Projects

Focusing on popular DIY projects can help you choose tasks that not only enhance your home’s appeal but also match your skill level. From refreshing your interiors to sprucing up your outdoor space, these projects can be completed over a weekend and provide satisfying results. Let’s explore some options that offer both ease and impact.

Painting and Wallpapering

Painting and wallpapering are among the quickest ways to transform a room’s ambiance. You can choose a fresh coat of paint or a bold wallpaper pattern to reflect your style. Techniques like using painter’s tape for clean edges and applying multiple coats strategically can yield professional results without the cost.

Landscaping and Gardening

Enhancing your outdoor space through landscaping and gardening can add beauty and value to your property. Simple tasks like planting seasonal flowers, mulching, or creating a small herb garden can significantly improve aesthetics while allowing you to enjoy nature more fully.

When tackling landscaping, start with a plan that considers both design and maintenance. You can create raised beds for easy access and better drainage, or use native plants that require less water and care. Incorporating pathways with stones or mulch can also delineate areas, making your garden feel more organized and visually appealing.

Upcycling Furniture

Upcycling furniture gives old pieces a new life while saving money and reducing waste. Whether it’s refinishing a wooden chair or painting a worn-out dresser, you can often achieve remarkable results with minimal investment. Simple techniques such as distressing or applying new hardware can make a world of difference.

Consider furniture that complements your style for upcycling projects. For instance, transforming a vintage table with chalk paint can modernize its look. Additionally, adding stencils or decoupage techniques can customize the piece to fit your home’s decor. The result is not just a functional item, but a conversation starter that adds character to your space.

Simple Repairs and Maintenance

Simple repairs and maintenance tasks are vital for keeping your home in good condition. Tasks such as fixing leaky faucets, patching drywall, or tightening cabinet handles can be easily managed over a weekend. Completing these projects helps ensure your space remains functional and comfortable.

Regular maintenance activities, such as cleaning gutters or checking for drafts, can prevent more extensive issues down the line. You can tackle these jobs with straightforward materials, like caulk for sealing gaps or vinegar for cleaning. Committing a few hours to these tasks not only improves your home’s performance but also extends the lifespan of your fixtures and finishes.

Safety Tips for DIY Enthusiasts

Protecting Yourself

Prioritize your safety by using the right gear and understanding your tools. Wearing safety glasses protects your eyes from dust and debris, while gloves prevent cuts and abrasions. If you’re working with power tools, make sure to have hearing protection to guard against long-term damage. Understanding the functions of your tools is imperative; always read the manual, especially for unfamiliar devices. If you’re working outdoors, be aware of your surroundings and avoid electrical hazards. The most experienced DIYers still follow these vital safety practices.

  • Use safety goggles to shield your eyes.
  • Wear gloves to prevent injuries.
  • Read user manuals for unfamiliar tools.
  • Ensure your workspace is well-lit and clutter-free.
  • Have a first aid kit on hand for emergencies.

Budgeting for Home Improvements

Understanding Costs

Start by itemizing all potential expenses, including materials, tools, and any hired help. For instance, a simple kitchen backsplash can run from $300 to $1,000 depending on the tile selected. Research local prices online and adjust your budget accordingly. You might find comparable tile options at discount retailers that fit your budget better.

Prioritizing Projects

Identify which projects will provide the best return on investment. Projects like adding energy-efficient windows or landscaping can significantly boost your home’s value. Allocate more funds to these areas while scaling back on less impactful tasks.

Creating a Contingency Fund

Set aside 10-20% of your total budget for unexpected costs that may arise during the renovation process. This might cover additional supplies or repairs that you didn’t anticipate, ensuring your project stays on track financially.

Conclusion

Whether you tackle a fresh coat of paint on a piece of furniture, install floating shelves for extra storage, or upgrade your outdated lighting fixtures, these Easy Weekend Projects For Every Skill Level prove that big results don’t require big time investments. The real joy of these tasks is the quick gratification and the confidence boost they provide for tackling larger projects down the road. Gather your tools, pick one idea, and enjoy the satisfaction of completing a high-impact home improvement project before your Monday morning alarm clock rings!

Presently, DIY home improvements provide an accessible way for you to enhance your living space over the weekend, regardless of your skill level. By selecting projects that align with your abilities and interests, you can achieve satisfying results that elevate both your home’s value and your personal satisfaction. These weekend endeavors not only allow you to express creativity but also improve your confidence in tackling home repairs and upgrades. Embrace the opportunity to transform your home and enjoy the rewards that come with your hard work.

Categories
Uncategorized

How much does it cost to run gas central heating for 1 hour?

With energy prices constantly fluctuating, knowing how much does it cost to run gas central heating for 1 hour has become essential for budgeting homeowners. Unfortunately, there isn’t a single universal number, as the price depends heavily on two key variables: your boiler’s energy efficiency and your home’s heat loss (insulation quality and size). We will break down the simple calculation you can use to estimate the hourly cost, taking into account the output of your boiler and your current gas tariff. Understanding this formula is the first step toward reducing your energy usage and getting control over your heating bills this winter.

You may be curious about the cost of running your gas central heating for just one hour. Understanding this expense can help you manage your energy bills effectively and make informed decisions about your heating usage. In this post, we will break down the various factors that influence the cost, helping you gain a clearer picture of what it means for your budget and comfort on chilly days.

Understanding Gas Central Heating

Gas central heating is a system that utilizes natural gas to heat your home through radiators or underfloor heating. By igniting gas in a boiler, hot water is circulated through pipes, providing warmth to various rooms. This method is often favored for its efficiency and relatively low operating costs compared to other heating systems.

How Gas Central Heating Works

Your gas central heating system operates by channeling natural gas to a boiler, which heats water. The hot water then travels through pipes to radiators or underfloor heating zones, radiating warmth throughout your living space. The system can be controlled via thermostats, allowing you to maintain a comfortable temperature efficiently.

Benefits of Gas Central Heating

Gas central heating offers several advantages, including lower running costs, quick heat delivery, and a reliable power source. With high efficiency rates, you can save on energy bills compared to electric heating systems. The convenience of centralized control through programmable thermostats enhances your comfort, providing warmth exactly when and where you need it.

In addition to cost savings, gas central heating can significantly enhance your living experience. For instance, modern gas boilers attain efficiency ratings above 90%, meaning most of the energy consumed is converted into heat for your home. Plus, with the right maintenance, these systems can last well over a decade, minimizing replacement costs and ensuring continual comfort during colder months.

Cost Factors

Several elements influence the overall cost of running gas central heating for one hour. These factors include the efficiency of your heating system, current gas prices, and any seasonal variations in demand. Understanding these variables will help you make informed decisions about your heating usage and expenses.

  • Efficiency ratings of your boiler
  • Current market prices for natural gas
  • Your home’s insulation quality
  • Climate and weather conditions in your area

Recognizing the interplay of these factors can help you manage your heating costs more effectively.

Gas Prices

Your heating costs are heavily influenced by current gas prices, which can fluctuate due to market conditions and changes in demand. Following gas price trends can help you anticipate and budget for your heating expenses better. You can also check local suppliers or energy providers for the most competitive rates.

Efficiency of the Heating System

The efficiency of your gas central heating system plays a significant role in determining your energy costs. Systems with higher energy efficiency ratings convert a greater percentage of gas into usable heat, resulting in lower expenses. If your system operates at around 90% efficiency, you only waste 10% of your fuel. Upgrading to a more efficient boiler can lead to substantial savings over time.

Older boilers, particularly those over 15 years old, often have efficiency ratings below 80%. Upgrading to a modern condensing boiler can improve this significantly, with many achieving efficiency ratings above 90%. Such improvements mean that for every unit of gas consumed, you get substantially more heat, allowing you to lower your running time or maintain comfort at a lower cost. Proper maintenance, such as regular servicing, also ensures your system runs at peak efficiency, maximizing your investment and further reducing operating costs.

Average Costs

The average cost to run gas central heating for one hour largely depends on several factors, including the efficiency of your boiler, the price of gas in your area, and the size of your home. Typically, you can expect to pay between 8 to 15 pence per kilowatt-hour (kWh) for gas. If your boiler has a heat output of 24 kW, this translates to a cost of about 1.92 to 3.60 pounds per hour.

Cost per Hour of Operation

Your cost per hour of operation will vary based on the boiler’s efficiency and the current gas rates. For example, with an average boiler efficiency of around 85%, you could spend approximately £2 to £3.40 for one hour of heating when gas is priced at around 10 pence per kWh. Tracking your energy bills will help you estimate these costs more accurately.

Regional Variations in Costs

You’ll find significant regional variations in the cost of gas, which directly impacts your heating expenses. Generally, urban areas tend to have higher rates due to increased demand, while rural locations might benefit from lower costs. It’s imperative to check the current gas prices in your area to make an informed calculation of your heating expenses.

In the UK, for instance, gas prices can differ by as much as 20% between various regions, with London often recording the highest costs. Conversely, regions in the North East may enjoy lower prices owing to competitive suppliers and less demand. Checking local utility reports or using online energy price comparison tools can help you pinpoint these differences and identify the most cost-effective options for your heating needs.

Calculating Your Personal Costs

Understanding the costs associated with running gas central heating in your home requires assessing both your specific consumption patterns and local gas prices. By analyzing your usage, you can determine a more accurate estimate tailored to your situation, ensuring you know exactly what to expect on your energy bills.

Estimating Usage

Your heating usage depends on several factors, including the size of your home, insulation quality, and outside temperatures. To estimate your hourly usage, consider how often your heating system runs during colder months and track the hours of operation. This data allows you to calculate the overall cost based on the energy consumed in kilowatt-hours (kWh).

Tools for Calculation

Utilize calculators available online for a straightforward method to determine heating expenses. You can input your gas price, boiler efficiency, and estimated hours of operation to find specific estimates. This approach is particularly helpful for comparing costs with other heating methods.

Various online tools can significantly streamline your cost assessments. Many energy providers offer calculators where you can enter specific parameters, such as the boiler’s energy output and your average usage patterns. For example, if you know your gas costs $0.05 per kWh and your system uses 7 kW, you can easily find your costs for an hour’s operation. This detailed analysis aids in budgeting and managing your heating expenses effectively.

Tips for Reducing Heating Costs

By implementing a few strategic changes, you can effectively lower your heating costs. Start by investing in energy-efficient appliances and consider upgrading insulation in your home to retain heat better. Regularly check your thermostat settings and utilize programmable options to optimize heating times. Seal drafts around windows and doors to prevent heat loss. Additionally, consider using heavy curtains to trap warmth during colder months.

  • Invest in programmable thermostats.
  • Seal drafts around windows and doors.
  • Upgrade insulation.
  • Use heavy curtains or thermal blinds.

Thou can save significantly through these enhancements.

Maintenance Practices

Regular maintenance is vital for cost-effective heating. Schedule an annual inspection of your boiler or furnace to ensure optimal performance, as any inefficiencies can lead to increased energy consumption. Clean or replace filters monthly to promote better airflow and efficiency. Additionally, bleeding radiators can help remove trapped air, improving heat distribution throughout your home.

Energy-Saving Habits

Adopting energy-saving habits can lead to substantial savings on your heating bills. Simple actions such as lowering thermostat settings by just one degree can reduce your heating costs by up to 10%. Layering your clothing and using space heaters selectively in frequently used rooms can also effectively manage your home’s temperature without over-reliance on central heating. Consider limiting the use of exhaust fans and closing off rooms that you rarely use. These habits cumulatively contribute to a significant decrease in energy consumption over time, leading to lower utility bills.

Comparisons with Other Heating Methods

Heating Method Cost Per Hour
Gas Central Heating £0.10 – £0.20
Electric Heating £0.25 – £0.50
Oil Heating £0.15 – £0.30

Electric Heating

With electric heating, your costs can be significantly higher compared to gas. On average, you may spend around £0.25 to £0.50 per hour. While electric heating systems can provide immediate warmth, the overall cost-effectiveness can be less favorable, particularly in large homes or during prolonged cold spells.

Oil Heating

Oil heating generally falls in the range of £0.15 to £0.30 per hour. Though it can be an efficient option in rural areas, oil prices can fluctuate, impacting your budget. If your home lacks access to natural gas, oil heating could provide a viable alternative, offering reliable warmth during winter months.

Furthermore, oil heating systems often require a storage tank, which can affect installation and maintenance costs. Efficiency ratings of modern oil boilers have improved considerably, making them more competitive with gas. Regular servicing is vital to maintain performance, ensuring that your system runs as efficiently as possible while keeping your operating costs under control.

Conclusion

Hence, understanding the cost of running gas central heating for one hour is important for budgeting your energy expenses. On average, you can expect to spend between 10 to 15 pence per hour, depending on your boiler’s efficiency and the current gas prices in your area. By keeping an eye on your usage and optimizing your heating system, you can manage your costs effectively and ensure your home remains comfortable without overspending.

To sum up, estimating how much does it cost to run gas central heating for 1 hour requires knowing your boiler’s maximum output (in $\text{kWh}$), your gas tariff rate, and its efficiency rating. While a small, modern, highly efficient home might cost just pennies per hour, a large, older home with a low-efficiency boiler could easily cost much more. The best ways to reduce this hourly figure are to upgrade to a high-efficiency boiler, improve your home’s insulation, and utilize a smart thermostat to ensure your heating only runs when and where it is truly needed. Start by checking your latest energy bill and boiler manual to perform your personalized calculation today!

Categories
Uncategorized

Should a 20 year old boiler be replaced?

If you’re asking yourself, should a 20 year old boiler be replaced, the answer is almost certainly yes. While a well-maintained boiler can technically last two decades, it is operating at a massive disadvantage compared to modern units. At this age, your system is likely performing at a dismal 60-70% efficiency, meaning a significant portion of your energy costs is literally going straight up the flue. Beyond the mounting costs, older boilers pose increased risks for breakdowns, expensive repairs, and potential safety concerns. Read on for a full breakdown of the financial, environmental, and safety reasons to replace your aging unit now.

Replacing an old boiler can significantly impact your home’s efficiency and safety. If your boiler is 20 years old, you may be facing higher energy bills and a greater risk of breakdowns. As you consider whether to replace your boiler, it’s crucial to evaluate its performance, maintenance history, and any signs of wear. Understanding the advantages of a new system versus the costs associated with keeping an aging unit can guide your decision-making process effectively.

Understanding Boiler Lifespan

Your boiler’s lifespan is a critical factor in deciding whether to replace it. Typically, boilers are designed to last between 10 to 15 years, but with proper maintenance, some can exceed this range. Factors like usage patterns, the quality of installation, and fuel type can significantly influence how long your boiler operates effectively. If yours is approaching the end of its expected lifespan, it’s crucial to assess its condition and performance.

Average Boiler Lifespan

Most residential boilers have an average lifespan of 15 to 30 years, depending on the type. Conventional boilers often reach the 15 to 20-year mark, while modern condensing units can last upwards of 25 years when maintained regularly. If your boiler is nearing this threshold, it may be time to contemplate a replacement.

Factors Affecting Longevity

The longevity of your boiler is influenced by several factors. Regular maintenance, water quality, and usage frequency play significant roles. Additionally, the type of boiler installed and how well it was initially fitted can enhance or hinder its lifespan. Environmental conditions, such as humidity and temperature fluctuations, can also contribute. Knowing all these aspects will help you decide if a replacement is needed.

  • Regular maintenance schedules
  • Water quality and hardness
  • Usage frequency and load
  • Type and model of the boiler
  • Installation quality

Addressing the health of your heating system is vital. Basic upkeep involves annual servicing, which can prevent small issues from evolving into significant failures. If your water quality is poor or if your boiler sees heavy usage, those factors can accelerate wear and tear. Newer models may incorporate advanced technology to enhance durability, providing a more reliable solution. Knowing the impact of these factors on your boiler will ensure you can make informed decisions.

  • Age of the boiler
  • Frequency of repairs
  • Environmental exposure
  • Fuel type used
  • Energy efficiency ratings

Signs Your Boiler Needs Replacement

Recognizing the signs that your boiler requires replacement can save you from expensive repairs and comfort issues. Look for various indicators such as decreased efficiency, frequent breakdowns, and unusual noises. If your boiler shows multiple signs, it may be time to consider investing in a new model.

Decreased Efficiency

If you notice a sudden increase in your energy bills without a corresponding change in usage, your boiler may be losing efficiency. A well-functioning boiler operates at around 90% efficiency, but older models often fall short. Regularly evaluating the cost-effectiveness of your system is vital to avoid wasting money.

Frequent Repairs

Frequent repairs are a significant warning sign that your boiler may need replacing. If you find yourself calling for service multiple times a year, the costs can quickly add up. An older boiler tends to require more annual maintenance, often indicating that the unit is nearing the end of its lifespan.

Frequent repairs not only strain your budget but also disrupt your daily life. Consider the cumulative costs of these repairs compared to investing in a new boiler. For instance, if you spend over 30% of the boiler’s purchase price on repairs annually, it’s a strong signal that replacement is a more cost-effective solution in the long run.

Cost-Benefit Analysis

Analyzing the costs and benefits of replacing your 20-year-old boiler is vital for making an informed decision. Consider not only the immediate expenses associated with a new installation but also the long-term financial impacts. While upfront costs may be significant, a new boiler can lead to considerable savings on energy bills and maintenance over time. Evaluate your current boiler’s performance and repair history against the potential savings from an efficient model, making sure to factor in the comfort and reliability gains that a new unit brings.

Repair Costs vs. Replacement Costs

You may face escalating repair costs with a boiler that’s reached its 20-year milestone. Frequent repairs can add up quickly, often outpacing the cost of a new unit. A professional assessment can provide clarity on whether ongoing repairs are financially viable, or if investing in a modern, reliable system offers better long-term value. Evaluate the frequency and cost of repairs to weigh against the price of a new boiler and its warranties.

Energy Savings from New Boilers

Investing in a new boiler can yield significant energy savings. Modern boilers are designed with advanced technology that enhances their efficiency compared to older models. Many new systems operate at efficiencies of over 90%, while older boilers can slip below 70%. This means that by upgrading, you not only reduce your carbon footprint but also cut down your energy bills substantially.

For example, if your current boiler runs at an efficiency of 65% and you replace it with a new model operating at 95%, you could save around 30% on your heating costs. In practical terms, for a home that typically spends $1,500 annually on heating, this could result in savings of $450 each year. Moreover, consider the escalating energy costs over time; this cumulative savings can pay back your investment in a new boiler within a few years while ensuring optimum comfort and reliability in your home heating system.

Types of Replacement Boilers

When considering a boiler replacement, you have various options tailored to your heating needs.

  • Conventional Boilers
  • High-Efficiency Boilers
  • Combi Boilers
  • System Boilers
  • Electric Boilers

Assume that each type offers unique advantages tailored to different household requirements and energy efficiency goals.

Type Features
Conventional Boilers Traditional design, separate hot water cylinder, and a more complex installation.
High-Efficiency Boilers Utilize advanced technology to maximize gas usage, offering lower energy bills.
Combi Boilers Compact, combining heating and water in one unit, providing hot water on demand.
System Boilers Ideal for larger homes, store hot water for multiple outlets but need a water tank.
Electric Boilers Efficient without emissions, suited for smaller spaces, but higher running costs.

Conventional Boilers

Conventional boilers, historically popular, consist of a boiler unit and a separate hot water cylinder. They provide reliable heating and hot water but require more space for installation and can take longer to deliver hot water to taps. You might find that they are increasingly less energy-efficient compared to modern options, potentially impacting your energy bills.

High-Efficiency Boilers

High-efficiency boilers are designed to maximize energy use while minimizing waste. These units capture heat that would typically escape through the flue, resulting in a significant reduction in fuel consumption. You can save up to 30% on energy bills with a high-efficiency model, making it a financially wise option for homeowners.

High-efficiency boilers often come with an Energy Star rating, indicating their capability to operate at lower energy use while still delivering optimal heating performance. They may have condensing technology that allows water vapor to condense, reclaiming heat that would otherwise be lost. Installing one may qualify you for energy rebates, so it’s worth consulting your local guidelines. Also, consider your home’s size and specific heating needs when selecting the right high-efficiency model for optimal performance.

The Replacement Process

Replacing your boiler involves several steps, from planning to installation. Start by assessing your home’s heating requirements, followed by selecting the appropriate boiler type. Once you decide on equipment, gather quotes and timelines from contractors to compare. Scheduling the installation for a time that minimizes disruption is crucial. Be prepared for any additional work needed, like updating your heating system’s infrastructure, ensuring that everything functions efficiently.

Choosing a Qualified Contractor

Selecting a qualified contractor ensures a smooth replacement process. Look for licensed, insured professionals with experience in your type of boiler. Check customer reviews and ask for references to gauge their reliability. Obtaining multiple estimates allows you to evaluate price differences and included services, helping you make an informed choice.

What to Expect During Installation

During the installation, the contractor will remove the old boiler, install the new unit, and connect it to your heating system. This process may take several hours to a full day, depending on the complexity of your system. You should expect your contractor to keep the work area tidy and communicate the progress at each stage. Final adjustments and system checks will be performed to ensure optimal operation before leaving.

Installation can vary in complexity based on your existing heating infrastructure. If your system requires significant adjustments, this might extend the installation time. Expect your contractor to conduct a detailed inspection to confirm that everything is compatible with the new boiler. You may also receive guidance on any necessary system upgrades or adjustments to optimize energy efficiency, ensuring your new boiler operates effectively and meets your heating demands.

Maintenance Tips for New Boilers

Ensuring longevity and efficiency in your new boiler is crucial. Here are some tips to help you maintain your system:

  • Regularly check the pressure gauge.
  • Bleed radiators to remove trapped air.
  • Keep the boiler area clear of debris.
  • Check for leaks periodically.
  • Monitor the boiler’s performance for any unusual sounds.

Recognizing early signs of trouble can prevent costly repairs and ensure your boiler runs smoothly.

Regular Service Checks

Scheduling regular service checks enhances your boiler’s reliability and efficiency. A qualified technician can identify minor issues before they escalate into significant problems, leading to a more efficient heating system. Regular maintenance typically includes cleaning, safety checks, and adjustments, ensuring everything operates optimally for years.

Importance of Maintenance Contracts

Maintenance contracts provide peace of mind and financial predictability. By entering a contract, you ensure that your boiler receives timely inspections and necessary repairs without unexpected costs. Many contracts also offer priority service and discounts on repairs, making it an economical choice in the long run.

Investing in a maintenance contract not only safeguards your boiler but also enhances its lifespan. Typical plans cover annual servicing and offer tailored options, such as emergency repairs at no extra cost. With various plans available, from basic inspections to comprehensive coverage, you can select one that meets your heating needs and budget. This proactive approach can ultimately save you money on energy bills and unforeseen repair expenses.

To wrap up

Considering all points, if you have a 20-year-old boiler, it’s advisable to consider a replacement. Aging boilers can lead to inefficiencies, escalating energy bills, and increased repair costs. A new boiler can enhance your home’s comfort and effectiveness while also reducing your carbon footprint. Evaluating your current system’s performance, reliability, and energy efficiency against the benefits of a modern unit will guide your decision. Transitioning to a newer model may require an upfront investment, but the long-term savings and improvements in home heating often justify the decision.

In conclusion, the question should a 20 year old boiler be replaced ultimately comes down to long-term cost and peace of mind. While the upfront expense of a new A-rated condensing boiler is significant, the fuel savings—which can be up to 40% annually—will often allow the unit to pay for itself over its lifespan. Furthermore, a new installation provides the benefits of a long warranty, compatibility with smart thermostats, and crucially, modern safety features. Don’t wait for a costly winter breakdown; consult a certified HVAC professional today to evaluate your current system and get quotes for a highly efficient replacement.

Categories
Uncategorized

Which is Better, a Combi or Condensing boiler?


When shopping for a new heating system, homeowners often ask: Combi or Condensing boiler? The simple answer is that you can have both! This is because “Condensing” refers to the boiler’s mandatory, high-efficiency technology, while “Combi” refers to the type of boiler that provides instant hot water. In reality, the most efficient and popular new choice is a condensing combi boiler. We explain the crucial difference between these two terms and help you decide if a Combi boiler—or a System or Regular boiler—is the right fit for your home’s hot water needs.

Efficiency is a key factor in choosing the right boiler for your home, and understanding the differences between a combi and a condensing boiler can greatly impact your energy consumption and heating costs. You need to consider how each type fits your specific heating and hot water needs, as well as the available space in your home. In this post, you’ll learn the benefits and drawbacks of each boiler type, helping you make an informed decision that aligns with your lifestyle and budget.

Understanding Combi Boilers

Definition and Functionality

A combi boiler, short for combination boiler, merges both heating and hot water functions into a single unit. It heats water on demand, meaning there’s no need for a separate hot water tank. This design is particularly beneficial for homes with limited space, providing instant hot water directly from the mains as needed without delay.

Advantages of Combi Boilers

Combi boilers offer several advantages, most notably energy efficiency and space-saving design. They eliminate the need for bulky hot water storage tanks, which saves valuable room in your home. Additionally, their on-demand heating reduces energy waste, leading to potential savings on your energy bills.

With a combi boiler, you benefit from convenience; hot water is available instantly without waiting for a tank to refill or heat up. For instance, if you run multiple showers or taps simultaneously, a high-capacity combi can handle the demand effectively. Their compact size also allows for straightforward installation in smaller properties, making them ideal for urban dwellings or apartments, where space is a premium. Many modern combi models are designed with advanced technology to enhance energy efficiency even further, making them a smart long-term investment for your heating needs.

Understanding Condensing Boilers

Definition and Functionality

A condensing boiler operates by utilizing the heat from exhaust gases that would typically be expelled into the atmosphere. This design enables the boiler to capture and reuse this heat, significantly improving its efficiency. By condensing water vapor back into liquid, these boilers can extract up to 90% of the potential heat from the fuel, making them an energy-efficient choice for heating your home.

Advantages of Condensing Boilers

One of the primary advantages of condensing boilers is their high energy efficiency, which can lead to reduced energy bills. They typically achieve efficiency ratings of over 90%, allowing you to maximize energy use and minimize waste. Additionally, condensing boilers generally produce lower carbon emissions, contributing positively to environmental sustainability.

Moreover, you may find that many modern condensing boilers qualify for government incentives or rebates due to their eco-friendly design. They also operate quietly and can be compact, fitting well in smaller spaces, which is particularly beneficial for urban homes. The longevity of these systems, often lasting 15 years or more with proper maintenance, adds to their appeal, as you may save significantly on repairs and replacements over time.

Key Differences Between Combi and Condensing Boilers

Combi and condensing boilers each offer unique benefits that cater to different needs. A combi boiler provides on-demand hot water and heating in a single unit, making it ideal for smaller spaces. In contrast, condensing boilers are designed to maximize efficiency by reusing exhaust gases, often leading to lower energy bills and reduced carbon footprints. Understanding these differences will help you determine which option best suits your home and lifestyle.

Efficiency and Energy Use

Combi boilers are generally efficient, but condensing boilers excel when it comes to energy use, often achieving efficiencies of over 90%. They recycle heat from flue gases, meaning less energy is wasted. This can lead to significant savings on your heating bills, especially during colder months, making condensing boilers a smart choice for eco-conscious homeowners.

Installation and Space Requirements

When considering installation and space requirements, combi boilers typically require less room, as they do not need separate hot water tanks. You can install them in compact areas, such as kitchens or utility rooms. Condensing boilers, however, may occupy more space due to their design and necessity for a clear flue system. Depending on your home’s layout, this could impact your decision.

Installation involves more than just space; you must also think about the existing infrastructure. Combi boilers are often simpler to install, requiring fewer pipes and connections, which can reduce installation costs and time. Conversely, condensing boilers may need extensive adjustments to the flue system and potentially larger space for components. Consequently, understanding your current setup can greatly influence your choice, ensuring optimal performance with minimal disruption.

Cost Considerations

Initial Costs

The upfront expense of installing a combi boiler can range from £2,000 to £3,500, depending on the model and installation specifics. In contrast, a condensing boiler typically costs between £3,000 and £5,000 due to its more complex installation requirements and efficiency features. Factors such as your home’s size and existing plumbing can influence these figures, so assessing your situation is necessary for making an informed decision.

Long-term Savings

Regarding long-term savings, condensing boilers tend to have a higher efficiency rating, often exceeding 90%, which translates to lower energy bills. This can result in annual savings of £200 to £300 compared to traditional boilers. Over a decade, these savings can accumulate significantly, often offsetting the higher initial price of a condensing unit.

In addition to lower energy bills, consider the maintenance aspects. Condensing boilers are designed to be energy-efficient and require less frequent servicing, which can save you further on maintenance costs. Many users report reduced gas consumption due to the ability of condensing boilers to recover heat from exhaust gases. By tracking your usage, you may find that the improved efficiency and lower operational costs make the investment worthwhile in the long run.

Suitability for Different Homes

When choosing between a combi boiler and a condensing boiler, consider your home’s size and layout. Combi boilers work well in smaller spaces where a compact design is imperative, providing both heating and hot water from one unit. In contrast, condensing boilers suit larger homes with higher heating demands, offering the benefit of modular systems that can be expanded with multiple units without sacrificing efficiency.

Small vs. Large Households

If you live in a small household, a combi boiler could be your best option due to its space-saving design and efficiency in meeting moderate hot water needs. Conversely, large households with multiple bathrooms and high simultaneous hot water usage often require the greater capacity and flexibility of a condensing boiler, ensuring that everyone has access to hot water without delays.

Hot Water Demand Analysis

Your hot water demand is a critical factor in determining the right boiler type. For homes with a consistent need for hot water, such as multiple bathrooms in use at once, a condensing boiler is often necessary to provide sufficient flow rates. In contrast, if your hot water usage is sporadic, a combi boiler may efficiently meet your needs while saving space and costs.

To assess your hot water demand, consider the number of occupants and the frequency of hot water use in your home. For example, a household with two bathrooms may require up to 25-30 liters per minute for adequate performance, which a combi boiler might struggle to deliver during peak times. In this scenario, a condensing boiler can ensure a steady supply, efficiently meeting demand. Additionally, reviewing usage patterns, such as shower times and appliance schedules, can provide valuable insights into the specific needs of your household.

Consumer Preferences and Trends

Consumer preferences are shifting towards energy-efficient solutions, with many homeowners favoring combi boilers for their compact design and instant hot water supply. Current trends indicate a growing preference for systems that integrate smart technology, allowing for remote control and optimization of energy consumption, which leads to cost savings and environmental benefits.

Market Research Insights

Recent surveys reveal that 65% of homeowners prioritize energy efficiency when selecting a boiler, with combi boilers receiving high satisfaction ratings for their space-saving features and reliability. Notably, the condensing boiler market is gaining traction, appealing to those focused on long-term energy savings and reduced carbon footprints.

Customer Feedback and Performance

Feedback highlights that users appreciate the on-demand hot water of combi boilers, which eliminates the need for bulky storage tanks. However, some customers indicate performance issues in larger households during peak demand times, prompting consideration of condensing boilers for better handling of simultaneous heating and hot water requirements.

In analyzing customer reviews, many homeowners report satisfaction with the energy savings they experience after switching to condensing boilers. They highlight improved efficiency, particularly in modernized homes where heating demands are higher. Users often share anecdotes where annual energy bills decreased significantly, reinforcing this technology’s value in reducing overall heating costs without sacrificing performance. As such, both types of boilers have their advocates, underscoring the importance of individual needs when making a choice.

Summing up

From above, it’s clear that choosing between a combi and a condensing boiler depends on your specific heating and hot water needs. If you prioritize space and instant hot water, a combi boiler may suit your lifestyle better. However, if you need a more efficient system that can handle higher demands, particularly for larger households, a condensing boiler offers superior fuel efficiency and performance.

The choice isn’t between Combi or Condensing boiler, but rather selecting a system type (Combi, System, or Regular) that is a modern, high-efficiency Condensing model. If you have limited space and low-to-moderate hot water demand, a Combi is the perfect choice for on-demand heating. However, if you have multiple bathrooms or a large family, a System or Regular boiler with a hot water cylinder might deliver better performance. Always consult a certified Gas Safe or local equivalent engineer to properly size the boiler for your specific property and energy requirements.

Evaluate your home’s hot water usage and heating requirements to determine the best option for you.

Categories
Uncategorized

The 2025 Paint Color Trends That Will Define Your Home’s Interior


A new year and time for a new look, but what will be the 2025 paint color trends to look for?

Most homeowners will find 2025’s palette blends soothing earth tones, bold jewel accents, and sustainable neutrals to shape your rooms; this guide helps you choose durable, light-enhancing colors, pairings, and finishes to elevate flow and resale value while reflecting your lifestyle. You’ll learn which hues suit orientation, lighting, and focal points so your choices are confident and future-proof.

Overview of The 2025 Paint Color Trends

You’ll find 2025 leaning into three dominant directions: warm earth-driven palettes (terracotta, ochre, clay), verdant greens and muted botanicals, plus deep, moody anchors like indigo and warm charcoal. Designers pair tactile finishes—matte and low-sheen eggshell—with sustainable pigments, using 60/40 proportions (neutral field/colored accents) to balance boldness and resale appeal. Expect color to work with texture and light, not compete, so your selections support layered, multifunctional rooms rather than single-statement schemes.

Key Influences Shaping Color Choices

Five forces are steering palettes: biophilic design and indoor greenery, sustainability and low-VOC pigments, nostalgia for midcentury and global artisan hues, tech-driven personalization (AI palette tools), and economic factors that favor timeless, adaptable colors. You’ll notice supply-chain realities nudging pigment availability, while lighting trends—LED warmth ranges and human-centric lighting—change how your chosen shades read across morning, noon and evening.

Predictions from Industry Experts

Top designers forecast wider adoption of adaptive palettes that shift with décor: layered neutrals with two or three accent hues, and a strong move toward olive-to-moss greens paired with clay or rust. Firms like Farrow & Ball and larger manufacturers are already promoting collections that emphasize longevity and cross-room cohesion, so you’ll see curated sets meant to simplify whole-home color planning rather than isolated accent picks.

Practically, experts advise you to sample large swatches (at least 18×24 inches) and observe them in three lighting conditions before committing. In staged projects, using a 70/30 neutral-to-accent ratio and combining a matte field with a low-sheen focal wall improved buyer appeal in several recent urban listings; apply that tactic in your schemes to maintain both trend relevance and long-term versatility.

Popular Color Palettes for 2025

Warm Neutrals

Think greige, warm taupe, sun‑baked clay and soft sand—these are the go‑to neutrals in 2025. Designers report about 60% of recent renovations lean on these tones to create layered warmth. You should pair them with walnut floors, matte‑brass hardware, and textured plaster to add depth without overpowering your furniture or art.

Vibrant Accents

Jewel tones and saturated hues—emerald, teal, mustard and coral—act as focal accents. Apply them to one or two elements (island, trim, or a single wall) following an 80/20 balance so the pops don’t dominate. You can use semi‑gloss on cabinetry for durability while keeping surrounding walls in warm neutrals to maintain cohesion.

You should test a 3×4‑foot swatch at multiple times of day to see how natural light shifts hue. Try painting your kitchen island deep teal while keeping upper cabinets off‑white; use two coats of quality acrylic latex, allowing 4–6 hours between coats. Aim for accents to occupy about 30–40% of a room’s visual weight to add energy without visual chaos.

The Role of Texture in Color Trends

Texture reshapes how your chosen colors read in a room by influencing light behavior and perceived depth; rougher surfaces scatter light and soften saturated hues, while smoother, reflective surfaces intensify them. Use textured finishes like limewash, venetian plaster or woven grasscloth to add dimensionality to neutrals and deepen jewel tones without changing pigment. You can manipulate mood with as little as one accent surface—an entry wall or fireplace—so texture becomes a design tool that amplifies the 2025 palette choices.

Matte vs. Gloss Finishes

Matte (flat) sheens, typically 0–5% gloss, absorb light and hide wall flaws, making them ideal for living rooms and ceilings; you’ll get richer-looking deep colors with a matte finish. Gloss levels such as semi-gloss (40–70%) and high-gloss (70–90%) reflect light, stand up to cleaning, and suit trim, doors, kitchens and bathrooms. When you choose, match sheen to function: pick easy-clean glosses where durability matters and low-gloss surfaces where visual depth and softness matter more.

Incorporating Textured Elements

Introduce texture strategically by limiting heavy treatments to about 20–30% of wall area—an accent wall, wainscot, or band behind shelving—to avoid visual overload. Try Venetian plaster (applied in 2–3 thin layers and burnished) for a polished patina, or grasscloth wallpaper for natural warmth; pair matte charcoal walls with a woven-texture focal wall to enhance contrast. You’ll find texture harmonizes color trends without needing new pigments.

Balance scale and maintenance: larger textures read softer from afar, while tight, small-scale textures add subtle richness up close. Test samples under your lighting—daylight and a 2700K warm LED—to see shifts in hue and shadow. Install glossy trim or beadboard (commonly 36 inches high) against textured walls to bounce light and create crisp edges, and seal porous materials in humid zones to keep colors true over time.

Room-by-Room Color Recommendations

Living Room Inspiration

Lean into balanced palettes: try a muted olive accent wall (#8A9A5B) with warm beige and a 60/30/10 distribution to guide furniture and accessories. South-facing rooms handle cooler greens and blues, while north light benefits from warm terracotta or soft ochre to boost perceived warmth. For a contemporary look, combine a deep charcoal sofa with 2–3 brass accents and matte-wall paint to anchor an open-plan living area under 300–400 lux of ambient light.

Bedroom Color Ideas

Favor calming hues like muted blue-green, warm taupe, or soft clay to promote sleep; aim for wall LRV between 30–55 to balance coziness and light reflection. You can use a darker headboard wall for depth—about 1 wall in 3—paired with lighter ceiling and trim to keep the room airy. Layer in textiles in complementary tones and limit bold accents to one or two pieces for serenity.

Choose eggshell or low-sheen finishes for walls and semi-gloss for trims and doors to withstand cleaning without harsh glare. Combine 2700–3000K warm lighting and dimmers so your paint reads differently at night; studies show warmer kelvin improves sleep onset. If you have a 12×14 master, a single navy feature wall (Hale Navy-style) plus soft gray-beige all around creates a 70/30 calm-to-contrast ratio that still feels spacious.

Sustainable and Eco-Friendly Paint Options

You should favor zero- or very low‑VOC formulations (often under 5 g/L) and paints with plant‑based binders or recycled pigments; certifications like GREENGUARD Gold and Green Seal indicate third‑party testing. Choosing durable, washable finishes reduces repaint frequency and embodied carbon over time, while selecting light‑reflective pigments for sun‑exposed walls can cut cooling loads in warm climates. Look for transparent ingredient lists and performance data when comparing options.

Non-Toxic Paint Brands

You can trust brands such as ECOS Paints, AFM Safecoat, Clare, Sherwin‑Williams Harmony, and Behr Premium Plus for low‑odor, low/zero‑VOC options that carry GREENGUARD or Green Seal endorsements; zero‑VOC typically means under ~5 g/L while low‑VOC is under ~50 g/L. Many municipalities and school districts specify these lines for classrooms and healthcare settings to improve indoor air quality immediately after application.

The Importance of Sustainability in Color Choices

You should evaluate color for its Light Reflectance Value (LRV) on a 0–100 scale—whites often score 80–90, deep hues under 20—and how that affects heating, cooling, and lighting needs: high‑LRV colors increase daylighting and can lower electric lighting use, while strategic darker accents can add passive warmth in cold rooms. Also weigh pigment sourcing and durability to minimize environmental impact over the paint’s lifecycle.

You can extend sustainability by picking high‑performance finishes that last 7–15 years, reducing repaint cycles and waste; check manufacturer lifecycle data and ask for recycled‑content pigments or low‑energy production claims. Test sample swatches under your actual lighting to confirm LRV effects, and prioritize certified products (GREENGUARD Gold, Green Seal) combined with proper surface prep to maximize longevity and indoor air quality.

Tips for Choosing the Right Color for Your Space

You should prioritize room function and natural light when selecting color; use 2–3 sample swatches and note how they read at 7am, noon, and 8pm. Consider scale—darker colors shrink a 10×12 room visually, while pale warm tones open it. Test against fixed elements like floors and cabinetry. Use the checklist below to compare options. After you track shifts across the day and alongside furniture, choose the shade that consistently supports your intended mood.

  • You should test 2–3 shades per room and pick one dominant plus one accent;
  • You should paint sample squares 12×12″ or 24×24″ in at least three locations;
  • You should compare swatches against floors, cabinets, and textiles under both daylight and artificial light;
  • You should limit open-plan palettes to three colors to maintain flow across 500–1,200 sq ft living areas.

Undertones and Lighting Considerations

You should identify warm or cool undertones by comparing swatches to pure white and a neutral gray; test three samples on different walls because east-facing rooms get bluer morning light, while west-facing rooms have warmer late-afternoon light. Note manufacturer codes (e.g., Benjamin Moore 2140–60) to match undertones, and observe each sample for 48–72 hours to see subtle shifts before finalizing.

Testing Colors Before Committing

You should paint 12×12″ or 24×24″ sample squares in multiple spots—at least three—then view them at 6am, 12pm, and 6pm to note shifts; lighting changes can move a hue from neutral to greenish or mauve. Bring large swatches near sofas and countertops to check compatibility with finishes and textiles.

You should apply samples using two coats and a primer-backed test card to match final sheen; note changes under LED vs incandescent bulbs and with curtains open or closed. Record observations—date, time, and bulb type—and photograph samples at each interval; you should live with samples for 7–10 days to capture weekend and weekday lighting variations before ordering gallons.

Summing up

From above, the 2025 paint color trends — warm earthy neutrals, expressive moody hues, versatile pastels and sustainable pigments — give you a clear palette to shape mood, light and function across your rooms. Use contrast, texture and curated accents to personalize each space, balancing timeless foundations with bold focal walls so your home feels both contemporary and enduring.

Categories
Uncategorized

Are Home Improvements a Write off


It’s the first question every savvy homeowner asks before starting a big project: are home improvements a write off or not? The short answer for the average personal residence is often “no,” but the full story is far more valuable. While you generally can’t deduct the cost of a new roof or remodeled kitchen in the year you pay for it, strategic upgrades like energy-efficient improvements and medical modifications do qualify for significant tax benefits. Read on to clarify the crucial difference between an immediate deduction, a long-term capital improvement, and a direct tax credit

Home improvements can significantly enhance the value of your property, but you may wonder whether these expenses are tax-deductible. Understanding which improvements qualify as write-offs can help you maximize your tax benefits. You need to differentiate between personal and investment-related improvements to navigate the complexities of tax deductions appropriately. This post will guide you through the specifics of claiming home improvements on your taxes, ensuring you make informed financial decisions.

Understanding Home Improvements

Home improvements encompass enhancements that increase your property’s value or extend its lifespan. These modifications can range from major renovations, like a kitchen remodel, to smaller updates, such as energy-efficient windows. Effective home improvements not only uplift your living space but may also create potential tax benefits when selling your home.

Definition of Home Improvements

Home improvements refer to structural alterations or renovations that enhance the functionality, aesthetics, or efficiency of a property. These projects can include adding a new room, renovating a bathroom, or upgrading your HVAC system. Unlike simple maintenance tasks, improvements significantly upgrade your home’s overall value.

Difference Between Improvements and Repairs

Improvements and repairs serve different purposes in home maintenance. While improvements aim to enhance your home’s quality or functionality, repairs focus on fixing existing issues or wear and tear. Understanding this distinction is vital when considering tax implications, as improvements can often have more favorable write-off potential than routine repairs.

Improvements increase your property’s value or usefulness, while repairs simply restore it to its previous condition. For instance, installing a new roof is an improvement as it prolongs your home’s life and enhances its market value. In contrast, patching a leak is a repair aimed at maintaining the current state without adding value. This differentiation is crucial when calculating deductions or determining long-term benefits for your property. Thus, keeping clear records of both types of expenses is prudent for future tax considerations or resale value enhancement.

Tax Deductions and Write-Offs

Understanding the nuances of tax deductions and write-offs for home improvements is vital for maximizing your tax benefits. Certain renovations that enhance living conditions or home value can potentially qualify for deductions. It’s important to keep thorough records and receipts of all home-related expenses to substantiate these claims during tax season.

Types of Tax Deductions for Homeowners

As a homeowner, you may be eligible for various tax deductions that can ease financial burdens. These typically include:

  • Mortgage interest payments
  • Property tax payments
  • Points paid on a loan
  • Home office expenses
  • Energy-efficient home improvements

After exploring these options, evaluate which apply to your situation for optimal tax savings.

Type of Deduction Eligibility Criteria
Mortgage Interest Must be on a primary residence
Property Taxes Paid for a primary or secondary residence
Points Paid For purchase or refinancing of a mortgage
Home Office Designated office space in your home
Energy Improvements Improvements that meet IRS energy standards

Eligibility Criteria for Write-Offs

Eligibility for write-offs often hinges on the nature and purpose of the home improvement. Generally, improvements that add value to your home, prolong its life, or adapt it for new uses qualify. If you are making repairs rather than improvements, you might be more limited in what you can deduct.

For example, a new roof or upgraded plumbing can potentially qualify as write-offs, while routine maintenance like repainting might not. Factors like whether the renovation is for personal use or a rental property also influence eligibility. Additionally, you should consider local tax laws, as they can vary significantly with respect to homeowner deductions.

Home Office Deductions

When you operate a business from your home, certain home improvement expenses may qualify for deductions. This can significantly reduce your taxable income, making your home office an asset rather than a liability. Whether you’re upgrading your workspace or making necessary repairs, identifying which costs are deductible is necessary for maximizing your tax benefits.

Requirements for Deducting Home Office Improvements

To qualify for home office deductions, your space must be used regularly and exclusively for business purposes. This means the area designated as your office cannot serve dual functions, such as a guest bedroom. Additionally, the size of your designated office space relative to your home’s total size influences the deduction amount, as only the relevant portion is considered for tax purposes.

Calculating the Deduction Amount

Your home office deduction is typically calculated based on the percentage of your home that your office occupies. For example, if your home is 1,000 square feet and your office is 200 square feet, you’ll claim 20% of allowable expenses. This includes improvements that enhance your office space, such as renovations or new furniture specifically for that area.

When calculating your deduction amount, you’ll need to segregate expenses into direct and indirect categories. Direct expenses, like a new desk, are 100% deductible, while indirect costs, such as utility bills or mortgage interest, should be prorated based on the office’s square footage. Keep detailed records of all expenses and their business purpose to substantiate your claims and maximize your deductions effectively.

Selling Your Home: Capital Gains and Improvements

When you sell your home, certain improvements can significantly impact your capital gains tax. The Internal Revenue Service (IRS) allows you to adjust your home’s basis—what you originally paid—by adding the cost of eligible improvements. This can reduce the capital gains tax owed on the profit you make from the sale, making it necessary to understand how these improvements factor into your taxable income.

How Improvements Affect Capital Gains Tax

Improvements that enhance the value of your home or prolong its useful life can increase your adjusted basis, ultimately lowering your capital gains. For instance, adding a new roof or remodeling a kitchen likely adds significant value and can help mitigate your taxable gains when you sell your property. In contrast, regular maintenance expenses do not qualify for this basis adjustment.

Documenting Improvements for Tax Purposes

Accurate documentation of your home improvements is vital for tax purposes. Keep records of expenditures, including invoices, contracts, and payment receipts. These documents provide proof of your investment in the property, ensuring that you can substantiate your claims during tax filing and if audited by the IRS.

Enhancing your documentation can involve categorizing expenses by project, retaining before-and-after photos, and maintaining a detailed log of work completed. This organized approach not only allows for easier calculations when determining capital gains but also strengthens your case for qualifying improvements should you need to provide evidence of your claims to tax authorities. By being diligent with documentation, you create a solid foundation for maximizing your tax benefits when selling your home.

Common Myths About Home Improvements and Tax Deductions

Misconceptions Homeowners Have

Many homeowners mistakenly believe that all home improvement expenses automatically qualify as tax deductions. There’s a common perception that simply renovating your kitchen or adding a deck will reduce your tax burden, but this is not always the case. You may find that only certain improvements related to a home office or energy efficiency upgrades can lead to tax benefits.

Clarifying the Reality

While it’s true that certain home improvements can offer tax benefits, not all renovations will qualify for deductions. Investments intended to increase the value of your home, like a new roof or landscaping, generally don’t qualify unless you meet specific conditions. Conversely, expenses for a dedicated home office or energy-efficient upgrades can lead to significant savings on your tax return.

For example, if you use part of your home exclusively for business, renovations in that area may be deductible. Additionally, investing in energy-efficient technologies or materials can sometimes yield tax credits, providing direct financial benefits that are often overlooked. Familiarizing yourself with IRS guidelines and keeping thorough records can help clarify what qualifies, ensuring you maximize your potential write-offs while avoiding pitfalls of common misconceptions.

Practical Tips for Maximizing Write-Offs

To maximize your write-offs on home improvements, it’s vital to stay organized and informed. Consider these strategies:

  • Document all expenses associated with improvements.
  • Categorize upgrades based on potential tax benefits.
  • Keep up with tax law changes that may affect deductions.
  • Consult professionals when in doubt about eligibility.

Thou shalt not overlook the importance of thorough planning and execution when seeking write-offs.

Keeping Records and Receipts

Accurate record-keeping is vital for justifying your deductions. Retain receipts, invoices, and contracts for every improvement you make. Organizing these documents chronologically or by room will streamline the tax preparation process. When tax time arrives, having a clear record helps substantiate your claims and minimizes the risk of errors or audits.

Consulting with Tax Professionals

Enlisting the expertise of tax professionals can provide tailored advice specific to your situation. These experts stay updated on ever-changing tax laws and can identify deductions you might overlook. During consultations, you can discuss your home’s unique improvements and determine which may yield the most substantial tax benefits. Investing in professional guidance often pays off through maximized write-offs.

Effective collaboration with tax professionals not only clarifies the complexities of write-offs but also ensures compliance with IRS regulations. They can help you assess your property’s depreciation, energy-efficient upgrades, and specific improvements that qualify for tax credits. By leveraging their knowledge, you can enhance your strategy for home improvement deductions and safeguard against potential pitfalls.

Summing up

To wrap up, understanding whether home improvements can be a write-off is vital for maximizing your tax benefits. Generally, if your upgrades enhance your home’s value or are made for rental properties, they may be deductible. To ensure you’re taking full advantage of these potential write-offs, keep detailed records of your expenses and consult a tax professional for personalized advice related to your specific situation. This proactive approach can help you effectively manage your finances while potentially reducing your taxable income.

To summarize the central question, are home improvements a write off: routine repairs are not deductible, but capital improvements increase your home’s tax basis, which reduces your tax liability when you sell the home for a profit. Furthermore, don’t overlook immediate tax relief available for specific projects, such as the Energy Efficient Home Improvement Credit or medically necessary modifications. The key takeaway is documentation: keep every receipt and invoice for every upgrade you make. Before filing, consult with a qualified tax professional to ensure you correctly leverage every credit or deduction your home improvements qualify for.

Categories
Uncategorized

10 Finished Basement Ideas on a Budget

10 Finished Basement Ideas on a Budget: Transforming Your Space for Under $1,000

Transform your finished basement into a functional haven for under $1,000 with these budget-friendly ideas. Create a cozy family room with comfortable seating and ambient lighting. Set up a productive home office with natural light and light colors. Design a fun entertainment area complete with a large sectional sofa and a budget projector. Consider adding a craft space, a home gym, or a game room. Get creative with storage solutions, and you’ll find plenty of inspiration ahead.

Create a Cozy Family Room

When you’re creating a cozy family room in your basement, comfortable seating is key.

Think about adding a plush sofa or some inviting armchairs that make everyone want to gather.

With the right seating, you’ll transform your space into the perfect spot for relaxation and family bonding.

Comfortable Seating Options

Creating a cozy family room in your finished basement starts with the right seating options. Look for a comfortable sofa that fits your style and budget; a sectional can provide ample space for everyone.

Add a couple of oversized chairs or bean bags for a relaxed vibe. Don’t forget about multifunctional furniture, like ottomans with storage, which can save space and keep things tidy.

If you’re on a tight budget, consider thrift stores or online marketplaces for gently used pieces. Layer soft throw blankets and plush cushions to enhance comfort.

Finally, arrange your seating to promote conversation and connection, making your basement the perfect spot for family movie nights or game days.

Design a Productive Home Office

To create a productive home office in your finished basement, start by maximizing natural light.

Position your desk near windows or use light-colored decor to brighten the space. This not only boosts your mood but also enhances focus and creativity while you work.

Maximize Natural Light

How can you turn your finished basement into a bright and inviting home office? Start by choosing a light color palette for the walls and furniture. This not only reflects light but also creates an airy feel.

If possible, install larger windows or opt for glass-block windows to let in more natural light. Incorporate mirrors strategically to bounce light around the room.

Consider adding skylights if your basement allows for it. If you can’t change the windows, use light-filtering curtains that provide privacy while letting sunlight in.

Finally, enhance the lighting with LED bulbs that mimic daylight. By maximizing natural light, you’ll create a workspace that feels open, energizing, and conducive to productivity.

Set Up a Fun Entertainment Area

Transforming your finished basement into a fun entertainment area can be both exciting and budget-friendly.

Start by choosing a theme, whether it’s a cozy movie nook or a vibrant game room. A large, comfy sectional sofa can be a great investment, while accent pillows add personality without breaking the bank.

Consider a budget-friendly projector for movie nights or a flat-screen TV for gaming. Use wall-mounted shelves to display games, movies, or books, keeping the space organized.

Add ambient lighting with string lights or floor lamps to create a welcoming atmosphere.

Don’t forget a small fridge stocked with your favorite snacks and beverages for easy access.

With a little creativity, you’ll have a fantastic entertainment area everyone will love!

Build a Craft or Hobby Space

If you’re looking to release your creativity, building a craft or hobby space in your finished basement can be a rewarding project.

Start by designating a specific area, ensuring it has ample lighting and ventilation. Use affordable materials like plywood for tables and pegboards for organizing supplies.

Consider repurposing furniture, such as an old desk or shelving units, to save money. Stock up on storage bins to keep your materials tidy and accessible.

Personalize the space with inspiring decor or a bulletin board for ideas. Whether you’re painting, knitting, or working on DIY projects, having a dedicated area will help you focus and enjoy your hobbies.

With a little creativity and planning, your craft corner can thrive without breaking the bank.

Establish a Home Gym

Creating a home gym in your finished basement can be a smart way to stay fit without breaking the bank.

Start by identifying essential equipment that fits your space and workout style.

With a little planning, you can set up an effective gym that encourages you to stay active.

Essential Equipment Checklist

Establishing a home gym in your finished basement can be a game-changer for your fitness routine, and having the right equipment is essential.

Start with a set of dumbbells or adjustable weights; they’re versatile and take up minimal space. A sturdy exercise mat is vital for floor workouts, stretching, or yoga.

Consider a resistance band set for strength training and flexibility exercises. If cardio is your focus, a jump rope or an affordable stationary bike can do wonders.

Finally, don’t forget a foam roller for recovery. With these essentials, you’ll create a functional gym without breaking the bank, allowing you to stay committed to your fitness goals right at home.

Develop a Kids’ Playroom

While you might think a kids’ playroom requires a hefty budget, transforming your finished basement into a vibrant space for play can be both affordable and rewarding.

Start by clearing out any clutter and painting the walls in bright, cheerful colors. Use inexpensive area rugs to define play zones and add comfort.

Consider repurposing old furniture, like bookshelves for toy storage or a small table for crafts. Invest in some cushions or bean bags for seating; they’re cozy and budget-friendly.

You can also create a chalkboard wall with chalkboard paint for endless creativity.

Don’t forget to involve your kids in the design process—they’ll love seeing their ideas come to life, making the space even more special for them.

Create a Guest Bedroom

How can you turn your finished basement into a cozy guest bedroom without breaking the bank? Start by selecting a warm color palette for the walls; soft neutrals create an inviting atmosphere.

Consider investing in a comfortable bed, like a budget-friendly futon or a quality air mattress. Add cozy bedding to enhance comfort.

Next, incorporate functional furniture like nightstands and a small dresser from thrift stores or online marketplaces.

Don’t forget lighting! Use a mix of ambient and task lighting to create a warm glow.

Personal touches, like artwork or plants, can make the space feel homey.

Finally, guarantee your guests have privacy with simple room dividers if needed. Your basement can become a charming retreat with just a few thoughtful updates!

Install a Wet Bar or Mini Kitchen

Creating a cozy guest bedroom sets the stage for entertaining, but enhancing your finished basement with a wet bar or mini kitchen takes it to the next level.

You don’t need to break the bank to achieve this upgrade. Start by selecting a compact bar cart or a small cabinet to hold your drinks and glassware. Add a mini fridge to keep beverages chilled.

Consider installing a simple countertop for extra prep space. You could even incorporate a wine rack or shelving for easy access to your favorite drinks.

For a touch of style, add some bar stools and ambient lighting. With a few budget-friendly choices, you’ll create an inviting spot where friends and family can gather and enjoy their time together.

Add a Game Room

Adding a game room to your finished basement transforms the space into a fun retreat for family and friends. You don’t need to break the bank to create an inviting atmosphere.

Start by choosing a few key games—perhaps a pool table, a foosball table, or a dartboard. If space is tight, opt for multi-game tables or classic board games that encourage interaction.

Consider comfortable seating like bean bags or a small sectional to keep everyone cozy. Add some vibrant wall art or posters to set the mood.

Lighting can make a huge difference, so include some fun string lights or a stylish lamp. With a little creativity and effort, you’ll have a game room that everyone will love!

Transform Into a Media Room

If you want to enjoy movie nights or binge-watch your favorite shows without leaving home, transforming your finished basement into a media room is the perfect solution.

Start by investing in a quality projector or a large-screen TV, which can be found for budget-friendly prices. Arrange comfortable seating, like a sectional sofa or bean bags, to create a cozy atmosphere.

Don’t forget good lighting; consider dimmable LED lights or blackout curtains to enhance the viewing experience. For sound, a budget-friendly soundbar can greatly improve audio quality.

Finally, add personal touches like movie posters or themed decor to make the space truly yours. With a little creativity, you can create a fantastic media room without breaking the bank!

Use Creative Storage Solutions

Since finished basements often face storage challenges, using creative storage solutions can maximize your space while keeping it organized.

Start by incorporating multifunctional furniture, like ottomans or benches with hidden compartments. Wall-mounted shelves can also free up floor space and display your favorite items.

Consider using clear bins for easy visibility and labeling, which helps you find things quickly. Pegboards are fantastic for tools and smaller items, keeping them accessible yet tidy.

If you have underutilized corners, install corner shelves or a tall bookcase to take advantage of vertical space.

Finally, don’t forget about utilizing the area under stairs for additional storage, whether it’s a small closet or custom shelving.

Get creative, and you’ll make the most of your basement!