
Energy costs play a significant role in your home’s heating expenses, making it crucial to choose an efficient central heating system. You may be wondering which options are the most cost-effective for your needs. In this post, we will explore various central heating systems, their operational costs, and factors that affect your overall expenses, helping you make an informed decision to keep your home warm without overspending.
Understanding Central Heating Systems
Central heating systems are necessary for maintaining warmth and comfort in your home during colder months. They function by distributing heat from a central source throughout your living space, often using water or air as the heating medium. Various systems are designed to meet different needs, energy sources, and efficiency levels, which can significantly impact your heating costs.
Types of Central Heating Systems
Several types of central heating systems are available, each catering to different home layouts and preferences. These include:
- Gas Boilers
- Electric Boilers
- Oil Boilers
- Heat Pumps
- Wood or Pellet Stoves
This variety allows you to choose a system that best suits your home and budget.
| Type of System | Typical Efficiency (%) |
| Gas Boiler | 90-98 |
| Electric Boiler | 95-100 |
| Oil Boiler | 85-95 |
| Heat Pump | 300-400 |
Efficiency Ratings and Costs
When selecting a central heating system, understanding efficiency ratings is crucial since these ratings directly affect your operating costs. Systems with higher efficiency ratings convert more energy into heat, which reduces energy bills in the long run. The initial installation costs may vary, but the savings on utility bills often justify the investment in a more efficient system.
For instance, a heat pump may have a higher upfront cost than a traditional gas boiler, but its efficiency can potentially save you hundreds annually on energy costs. On the other hand, oil boilers, while less efficient, are sometimes preferred in areas without gas supply. Your choice ultimately hinges on balancing initial costs with long-term savings and efficiency preferences.
Factors Affecting Heating Costs
Your heating expenses are influenced by several factors that determine how efficiently your system operates. Key elements include the type of heating system, insulation quality, thermostat settings, and the size of your home.
- Type of central heating system
- Insulation quality
- Thermostat settings
- Size of your home
Perceiving these influences can help you optimize your heating costs.
Energy Prices
Energy prices fluctuate based on market conditions, policies, and demand. Spotting trends in natural gas, electricity, or oil prices allows you to make informed decisions about the most economical heating system to use in your home. For example, opting for a gas furnace may be cheaper in some areas than electric heaters.
Local Climate
Your local climate significantly impacts heating costs. Homes in colder regions typically require more robust heating systems, leading to higher energy consumption. For instance, a well-insulated home in a milder climate might benefit from a heat pump, while those in frigid areas may rely on gas boilers for greater efficiency.
In regions with extreme winters, the demands on your heating system are amplified, causing increased energy usage. Understanding the average temperature ranges and seasonal variations can help you select a heating system that best suits your environment. Such systems may include options like biomass boilers or geothermal heat pumps, which can offer cost-effective solutions in colder climates.
The Cheapest Options for Central Heating
When considering central heating, some systems stand out for their affordability both in initial setup and ongoing running costs. Each option presents distinct advantages. Evaluating electric, gas, and renewable energy systems can help you make an informed decision tailored to your needs and budget.
Electric Heating Systems
Electric heating systems, like electric radiators and underfloor heating, offer low installation costs and are easy to maintain. They convert electricity directly into heat, providing immediate warmth. While electricity prices can fluctuate, off-peak tariffs may help you save on running costs, especially if you schedule usage during quieter periods.
Gas Heating Systems
Gas heating systems are often considered one of the most cost-effective heating methods for homes. They typically have lower fuel costs than electricity, resulting in savings on your energy bills. Additionally, modern gas boilers are highly efficient, converting over 90% of energy into heat, which can significantly reduce your overall heating expenses.
In areas where natural gas is available, you can benefit from lower rates compared to electric heating. Gas systems also provide rapid heating and are generally more environmentally friendly than electric systems, especially when combined with renewable gas sources. Choosing a high-efficiency condensing boiler can further optimize energy usage, ensuring you get the most for your money.
Renewable Energy Solutions
Investing in renewable energy solutions, like heat pumps and solar heating, can dramatically lower your heating costs over time. While the initial investment might be higher, government incentives and savings on energy bills can make these options economically viable, especially in energy-conscious households.
Heat pumps utilize renewable energy from the air or ground to generate heat, offering copious savings over traditional systems. For instance, a ground-source heat pump can produce three to four times more energy in heat than it consumes in electricity. Solar thermal systems can further reduce your reliance on fossil fuels, allowing you to harness the sun’s power to heat your home efficiently and sustainably. Embracing these technologies not only cuts costs but also promotes a greener lifestyle.
Comparison of Central Heating Systems
| Heating System | Annual Running Cost (£) |
|---|---|
| Gas Boiler | 600-800 |
| Electric Heating | 1,200-1,800 |
| Oil Heating | 800-1,200 |
| Heat Pumps | 500-1,000 |
| Wood Pellets | 700-900 |
Cost Analysis
When evaluating the cost of central heating systems, it’s crucial to look beyond the initial installation price. While gas boilers might have a lower setup cost, their operational costs can add up significantly depending on gas prices. On the other hand, heat pumps, despite higher upfront costs, generally offer lower running expenses, possibly saving you more in the long run.
Long-term Savings
Long-term savings are a vital consideration in your heating system choice, as they impact your overall financial strategy. Although some systems have higher initial costs, lower running costs, and maintenance fees often mean significant savings over time. Investing in energy-efficient systems can reduce your energy bills and possibly qualify you for government grants or rebates, making a substantial difference to your finances.
For instance, a household with a heat pump may spend approximately 40% less annually compared to traditional gas heating. Additionally, maintaining modern systems is typically less frequent and cheaper, meaning lower maintenance expenses throughout their lifespan. Thus, choosing the right central heating system not only helps in immediate costs but also accumulates considerable savings as years go by.
Maintenance and Running Costs
To ensure your central heating system remains cost-effective over time, understanding its maintenance and running costs is vital. Regular maintenance can significantly extend the lifespan of your unit, prevent breakdowns, and improve efficiency, reducing your overall energy expenses. Investing time and resources into keeping your system in top condition means you will enjoy low running costs and reliable performance.
Regular Maintenance
Routine maintenance, such as yearly inspections and cleaning, helps you identify and address issues before they escalate. Simple tasks like bleeding radiators, checking for leaks, and replacing filters can enhance performance. Scheduling a professional servicing annually can lead to significant savings on potential repairs and energy bills down the line.
Impact on Efficiency
The efficiency of your heating system directly affects your energy costs. A well-maintained system operates closer to its optimal capacity, ensuring you use less fuel. Conversely, neglecting maintenance can lead to decreased performance, making your heating system work harder and driving up your energy bills.
A study by the Energy Saving Trust indicates that a poorly maintained boiler can lose up to 30% of its efficiency, resulting in hundreds of dollars in unnecessary costs annually. By prioritizing maintenance, you optimize your heating system’s efficiency, ultimately reducing energy consumption and monthly expenses. Regular servicing not only aids in maintaining efficiency but also helps identify any potential upgrades that could further reduce operational costs.
Regional Considerations
When evaluating heating systems, regional factors significantly impact your overall costs. Variations in climate, fuel availability, and local energy prices can greatly affect efficiency and running expenses. For example, in areas where natural gas is abundant, a gas boiler may emerge as the most affordable option. Conversely, regions heavily reliant on electricity might find electric heating systems more feasible. Understanding your local context enables you to tailor your choices to suit both climate conditions and cost-effectiveness.
Urban vs. Rural Heating Costs
Your heating expenses can differ markedly between urban and rural settings. In urban areas, you may benefit from advanced heating technologies and possibly lower labor costs for installation and maintenance. However, rural locations might have limited options, often leading you to rely on more expensive alternatives. Additionally, transport costs for fuel deliveries can affect overall expenses significantly, making location a vital factor in determining your heating setup.
Incentives and Rebates
Financial incentives and rebates for specific heating systems can significantly lower your initial investment and long-term running costs. Many governments and local authorities offer programs to encourage energy-efficient technologies like heat pumps or solar heating, with rebates often covering a percentage of installation expenses. Accessing these incentives can result in substantial savings, making it vital to research available options.
For instance, in the UK, the Renewable Heat Incentive (RHI) allows homeowners to receive payments for generating heat from renewable sources. By utilizing such programs, you might recoup installation costs over time while also reducing your carbon footprint. Additionally, energy efficiency grants often offer financial help for updating insulation and technology, enhancing your heating system’s performance and further lowering your bills. Be proactive about exploring these opportunities to maximize savings and minimize running costs.
Summing up
Taking this into account, the cheapest central heating system for you to run will typically be a gas or biomass boiler, as they offer lower fuel costs and higher efficiency ratings compared to electric alternatives. Additionally, consider investing in smart thermostats and proper insulation to enhance energy savings. By choosing the right heating system and implementing energy-efficient practices, you can significantly reduce your heating bills while ensuring a comfortable living environment.
There’s a variety of central heating systems available, each designed to meet your specific needs and preferences. Understanding the different types can help you make informed decisions for maintaining comfort in your home. From traditional boilers to modern heat pumps, knowing the options allows you to choose the most efficient and reliable system for your space. In this post, we’ll explore the four primary types of central heating systems and their unique benefits.
Overview of Central Heating Systems
Central heating systems are important for maintaining a comfortable indoor environment during colder months. They provide consistent warmth by distributing heat from a central source across various spaces in your home. Understanding the different types of systems available—each with unique benefits—allows you to make informed choices for improved energy efficiency and cost savings.
Definition and Purpose
A central heating system consists of a network designed to heat multiple rooms from a single heat source. Its primary purpose is to ensure your living space remains warm and comfortable, regardless of the outdoor temperature. Through efficient heat distribution, these systems can enhance your home’s livability and overall energy performance.
Importance of Choosing the Right System
Choosing the right central heating system impacts your comfort, energy bills, and environmental footprint. Each type offers unique advantages regarding installation, efficiency, and operational costs. By evaluating your home’s specific needs, such as size, insulation, and budget, you can select a system that optimizes heating while minimizing expenses.
Different heating systems vary significantly in their installation costs, maintenance needs, and energy sources—gas, electric, or renewable options. For instance, a gas boiler may offer lower running costs compared to electric systems but can come with higher initial installation fees. In contrast, investing in a heat pump may reduce energy use over time, depending on your local climate. Evaluating these factors can lead you to a system that not only fulfills your heating needs but also respects your financial and environmental goals.
Types of Central Heating Systems
Understanding various central heating systems can help you make an informed decision for your home. The following systems cater to different heating needs and preferences:
- Boilers
- Furnaces
- Heat Pumps
- Radiant Heating
The range of options ensures that you find a suitable system for your specific requirements.
| Boilers | Utilize water to generate heat and circulate it through pipes. |
| Furnaces | Heats air and distributes it through ducts. |
| Heat Pumps | Transfers heat between the indoors and outdoors. |
| Radiant Heating | Uses heated surfaces to warm the air in a room. |
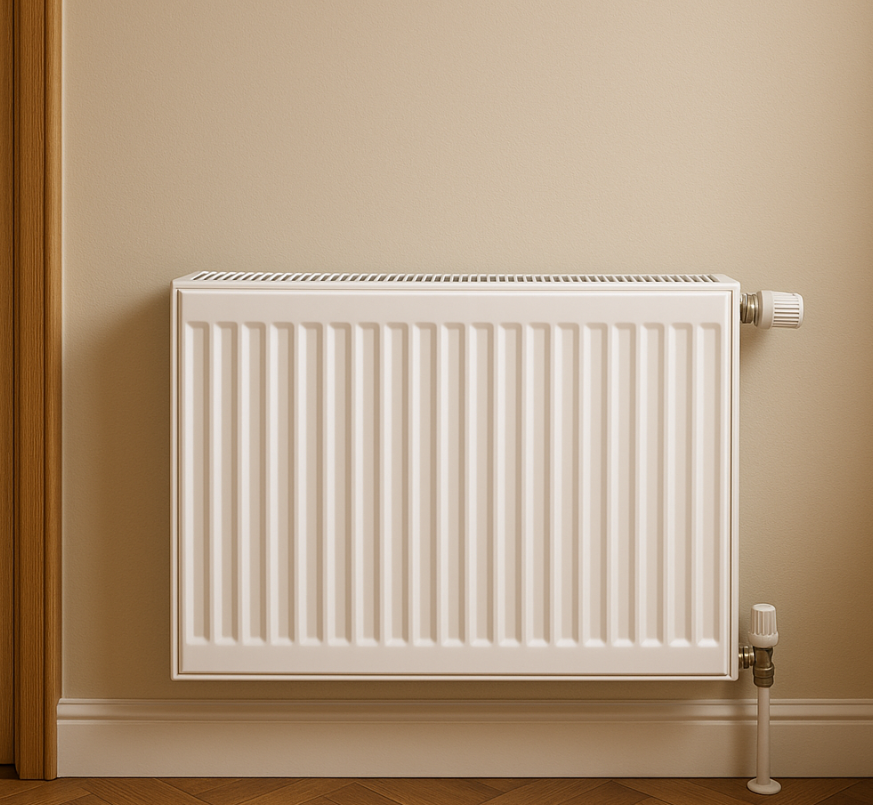
Boilers
Boilers are highly efficient systems that heat water and distribute it as steam or hot water. This method allows for even heating across your home. Many modern boilers can achieve 90% efficiency or higher, significantly reducing energy bills. Depending on your system type, you may opt for gas, oil, or electric-powered boilers to fit your needs.
Furnaces
Furnaces are designed to heat air and circulate it throughout your home via ductwork. They can operate on various fuel types, including gas, oil, or electricity. Generally, furnaces achieve high efficiency ratings and can be finely tuned to ensure consistent comfort amidst varying outdoor temperatures.
With a furnace, you enjoy rapid heating, which is beneficial during harsh winter months. The system offers different models, including conventional and high-efficiency units, providing options that suit your budget and energy goals.
Heat Pumps
Heat pumps work by transferring heat rather than generating it directly, making them an energy-efficient option for heating and cooling your home. They can extract heat from the air, ground, or water, and use it to warm your living spaces effectively. Depending on climate conditions, specific types of heat pumps may perform better.
In milder climates, air-source heat pumps offer efficient heating, while ground-source heat pumps provide stability in extreme temperatures. The versatility means your system can be catered to year-round needs, often leading to considerable savings on energy bills.
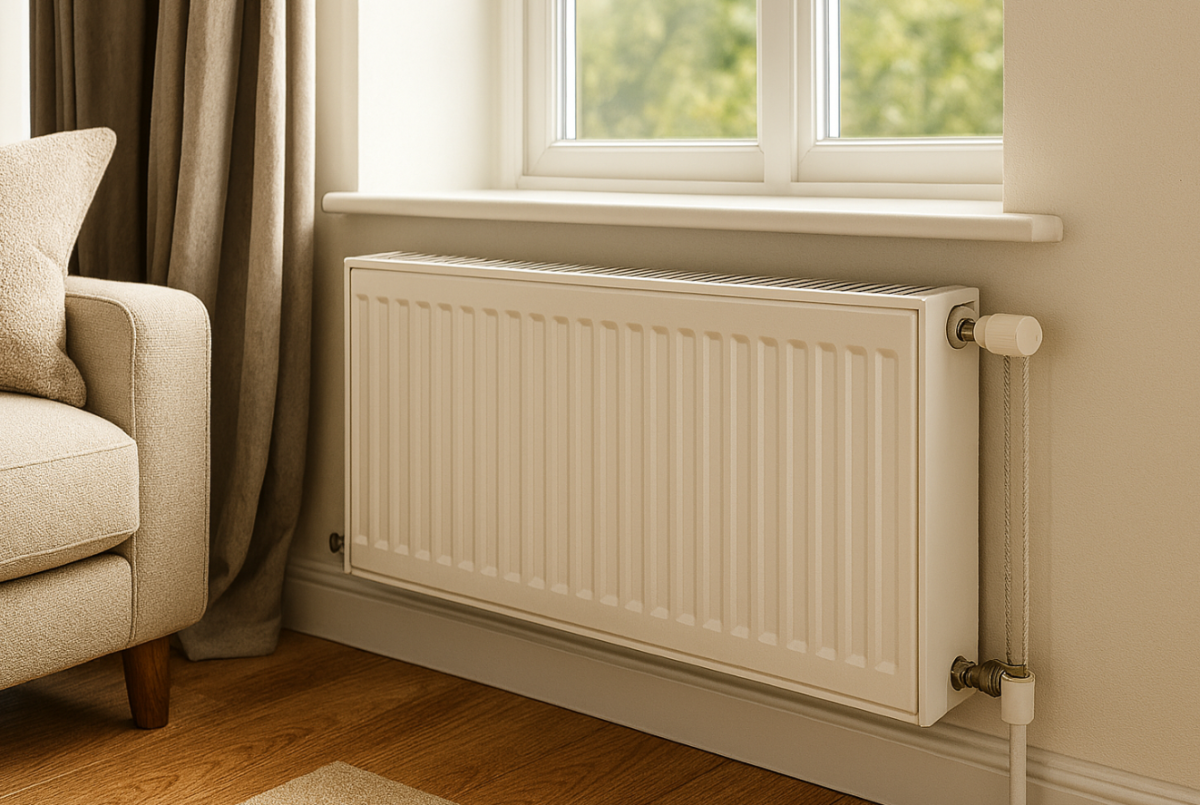
Radiant Heating
Radiant heating systems provide warmth directly to floors or walls, achieving a uniform heat distribution. This approach often involves hydronic systems that circulate heated water through tubes or electric systems installed beneath flooring. The result is a cozy environment without the drafts common with traditional systems.
In addition to comfort, radiant heating can enhance energy efficiency by allowing lower thermostat settings since heat is emitted evenly. It’s particularly effective in homes with tile or concrete floors, where the system operates silently, making it a desirable choice for modern living spaces.
Comparison of Heating Systems
| Heating System | Features |
|---|---|
| Gas Central Heating | Efficient, quick heating, lower running costs. |
| Electric Heating | Simple installation, but higher energy costs. |
| Oil Central Heating | Good for rural areas, fluctuating oil prices. |
| Heat Pumps | Eco-friendly, significant installation costs. |
Efficiency
When evaluating heating systems, efficiency plays a critical role in your energy bills. Gas central heating typically outperforms electric systems in efficiency, while heat pumps offer substantial energy savings in milder climates. Electric heating might be convenient, but it tends to be less energy-efficient, impacting your overall costs.
Cost
Your initial investment and ongoing expenses can vary significantly among heating systems. Gas boilers might have a higher upfront cost but can lower your monthly energy bills, unlike electric systems that usually result in increased expenses over time due to energy prices.
For example, installing a gas central heating system may cost around £3,000-£5,000, whereas electric heating solutions can be lower in installation cost yet may lead to monthly bills that exceed £100, especially during the winter months. In contrast, oil systems can cost up to £4,500 initially and present variable fuel prices. Heat pumps often necessitate higher initial investments of £8,000-£12,000, but they can significantly reduce your energy bills in the long term, especially in well-insulated homes.
Maintenance
Regular maintenance is vital for optimal performance and longevity of your heating system. Gas central heating systems require annual checks by a certified technician to ensure safety and efficiency, while electric systems typically demand less maintenance.
Neglecting maintenance on gas boilers can lead to serious safety hazards, including carbon monoxide leaks. Conversely, electric heating systems, though easier to maintain, can suffer from issues like system overheating if not regularly checked. It’s important to factor in these maintenance needs when assessing the lifetime costs and reliability of any heating system in your home.
Selecting the Right System for Your Home
Choosing the appropriate central heating system for your home involves assessing your specific needs and preferences. Factors such as the layout of your home, available energy sources, and budget will influence your decision. Each system has its advantages and challenges, ensuring there’s a suitable option for every household.
Factors to Consider
When choosing a heating system, consider the following:
- Size of your home
- Energy efficiency ratings
- Installation and maintenance costs
- Fuel availability in your area
- Your personal comfort preferences
Recognizing these factors will help identify the most effective heating solution for your living space.
Professional Consultation
Engaging a professional can provide valuable insights as you navigate your heating options. Specialists can assess your home’s specific characteristics and recommend the best systems tailored to your needs. They can evaluate factors like insulation quality and existing infrastructure that may influence your heating efficiency.
A professional consultation often includes a detailed analysis of your home and a clear explanation of various systems’ benefits and drawbacks. By examining your current heating setup, professionals can suggest upgrades or alternatives that maximize comfort and energy savings. Access to their expertise ensures you make informed decisions that cater to both your current needs and future challenges, making the investment worthwhile.
Installation and Maintenance
Proper installation and regular maintenance of your central heating system ensure optimal performance and longevity. Skilled professionals should handle the initial setup to guarantee that all components are correctly integrated and functioning efficiently. Neglecting maintenance can lead to unforeseen breakdowns and costly repairs that could have been avoided with routine care.
Installation Process
The installation process typically involves assessing your space and selecting the appropriate system based on your heating needs. After that, layout planning ensures efficient piping and placement of radiators or vents. Qualified technicians will then install the system, ensuring all connections are secure and that controls and thermostats are calibrated correctly for efficient operation.
Regular Maintenance Tips
- Schedule annual system inspections.
- Inspect and replace filters regularly.
- Bleed your radiators to release trapped air.
- Check thermostat accuracy to ensure optimal settings.
- Assume that regular upkeep enhances system longevity.
Regular maintenance not only keeps your system running efficiently; it also identifies potential issues before they escalate into significant problems. Keeping a log of service dates and any repairs will assist you in staying organized. Consistently checking for signs of wear and tear can prevent catastrophic failures.
- Keep a maintenance log to track service dates.
- Inspect ducts and vents for blockages or damage.
- Ensure proper insulation to maintain heating efficiency.
- Evaluate your system’s performance regularly.
- Assume that preventative measures save money in the long run.
Benefits of Modern Central Heating Systems
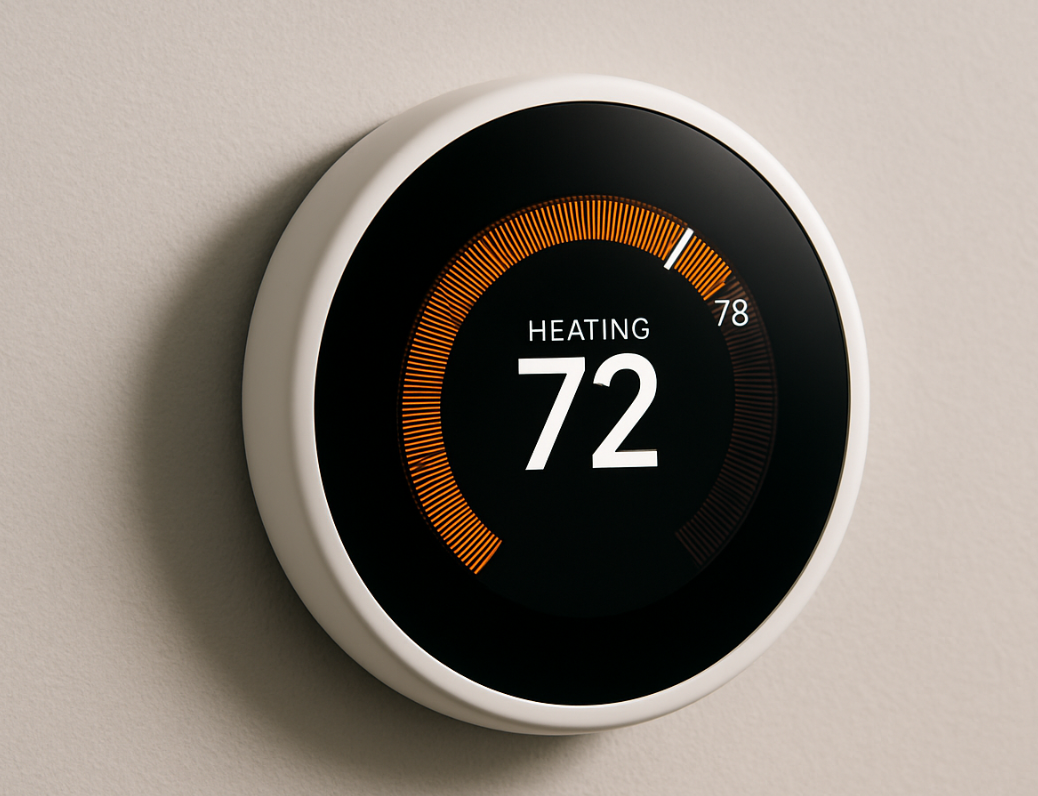
Modern central heating systems offer a range of benefits that enhance both comfort and efficiency in your home. With advancements in technology, these systems not only provide consistent warmth but also contribute to energy savings, helping you lower your utility bills and reduce your carbon footprint. You’ll find that features such as programmable thermostats and smart controls allow for more personalized heating options, making your living environment more enjoyable and cost-effective.
Energy Efficiency
Energy efficiency is a hallmark of contemporary central heating systems. By utilizing advanced technologies, such as condensing boilers or heat pumps, these systems can operate using significantly less fuel compared to older models. You could save up to 30% on heating costs simply by upgrading your equipment, which in turn reduces greenhouse gas emissions and supports environmental sustainability.
Comfort and Convenience
With respect to comfort, modern central heating systems excel by providing consistent and even warmth throughout your living spaces. Smart controls enable you to set schedules, adjust temperatures remotely, and create zones in your home for customized heating. This means you’ll enjoy customized comfort tailored to your preferences and lifestyle, enhancing your overall living experience.
With features like smart thermostats and zone heating capabilities, you can easily control temperatures in specific areas of your home. This flexibility not only maximizes comfort but also promotes energy savings by allowing you to heat only the rooms you use. Furthermore, many modern systems include Wi-Fi connectivity, letting you adjust your home’s heating from anywhere, ensuring a warm welcome when you arrive home. Such conveniences transform your central heating experience from a basic necessity into a seamless part of your daily life.
Conclusion
From above, you have learned that the four types of central heating systems—steam, hot water, forced air, and electric—each offer distinct advantages and operational methods tailored to your needs. Understanding these systems allows you to select the most efficient option for your home, ensuring comfort and effective energy use. By evaluating your specific requirements and preferences, you can make an informed decision that enhances your living space.
Fortify your home without breaking the bank! Discover the top DIY Security Upgrades, from smart doorbells and motion lighting to simple hardware fixes that deter intruders.
When it comes to home security, you don’t need to spend a fortune to make significant upgrades. Simple DIY measures can enhance your safety without straining your budget. From reinforcing locks to installing motion-activated lights, there are numerous ways to protect your home effectively. Let’s explore these practical upgrades so you can create a safer environment for your family and peace of mind for yourself. What’s the first step you’ll take?
Upgrade Your Locks
When it comes to securing your home, you can’t underestimate the importance of strong locks. Upgrading your locks is a practical step toward enhancing your security.
Consider investing in smart locks, which offer convenience and keyless entry options. These locks allow you to control access from your smartphone, ensuring you know who’s coming and going.
Additionally, explore deadbolt options that provide extra protection against break-ins. A high-quality deadbolt can greatly improve your home’s defense, so choose one that meets industry standards.
Don’t forget to replace any outdated or worn-out locks, as even the best locks won’t be effective if they’re compromised.
Install Motion-Activated Lighting
Installing motion-activated lighting can greatly enhance your home’s security while also providing convenience.
These lights can deter potential intruders by flooding your yard with light when movement is detected. To maximize effectiveness, focus on light placement strategies; position them near entry points like doors and driveways.
Experiment with motion sensitivity settings to guarantee they activate only when needed, reducing unnecessary triggers from pets or passing cars.
Consider using LED bulbs for energy efficiency and longer lifespan. Not only will you feel safer at home, but you’ll also create a welcoming environment for family and friends.
With a little planning, these simple upgrades can transform your space into a well-lit sanctuary that fosters a sense of belonging.
Reinforce Doors and Windows
Although you might think of your doors and windows as secure, reinforcing them can considerably boost your home’s overall safety.
Start by installing door frame reinforcement kits, which strengthen the area around your locks, making it harder for intruders to kick in. Consider replacing standard locks with high-quality deadbolts to enhance security further.
For windows, adding window locks is essential; they prevent easy access and give you peace of mind. You can also use window security film to make glass tougher against break-ins.
These budget-friendly upgrades not only protect your belongings but also create a safer environment for your family. Investing in these simple enhancements shows your commitment to your home’s security and the well-being of those you care about.
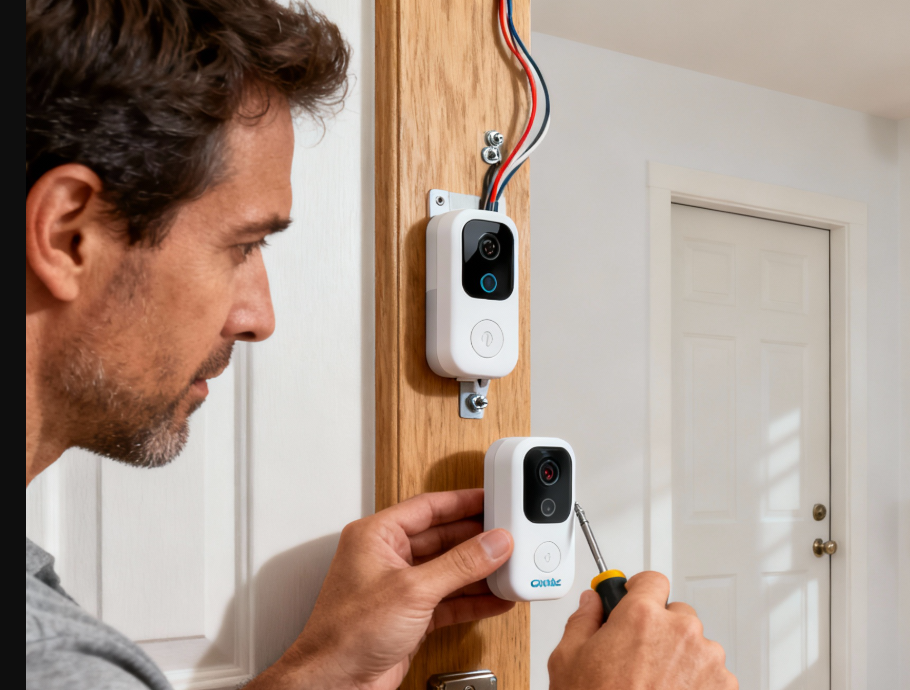
Use Security Cameras
Using security cameras is a smart step in enhancing your home’s security.
You’ll want to choose the right cameras based on your specific needs and guarantee they’re placed for maximum coverage.
Plus, integrating them with your existing home systems can make monitoring even easier.

Choosing the Right Cameras
How do you know which security cameras are right for your home? Start by evaluating your needs. Consider camera features like resolution, night vision, and motion detection. High-resolution cameras provide clearer images, while night vision guarantees safety even in low light.
You’ll also want to think about connectivity; Wi-Fi cameras offer easy access through your smartphone.
For installation tips, choose models that suit your skill level. Some cameras come with user-friendly mounts, while others might require professional help.
Don’t forget to check for warranty and customer support options. Ultimately, the right security camera system should blend seamlessly into your home, making you feel secure and connected.
With the right choice, you’ll enhance your home’s safety, fostering a sense of belonging for everyone inside.
Placement for Maximum Coverage
After selecting the right cameras for your home, the next step is to confirm they’re placed for maximum coverage.
Start by identifying your security zones—areas that need the most monitoring, like entryways and backyards. Position cameras to cover these zones effectively, confirming they capture key points of access.
Don’t forget to check for blind spots; these are vulnerable areas where intruders could go unnoticed. Elevate cameras to get a wider view, and angle them to eliminate potential obstructions.
Regularly review footage to confirm your setup is working as intended. By strategically placing your cameras, you create a safer environment that fosters a sense of belonging and security for you and your loved ones.
Integrating With Home Systems
While integrating security cameras into your home systems may seem intimidating, it can considerably enhance your overall safety.
Start by choosing cameras that support smart home integration, allowing you to connect them with other devices like lights and alarms. This way, you’re creating a cohesive security network that works together seamlessly.
Once set up, you’ll receive automated alerts on your phone whenever motion is detected, keeping you informed no matter where you are. You can even access live feeds straight from your smart devices, giving you peace of mind.
Embracing this technology not only boosts your home’s security but also fosters a sense of belonging to a community that values safety and comfort.
Create a Neighborhood Watch
Creating a Neighborhood Watch is a powerful way to boost your community’s security.
Start by organizing community meetings to discuss safety concerns and gather input from everyone.
Establishing clear communication channels will keep residents informed and engaged, making your neighborhood a safer place to live.
Organize Community Meetings
Gather your neighbors and ignite a sense of community by organizing regular meetings to discuss safety concerns and establish a Neighborhood Watch.
These gatherings foster camaraderie and allow everyone to voice their thoughts on community safety. Start by setting an agenda that includes sharing recent crime trends, discussing preventive measures, and brainstorming ideas to enhance neighborhood security.
Encourage participation by assigning roles, such as a coordinator or a security liaison. Creating a schedule for meetings helps maintain consistency, so everyone knows when to gather.
You can also invite local law enforcement to share valuable insights on crime prevention. By working together, you’ll not only strengthen your neighborhood but also create lasting friendships and a safer environment for all.
Establish Communication Channels
Effective communication channels are essential for a successful Neighborhood Watch, as they keep everyone informed and engaged.
Start by creating a group chat or social media group where neighbors can share updates and concerns. Make sure to exchange emergency contacts so everyone knows who to reach out to in case of trouble.
Encourage members to download safety apps that allow for quick reporting of suspicious activity or emergencies. Regularly check in with each other to strengthen relationships and build trust.
Secure Your Garage
While many homeowners overlook the garage when it comes to security, it’s often an easy target for intruders.
Start by reinforcing your garage door with a sturdy deadbolt or a smart lock. Consider adding security sensors that alert you to any unauthorized access, giving you peace of mind.
If your garage has windows, install shatterproof film or security screens to deter break-ins. Additionally, make certain your garage door is properly maintained; a malfunctioning door can be an open invitation for trouble.
Finally, consider motion-activated lights outside your garage to illuminate any suspicious activity.
Maintain Your Landscaping
Maintaining your landscaping not only enhances your home’s curb appeal but also plays an essential role in your overall security. A well-kept yard can deter potential intruders by eliminating hiding spots.
Start with thoughtful plant selection—opt for thorny shrubs near windows and entry points to create a natural barrier. Additionally, incorporate landscape lighting to illuminate pathways and dark corners. Motion-sensor lights can be especially effective, alerting you to movement while discouraging trespassers.
Regularly trimming overgrown trees and bushes helps maintain visibility, ensuring that your home remains a safe haven. By investing time in your landscaping, you create a welcoming environment that also protects your loved ones, making your home a place where you truly belong.

Invest in a Security System
A well-maintained landscape sets the tone for a secure home, but to truly protect your property, investing in a security system is a wise move.
Today’s technology offers smart home solutions that enhance your safety without breaking the bank. Look for wireless options that make installation a breeze and eliminate the hassle of messy wiring.
Many systems come with features like mobile alerts, video monitoring, and integration with other smart devices, ensuring you stay connected to your home no matter where you are.
Plus, you can customize the system to fit your specific needs, making it a practical choice for any budget.
With the right security system, you’ll not only feel safer but also create a welcoming environment for family and friends.

As the leaves turn and temperatures drop, now is the most critical time to prepare your property for the rigors of winter. Following an Essential Fall Home Maintenance Checklist isn’t just about saving energy—it’s about preventing costly damage, such as frozen pipes, leaky roofs, and furnace failures. The tasks required are often simple and highly cost-effective, but neglecting them can lead to thousands of dollars in winter repairs. We provide a complete, room-by-room guide to ensuring your home is insulated, safe, and running efficiently before the first hard frost hits your area.
As winter approaches, you need to take proactive measures to protect your home from the harsh elements. Start by inspecting your heating system to guarantee it’s running efficiently. Don’t overlook the importance of cleaning your gutters and sealing drafts around windows and doors. These tasks are just the beginning. Let’s explore the essential steps to winterize your house and keep it safe and efficient throughout the colder months.
Inspect Your Heating System
As the temperatures begin to drop, it’s crucial to inspect your heating system to verify it’s ready for the cold months ahead.
Start by checking your thermostat settings to guarantee accurate readings. Replace the air filter to improve heating efficiency and maintain cleaner air.
Next, inspect the vents for blockages and confirm they’re unobstructed. If you have a furnace, look for any signs of rust or wear, and consider scheduling professional maintenance to address any concerns.
Regular system maintenance not only prolongs the life of your heating system but also helps keep energy costs down.
Clean Gutters and Downspouts
Cleaning your gutters and downspouts is an essential task that can prevent serious water damage to your home. Neglecting gutter maintenance can lead to clogs, overflow, and costly repairs.
Start by removing debris like leaves and twigs from the gutters using a sturdy ladder and gloves. For downspout cleaning, guarantee water flows freely by using a plumber’s snake or a garden hose to flush out any blockages.
Check for signs of rust or damage while you’re up there; replacing any damaged sections now can save you headaches later. Regularly scheduled gutter maintenance not only protects your home’s foundation but also enhances its curb appeal.
You belong to a community that values a well-maintained home—take pride in this essential upkeep!

Seal Drafts and Insulate
To keep your home cozy this fall, start by inspecting your windows and doors for any gaps that could let cold air in.
Adding weatherstripping and caulking can greatly reduce drafts, enhancing energy efficiency.
Don’t forget to insulate your attic and pipes to maintain ideal temperatures and lower heating costs.
Inspect Windows and Doors
One of the most effective ways to enhance your home’s energy efficiency this fall is by inspecting windows and doors for drafts.
Start with window maintenance; check for any gaps or cracks in the frame. A simple visual inspection can reveal issues that need your attention.
Next, focus on door sealing. Verify that your exterior doors close tightly and look for any deterioration around the edges. If you find any problems, note them down for repair.
Not only will addressing these issues keep your home cozy, but it’ll also lower your energy bills. Taking the time to inspect and address drafts now will make a significant difference as temperatures drop, creating a comfortable space for you and your family.
Add Weatherstripping and Caulking
Adding weatherstripping and caulking is crucial for sealing drafts and improving your home’s insulation this fall.
Weatherstripping benefits include reducing energy bills and enhancing comfort by preventing cold air from entering your home. Start by inspecting doors and windows for gaps. Choose the right weatherstripping material, such as foam or vinyl, and apply it according to manufacturer instructions for the best results.
For caulking, use high-quality, flexible caulk that can withstand temperature changes. Clean the surfaces thoroughly before applying, and use a caulking gun for precision. This isn’t too difficult a job.
Smooth the bead with a finger or a caulk-smoothing tool to guarantee a tight seal. By mastering these caulking techniques, you’ll protect your home from harsh winter elements and create a cozy, welcoming environment.
Insulate Attic and Pipes
While you’re already sealing drafts with weatherstripping and caulking, don’t overlook the importance of insulating your attic and pipes. Proper attic insulation not only keeps your home warm but also reduces energy bills.
Consider using fiberglass batts or spray foam for effective coverage. Check for gaps or spaces where heat can escape, and guarantee your insulation reaches the recommended R-value for your climate zone.
For pipe insulation, wrap exposed pipes in foam sleeves to prevent freezing and conserve heat. Pay special attention to areas like basements and crawl spaces.
Check Smoke and Carbon Monoxide Detectors
Regularly checking your smoke and carbon monoxide detectors is essential for ensuring your home’s safety.
Start by conducting detector testing at least twice a year. Press the test button on each unit to confirm it’s functioning properly. If you hear no sound, replace the batteries immediately or the entire unit if it’s over ten years old.
Next, perform thorough safety checks by ensuring all detectors are installed in key areas—like the kitchen, hallways, and bedrooms. Remember to keep them free from dust and obstructions.
Encourage family members to recognize the sound of alarms, fostering a shared sense of safety.
Winterize Your Plumbing
As temperatures drop, winterizing your plumbing becomes essential to prevent costly damage.
Start by inspecting your pipes for leaks and addressing any issues. Next, wrap exposed pipes, especially those in unheated areas, with pipe insulation to protect them from freezing.
Don’t forget about your outdoor faucets—drain and shut them off to avoid burst pipes. For faucet maintenance, check for any drips or leaks and repair them before winter sets in.
If you have a sprinkler system, drain it completely to prevent ice damage. Finally, consider adding heat tape to vulnerable pipes for extra protection.
Taking these precautions not only safeguards your home but also guarantees your plumbing remains in top shape all winter long.
Prepare Your Fireplace
Before you light your first fire of the season, it’s crucial to prepare your fireplace to guarantee safety and efficiency.
Start with a thorough fireplace cleaning, removing ashes and soot, which can pose fire hazards. This not only improves air quality but also enhances the fire’s efficiency.
Next, schedule a chimney inspection to identify any blockages or damage that could lead to dangerous creosote buildup. A professional inspection is key to ensuring your chimney is safe and functioning correctly.
Don’t overlook the importance of checking the damper and flue as well; they should open and close smoothly.
Store Outdoor Furniture and Equipment
To protect your outdoor furniture and equipment from harsh winter weather, it’s vital to store them properly.
Start by cleaning each item to remove dirt and debris, which can cause damage over time. Once clean, disassemble any furniture if possible to save space.
Invest in quality outdoor storage solutions, like weather-resistant bins or sheds, to keep your items safe from moisture and pests.
For pieces that remain outside, use durable furniture covers that fit snugly to shield them from snow and ice. Don’t forget to cover grills and tools, too.
Categories
DIY Board and Batten Tips
For your DIY board and batten project, start by choosing durable materials like pine or vinyl that suit your style. Plan your design by measuring wall space and spacing battens 12 to 24 inches apart. Use precise cuts and secure boards with finishing nails for stability. After installation, prime and paint with quality products for a professional finish. Don’t forget to maintain your boards regularly—there’s plenty more to learn to guarantee your project lasts!
Choosing the Right Materials
When you’re ready to tackle your board and batten project, choosing the right materials is essential for both durability and aesthetics.
Start with quality wood, like pine or cedar, which can withstand wear and tear while providing a classic look. If you’re aiming for a low-maintenance option, consider composite materials or vinyl, which resist rot and insects.
Don’t forget about the finish; a good paint or stain can enhance the wood’s natural beauty and protect it from moisture.
When selecting trim, make sure it complements your chosen boards for a cohesive appearance.
Ultimately, the right materials can elevate your project, guaranteeing it lasts for years and looks fantastic in your home.
Make informed choices to achieve the desired outcome effortlessly.
Planning Your Design Layout
After selecting the right materials for your board and batten project, it’s time to focus on planning your design layout.
Start by measuring the wall space where you’ll install the boards. Decide on the height for your battens; a common choice is between one-third and two-thirds of the wall height.
Visualize your design by sketching it out or using painter’s tape to outline where the boards will go. Consider the spacing between the battens, which typically ranges from 12 to 24 inches.
Verify the layout complements your room’s style and proportions. Don’t forget to factor in any windows or doors, adjusting your design accordingly to maintain balance and harmony.
This thoughtful planning sets the stage for a stunning finish.
Proper Installation Techniques
When you’re working with board and batten on an angled wall, you’ll need to adjust your approach for a clean finish.
Start by measuring the angle carefully to guarantee your boards fit snugly.
With the right cuts and a steady hand, you’ll create a stunning look that enhances your space.
Board & Batten on an Angled Wall
Installing board and batten on an angled wall can seem intimidating, but with the right techniques, you can achieve a professional-looking finish.
Follow these steps to guarantee a smooth installation:
- Measure Carefully: Start by measuring the angle and length of your wall to determine the exact dimensions for your boards.
- Cut with Precision: Use a miter saw to cut your boards at the correct angle, guaranteeing a snug fit against the wall.
- Use a Level: Always check your boards with a level as you install them to maintain a straight line, regardless of the wall’s angle.
- Secure Firmly: Attach the boards using finishing nails, making sure they’re anchored into the studs for stability.
With these techniques, your angled wall will look stunning!
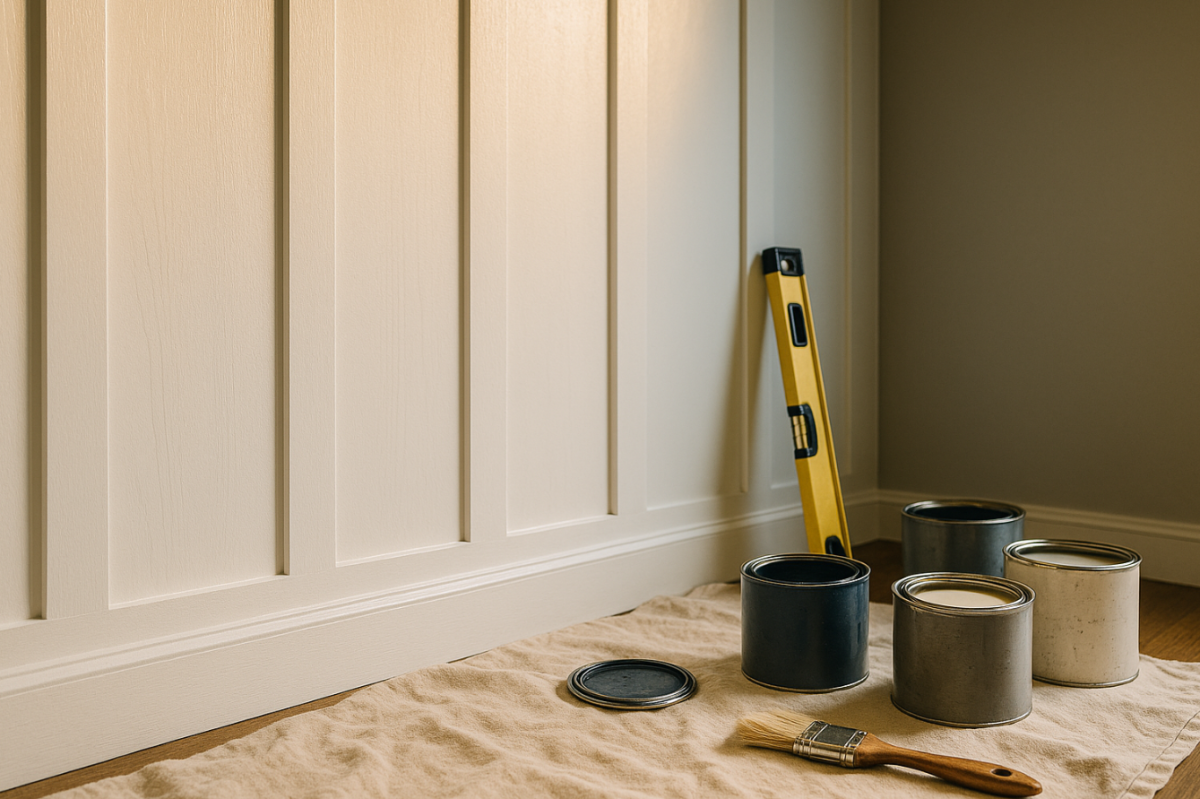
Painting and Finishing Tips
Once you’ve completed your board and batten installation, the next step is to elevate its appearance with thoughtful painting and finishing.
Start by choosing a high-quality primer to guarantee the paint adheres well and lasts longer. Apply it evenly with a brush or roller, filling any gaps or imperfections.
Once dry, select a paint that complements your space. You might prefer a matte finish for a cozy feel or a semi-gloss for a more polished look. Use a paint sprayer or brush for smooth application, and don’t forget to tape off edges for clean lines.
Finally, consider adding a protective topcoat for durability, especially in high-traffic areas. Enjoy your beautifully finished board and batten!
Maintaining Your Board and Batten
Maintaining your board and batten guarantees it stays looking fresh and vibrant for years to come.
Regular upkeep is essential, and it doesn’t have to be a chore. Here are four easy maintenance tips:
- Inspect Regularly: Check for signs of wear or damage, like cracks or peeling paint.
- Clean Often: Use a soft cloth or sponge with mild soap to wipe down surfaces and remove dirt.
- Touch Up Paint: Whenever you notice chips or scratches, touch up the paint promptly to prevent moisture damage.
- Seal Annually: Apply a water-resistant sealant once a year to protect the wood from the elements.
Categories
Ultimate Guide To Hanging Curtains

Hanging curtains can transform your space, and you have several stylish options. You can use a pole with clips or loops for easy adjustments, rings for smooth sliding, or even wire for a modern look. If you prefer no rods, adhesive hooks or branches work great too. For a taller feel, try floor-length curtains. Plus, bay windows can be beautifully accentuated with the right techniques. Keep going to discover more ways to enhance your curtains!
Different Ways Of Hanging Curtains
When it comes to hanging curtains, you’ve got several stylish options to choose from.
You can opt for poles, rings, wire, or even go rod-free for a unique look. Each method offers a different aesthetic and functionality, so let’s explore them together.
Hanging Curtains On A Pole
As you explore different ways to hang curtains on a pole, you’ll find that various methods can enhance both functionality and aesthetics in your space.
One popular option is using curtain clips, which allow for easy adjustment and a casual look. You might also consider using fabric loops that slide directly onto the pole, creating a smooth, streamlined appearance.
Another method is the use of tab-top curtains, which have sewn-in fabric loops for a relaxed, modern vibe. If you’re after a more traditional feel, you can opt for pocket curtains, where the pole is threaded through a sewn pocket.
Each method offers unique benefits, so choose the one that best fits your style and window treatment needs!
Hanging Curtains With Rings
Hanging curtains with rings offers a stylish alternative to using a pole directly. This method allows you to slide your curtains easily, giving you more control over light and privacy.
To get started, choose curtain rings that match your decor—metal, plastic, or wood all make great options. Attach the rings to your curtains by threading the fabric through or using clips if you prefer.
Once your curtains are ready, simply slide the rings onto a curtain rod. You can position the rod higher than the window frame to create the illusion of taller ceilings.
This technique not only enhances your room’s aesthetics but also makes it simple to open and close your curtains as needed. Enjoy the versatility this method provides!
Hanging Curtains On Wire
A wire system for hanging curtains can provide a sleek and modern look to your space. You can easily create a stunning display with minimal hardware.
Start by selecting a durable wire, usually made of stainless steel or nylon, and mount it securely to your walls or ceiling. Use curtain clips or hooks to attach your fabric, allowing for easy movement and adjustment.
You might also consider using a tension wire for a tighter fit, perfect for lightweight curtains. For a more decorative touch, choose colored or patterned wires that complement your decor.
This method not only maximizes natural light but also gives your room an open, airy feel. Enjoy the simplicity and versatility of hanging your curtains on wire!
Hanging Curtains Without Rod
If you’re looking to get creative with your window decor, there are several innovative ways to hang curtains without a traditional rod.
One option is to use adhesive hooks. Simply stick them to the wall and hang your curtains directly from them.
You could also try curtain clips attached to a tension wire or string, giving a more casual vibe.
Another fun method is using a decorative branch or dowel; just suspend it from the ceiling and drape your curtains over it.
A simple binder clip can also work wonders; attach it to the fabric and hang it from a hook.
Each of these methods adds a unique touch to your space while bypassing the conventional curtain rod.

Hanging Curtains From Ceiling To Floor
For a dramatic touch, consider installing curtains that stretch from ceiling to floor. This design creates an illusion of height, making your space feel larger and more elegant.
Start by measuring your ceiling height to choose the right length for your curtains. Hang your curtain rod close to the ceiling, allowing the fabric to flow seamlessly down to the floor. Use sturdy brackets for support, especially if your curtains are heavy.
Opt for floor-length curtains that just graze the floor or puddle slightly for added drama. Choose a fabric that complements your decor, whether it’s sheer for lightness or a heavier material for warmth.
Finally, guarantee your curtains are properly pleated for a polished look.
Hanging Curtains In A Bay Window
Bay windows add charm to any room, and hanging curtains in this unique space can enhance that beauty.
To start, measure the width of your bay window, including the angles. Choose a curtain rod that complements your decor and can accommodate the unique shape. If you prefer a more tailored look, consider using individual rods for each section of the window.
When hanging, position the rods at least a few inches above the window frame to create the illusion of height. For a flowing look, opt for lightweight fabrics that allow natural light to filter through.
Finally, use tiebacks to showcase the window’s angles and maximize your view. With these tips, your bay window will become a stunning focal point in your home.

Frequently Asked Questions
What Type of Fabric Is Best for Curtains?
Lightweight fabrics like linen or cotton work best for curtains, offering a breezy look. If you want more privacy, consider heavier materials like velvet or blackout fabrics. Choose what suits your style and needs!
How Do I Clean My Curtains Properly?
To clean your curtains properly, check the care label first. If machine washable, use a gentle cycle with cold water. For delicate fabrics, hand wash or spot clean, then hang to dry for best results.
Can I Hang Curtains Without Drilling Holes?
Yes, you can hang curtains without drilling holes! Use adhesive hooks, tension rods, or clip-on curtain rings. These options provide a no-damage solution while still allowing you to enjoy beautiful, flowing drapes in your space.
What Length Should Curtains Be for a Specific Room?
For a specific room, curtains should generally be floor-length for an elegant look, or just below the sill for a casual vibe. Measure from the rod to your desired length for the best fit.
How Do I Choose the Right Curtain Rod?
Choosing a curtain rod is like finding the perfect frame for a masterpiece. Consider your room’s style, the curtain weight, and the rod’s length. Don’t forget to factor in your budget for a seamless finish!
Categories
Eco-Friendly Home Improvements
Eco-Friendly Home Improvements – Sustainable Ideas For A Greener Home
It’s imperative to embrace eco-friendly home improvements that not only enhance your living space but also contribute to a healthier planet. By making sustainable choices, you can reduce your carbon footprint, save on energy costs, and create a more comfortable environment for you and your family. This guide will provide you with practical ideas and tips to transform your home into a greener haven, showcasing how simple upgrades can lead to significant positive impacts on both your lifestyle and the environment.
Understanding Eco-Friendly Home Improvements
Eco-friendly home improvements focus on enhancing energy efficiency and reducing environmental impact while increasing the comfort and value of your living space. This shift is driven by a growing awareness of sustainability and the long-term benefits of making better choices for your home. From energy-efficient appliances to sustainable building materials, every decision contributes to a greener lifestyle.
The Importance of Sustainability
Incorporating sustainability into your home improvements helps mitigate climate change and conserves natural resources. As you take steps to improve your home’s environmental footprint, you’re contributing to a larger movement that prioritizes ecological balance and responsible living. This mindset change not only reflects your values but also sets a positive example for your community.
Benefits of Eco-Friendly Choices
Choosing eco-friendly options leads to significant long-term savings, improved health, and enhanced property value. Energy-efficient upgrades can reduce utility bills, while sustainable materials decrease maintenance costs. Furthermore, healthier indoor air quality from non-toxic products can benefit your family’s health. Ultimately, these choices yield a more comfortable and sustainable living environment.
For instance, installing energy-efficient windows can reduce heating and cooling costs by up to 25%, while using low-VOC paints improves indoor air quality, safeguarding you and your family from harmful chemicals. Solar panels can further decrease energy bills and increase home value, providing a tangible return on your investment. By selecting eco-friendly products and designs, you not only foster a healthier home but also support the economy by promoting green jobs and sustainable methods of production.
Energy Efficiency Enhancements
Maximizing energy efficiency in your home not only lowers utility bills but also reduces your carbon footprint. Implementing energy-efficient upgrades can lead to significant savings over time. By making informed decisions on insulation, windows, and renewable energy, you cultivate a sustainable environment while boosting your home’s overall comfort and value.
Upgrading Insulation and Windows
Enhancing your home’s insulation and windows is vital for maintaining temperature control and minimizing energy loss. Proper insulation in attics and walls can reduce heating and cooling costs by up to 20%, while double or triple-pane windows provide better thermal performance and limit air leakage. This not only creates a more comfortable living space but also reduces reliance on heating and cooling systems.
Incorporating Renewable Energy Sources
Integrating renewable energy sources, such as solar panels, can significantly decrease your home’s dependency on fossil fuels. Solar systems can provide substantial energy savings, often reducing utility costs by 50% or more. With government incentives and advancements in technology, installing solar energy systems has become increasingly accessible, allowing you to harness clean energy and contribute to a more sustainable future.
To maximize the benefits of renewable energy sources, consider not only solar panels but also solar water heaters or wind turbines, depending on your location. Investing in a home battery storage system allows you to store excess energy for later use, further enhancing your energy independence. Many homeowners have successfully transitioned to net-zero energy homes, showcasing the potential of renewable energy in creating sustainable living environments. Your choice to incorporate these technologies could lead to long-term financial gains while actively contributing to a cleaner planet.
Water Conservation Strategies
Implementing effective water conservation strategies can significantly reduce your environmental footprint while lowering utility bills. By making small adjustments in your home, you can conserve this precious resource without sacrificing comfort. Consider upgrading fixtures and systems to more efficient models, which allows you to play a part in preserving our water supply.
Installing Low-Flow Fixtures
Switching to low-flow fixtures is an easy and effective way to reduce water consumption. These fixtures can cut your water usage by up to 50% without compromising performance. Installing low-flow showerheads, faucets, and toilets not only benefits the environment but also decreases your water bill, making it a win-win solution.
Rainwater Harvesting Systems
Implementing rainwater harvesting systems captures rainwater for irrigation and other non-potable uses. This approach reduces reliance on municipal water supplies and helps manage stormwater runoff. By collecting and storing rainwater, you create an eco-friendly alternative for maintaining your landscape and gardens.
Rainwater harvesting systems can vary in complexity from simple rain barrels to more elaborate systems with gutters, downspouts, and storage tanks. A basic setup involves positioning a barrel beneath a downspout to collect runoff from your roof. More advanced systems might include filtration units and pumps to distribute harvested rainwater throughout your garden or home irrigation system. Depending on your local climate and rainfall patterns, you could capture thousands of gallons annually, benefiting both your garden and the environment.
Sustainable Landscaping Options
Transforming your outdoor space into a sustainable landscape promotes biodiversity, reduces maintenance, and conserves resources. By selecting environmentally friendly landscaping practices, you can create a thriving ecosystem that benefits your home and the planet. From native plants to lawn alternatives, these options allow you to beautify your property while prioritizing sustainability.
Native Plant Gardens
Choosing native plants for your garden supports local wildlife and requires less water and maintenance compared to non-native species. These plants are well-adapted to your local climate, soil, and insects, making them resilient and easy to grow. Incorporating a variety of native species can enhance your garden’s aesthetics while providing important habitat for pollinators and other beneficial creatures.
Eco-Friendly Lawn Alternatives
Instead of traditional lawns that demand constant watering and chemical treatments, consider eco-friendly alternatives like clover, moss, or native ground covers. These options generally require less upkeep, naturally suppress weeds, and reduce the need for fertilizers. By replacing water-thirsty grass with more sustainable plants, you can significantly lower your water consumption and maintenance efforts.
For instance, utilizing clover not only establishes a lush, green ground cover but also fixes nitrogen in the soil, enriching it naturally. Eco-friendly lawns often thrive with minimal intervention, encouraging a healthy ecosystem while saving time, money, and resources. Many homeowners find that transitioning to these alternatives results in a more vibrant, resilient landscape that needs less input, ultimately creating a beneficial environment for both human and non-human inhabitants.
Choosing Green Materials
When choosing materials for your home improvements, choosing eco-friendly options can make a significant impact on sustainability. Look for products that have minimal environmental impact, such as those sourced from renewable resources, certified sustainable forests, and low-VOC (volatile organic compounds) emissions. Prioritizing these materials not only contributes to a greener home but also enhances indoor air quality, making your living space healthier for you and your family.
Recycled and Upcycled Products
Incorporating recycled and upcycled products into your home is a practical way to reduce waste and conserve resources. Items such as reclaimed wood, recycled glass tiles, and repurposed furniture can add unique character to your space while minimizing the demand for new materials. By choosing these options, you help divert waste from landfills and support a circular economy that emphasizes sustainability.
Non-Toxic Finishes and Paints
Opting for non-toxic finishes and paints is vital for maintaining a healthy indoor environment. Traditional paints often contain harmful chemicals that release volatile organic compounds (VOCs) into the air. Instead, select natural, low-VOC, or zero-VOC alternatives that improve air quality and reduce health risks associated with exposure to toxic substances.
Non-toxic finishes and paints can be made from natural ingredients such as plant oils, milk, or mineral pigments, which are safer for both the environment and your health. Brands like Benjamin Moore and Sherwin-Williams offer eco-friendly options that perform just as well as their conventional counterparts. Using these products not only enhances the aesthetic appeal of your home but also contributes to a sustainable living space free from harmful off-gassing, ensuring your family breathes healthier air.
Smart Home Technology for Efficiency
Integrating smart home technology enhances energy efficiency and promotes sustainable living. By utilizing devices that optimize energy usage, you lower your carbon footprint while saving money on utility bills. From automated systems that adjust power consumption based on your habits to intelligent devices that learn and adapt, these technologies are transforming how you manage energy in your home.
Energy Monitoring Systems
Energy monitoring systems provide real-time insights into your energy consumption. By tracking usage patterns and identifying peaks, you can make informed decisions about your energy habits. Some systems even offer recommendations for reducing waste, helping you to minimize environmental impact effectively.
Smart Thermostats and Appliances
Smart thermostats and appliances optimize energy use by adjusting settings automatically based on your lifestyle. With features like remote control and learning capabilities, these devices ensure that you’re only using energy when necessary, significantly reducing waste and enhancing comfort.
Installing smart thermostats allows you to set schedules and control temperatures from your mobile device, often leading to energy savings of up to 15%. Similarly, smart appliances, such as washing machines and refrigerators, can run during off-peak hours and adjust their settings for maximum efficiency, further optimizing your home’s energy consumption. By investing in these technologies, you can create a more sustainable living environment while enjoying modern conveniences.
Summing up
With this in mind, implementing eco-friendly home improvements not only enhances the sustainability of your living space but also contributes to a healthier environment. By adopting practices such as energy-efficient appliances, sustainable materials, and water conservation techniques, you can significantly reduce your carbon footprint. These choices not only benefit the planet but can also lead to long-term savings on utilities. As you explore these sustainable ideas, you’ll find that creating a greener home is both achievable and rewarding.
Categories
Open-Concept Kitchen Ideas
When you consider an open-concept kitchen, think about how each element interacts to create a harmonious space. The layout, flow, and even the choice of materials can greatly impact functionality and aesthetics. You’ll want to explore popular designs and practical solutions that enhance both cooking and socializing. However, it’s easy to overlook key aspects that can lead to frustration. What common pitfalls should you watch out for as you begin this design journey?
Understanding the Open-Concept Kitchen Trend
Have you ever wondered why open-concept kitchens have surged in popularity? This design evolution traces back to the mid-20th century when families sought more interactive spaces.
Traditional walls separating kitchens from dining and living areas began to dissolve, fostering togetherness. You can visualize a seamless flow where cooking, eating, and socializing intertwine, creating a warm, inviting atmosphere.
The open concept history reflects a shift toward multifunctional spaces that accommodate modern lifestyles. As you step into an open kitchen, you’ll notice how natural light floods the area, enhancing its spaciousness.
This layout encourages conversations and connection, embodying a sense of belonging that resonates with families and friends alike. Embracing this trend means embracing a lifestyle that thrives on togetherness.
Benefits of Open-Concept Layouts
Open-concept layouts offer numerous advantages that cater to the needs of modern households. By removing barriers between spaces, you create an inviting atmosphere that encourages social interaction, allowing family and friends to gather effortlessly.
Picture yourself cooking while still being part of the lively conversations happening in the living room. Increased visibility enhances your sense of belonging, as you can easily keep an eye on kids playing or guests mingling. This design fosters a cohesive flow, making entertaining a breeze.
Natural light also floods the space, creating a warm, welcoming environment. Ultimately, embracing an open-concept layout transforms your home into a vibrant hub where connections flourish and memories are made, ensuring everyone feels included and engaged.
Key Elements of a Functional Open-Concept Kitchen
Creating a functional open-concept kitchen hinges on incorporating key elements that enhance both usability and aesthetics.
Start with kitchen ergonomics; guarantee your workspace promotes comfort and efficiency. Position countertops at a height that feels natural for you, allowing for easy meal prep.
Thoughtful appliance placement is vital—keep your refrigerator, stove, and sink within a convenient triangle to streamline your cooking process.
Utilize cabinetry that offers ample storage while maintaining open sightlines, so the space feels inviting and cohesive.
Incorporate proper lighting, blending ambient and task lighting to create a warm atmosphere.
Finally, select materials and colors that resonate with your style, fostering a sense of belonging as you gather with family and friends in this beautiful, functional space.
Popular Layouts for Open-Concept Kitchens
When designing an open-concept kitchen, considering popular layouts can greatly enhance both functionality and aesthetics.
One popular layout variation is the L-shaped design, which efficiently utilizes corner space while promoting a natural flow between cooking and dining areas.
For a more expansive feel, the U-shaped layout offers ample counter space and storage, inviting gatherings and conversation.
If you prefer a modern touch, the island layout creates a central hub, perfect for meal prep and casual dining.
Each design style provides unique opportunities for creativity and connection, making your kitchen the heart of your home.
Maximizing Space With Smart Storage Solutions
In an open-concept kitchen, utilizing vertical storage options can transform your space while keeping essentials within reach.
Consider incorporating shelves that stretch to the ceiling or wall-mounted racks for pots and pans, making every inch count.
Pair these with multi-functional furniture, like an island that doubles as a dining table, to create a seamless blend of style and practicality.
Vertical Storage Options
To make the most of your open-concept kitchen, consider harnessing vertical storage options that draw the eye upward while maximizing every inch of space.
Wall-mounted storage, like sleek shelves or pegboards, not only creates a visual impact but also elevates your kitchen essentials. Think about stylish shelf organization—grouping your favorite cookbooks, vibrant jars, or elegant dishware can enhance both functionality and aesthetics.
You can even install magnetic strips for knives or spice racks, keeping your counters clear while adding charm.
Don’t forget to utilize the space above cabinets for decorative baskets or plants, which can soften the room’s look.
Embrace these vertical solutions, and you’ll transform your kitchen into a beautifully organized and welcoming space.
Multi-Functional Furniture
Multi-functional furniture can revolutionize your open-concept kitchen by seamlessly blending style with practicality.
Imagine a sleek multi-purpose table that serves as both a dining space and a food prep area, transforming your kitchen into a hub of activity. When guests arrive, simply flip the tabletop to reveal hidden storage for utensils or pantry items.
Pair this with convertible seating that effortlessly changes from stylish stools to comfortable benches, catering to both intimate dinners and lively gatherings.
These innovative pieces not only maximize your space but also enhance the flow of your kitchen, fostering a sense of belonging and connection.
Embrace these smart storage solutions and watch your kitchen become an inviting haven for family and friends.
Enhancing Traffic Flow in Your Kitchen
To enhance traffic flow in your kitchen, start by optimizing the work triangle design, positioning your sink, stove, and refrigerator within easy reach.
Make sure to create clear pathways that allow for smooth movement, preventing bottlenecks during meal prep and entertaining.
With these adjustments, your kitchen will feel more spacious and functional, making cooking a joy rather than a chore.
Optimize Work Triangle Design
When you design your open-concept kitchen, optimizing the work triangle can greatly enhance traffic flow and efficiency.
Picture your stove, refrigerator, and sink forming a triangle, with each point ideally spaced within 4 to 9 feet of each other. This triangle optimization minimizes unnecessary steps, making cooking a breeze.
Ascertain these key areas are unobstructed by cabinets or islands, allowing easy access for everyone in the kitchen.
Consider your workspace layout: a clean, organized environment fosters kitchen efficiency, inviting family and friends to gather.
By thoughtfully arranging your kitchen’s elements, you create a welcoming atmosphere where culinary creativity flows effortlessly, strengthening connections over shared meals and experiences.
Embrace the beauty of design that serves both function and togetherness.
Consider Clear Pathways
While planning your open-concept kitchen, it’s crucial to take into account clear pathways that enhance traffic flow.
Imagine moving effortlessly between the fridge, stove, and sink without obstructions. Effective pathway planning guarantees you can engage with family and friends while preparing meals.
Aim for at least 36 inches of clearance in high-traffic areas to avoid crowding and accidents. This space optimization will make your kitchen feel more inviting and functional.
Visualize an island that not only serves as a prep area but also creates natural shifts between cooking and dining spaces.
Choosing the Right Color Palette
As you commence designing your open-concept kitchen, selecting the right color palette can transform the space into a cohesive and inviting area.
Consider the principles of color psychology—warm tones like yellows and reds evoke energy, while cool shades like blues and greens promote tranquility.
To achieve palette harmony, blend complementary colors that flow seamlessly from the kitchen to adjacent living spaces. For instance, pairing soft cream cabinets with earthy green accents creates a soothing backdrop, while pops of vibrant colors can add personality.
Don’t forget to factor in natural light, as it can alter how colors appear throughout the day.
Ultimately, your chosen palette should reflect your personal style, making the kitchen a welcoming hub for family and friends.
Integrating Islands and Peninsulas
When planning your open-concept kitchen, integrating islands and peninsulas can transform your space into a functional masterpiece.
Consider how these elements enhance workflow, provide additional seating, and serve as focal points for design.
However, it’s essential to avoid common pitfalls that can disrupt the flow and usability of your kitchen.
Design Considerations for Islands
Integrating islands and peninsulas into your open-concept kitchen not only enhances functionality but also creates a focal point that draws people in.
When selecting island styles, consider how they’ll complement your kitchen’s overall design. A sleek, modern island can contrast beautifully with rustic cabinetry, while a traditional style can add warmth.
Think about seating arrangements too; bar stools or cushioned chairs can invite family and friends to gather around. Make sure there’s adequate space for movement—aim for at least 42 inches between the island and surrounding surfaces.
Lighting is vital; pendant lights above the island can create an inviting atmosphere.
Ultimately, it’s about creating a space where everyone feels welcome and connected, making your kitchen the heart of your home.
Peninsula Functionality and Benefits
Peninsulas offer a unique blend of functionality and style, seamlessly connecting the kitchen to the dining or living areas. With their extended countertops, they provide ample peninsula seating, perfect for casual meals or gatherings.
Imagine friends chatting while you chop vegetables or your kids completing homework nearby.
Additionally, peninsulas enhance your kitchen’s efficiency by offering peninsula storage, allowing you to tuck away utensils, pots, and other essentials within easy reach. This clever design not only keeps your space organized but also fosters a sense of togetherness.
Whether you’re entertaining guests or enjoying family time, a peninsula serves as a versatile hub that invites connection and creativity, making your kitchen the heart of your home.
Common Design Mistakes
Designing an open-concept kitchen with islands and peninsulas can be exciting, but it’s easy to overlook key details that lead to frustrating mistakes.
Common design errors include inadequate clearance around your island, which can create layout pitfalls when cooking or entertaining. Make sure you have at least 42 inches of space between the island and surrounding counters for smooth traffic flow.
Another mistake is neglecting the island’s function; if it’s just for looks, you miss out on its potential. Consider incorporating storage or seating to enhance usability.
Finally, don’t underestimate lighting; poorly placed fixtures can dim the atmosphere, making your beautiful design feel cramped.
Lighting Strategies for Open Spaces
While you might think open spaces naturally benefit from ample sunlight, effective lighting strategies are vital to enhance the ambiance and functionality of your kitchen.
Start with ambient lighting to create a warm foundation; consider dimmable options to set the mood for gatherings. For task lighting, pendant fixtures above islands deliver focused illumination, while under cabinet illumination brightens your workspace.
Don’t forget about natural light—maximize it with strategically placed windows or skylights. Light layering is key; combine different sources with varying color temperatures to avoid harsh shadows.
Pay attention to fixture placement to guarantee energy efficiency and comfort. With thoughtful design, your open kitchen will feel inviting, stylish, and perfectly functional for every occasion.
Creating Distinct Zones Within an Open Kitchen
How can you transform an open kitchen into a functional and inviting space? Start by defining distinct zones that cater to your lifestyle.
Use furniture and decor to create space delineation; a kitchen island serves as a cooking zone, while a cozy dining table can mark the eating area.
Consider varying flooring materials or area rugs to enhance visual separation. Incorporate open shelves or decorative screens to maintain airflow and light while clearly indicating different purposes.
For social gatherings, guarantee the zones encourage interaction, blending functionality with warmth.
Common Mistakes to Avoid in Open-Concept Design
When planning an open-concept kitchen, overlooking key design principles can lead to a chaotic and uninviting space. One common mistake is ignoring layout considerations; guarantee that your cooking, dining, and living areas flow seamlessly together. A poorly arranged kitchen can disrupt the harmony of your home, making it feel cramped.
Additionally, don’t neglect the importance of design elements like lighting and color schemes. Dim lighting or clashing colors can create an unwelcoming atmosphere.
Finally, avoid overcrowding surfaces with decor or appliances; this can make the space feel cluttered and overwhelming.
Tips for Personalizing Your Open Kitchen
As you begin personalizing your open kitchen, consider infusing your unique style into every corner to create a space that truly reflects who you are.
Start by selecting a color palette that resonates with you; warm hues invite coziness, while cool tones promote calm. Use unique accents like bold cabinet hardware or a striking backsplash to draw the eye.
Incorporate personal touches, such as artwork or family photos, that evoke memories and spark joy. Choose functional decor, like stylish storage solutions or vibrant dishware, that enhances both beauty and practicality.
Finally, don’t shy away from textures; mix woods, metals, and fabrics to create depth and interest. Your open kitchen should feel like a warm embrace, welcoming friends and family into your personalized haven.
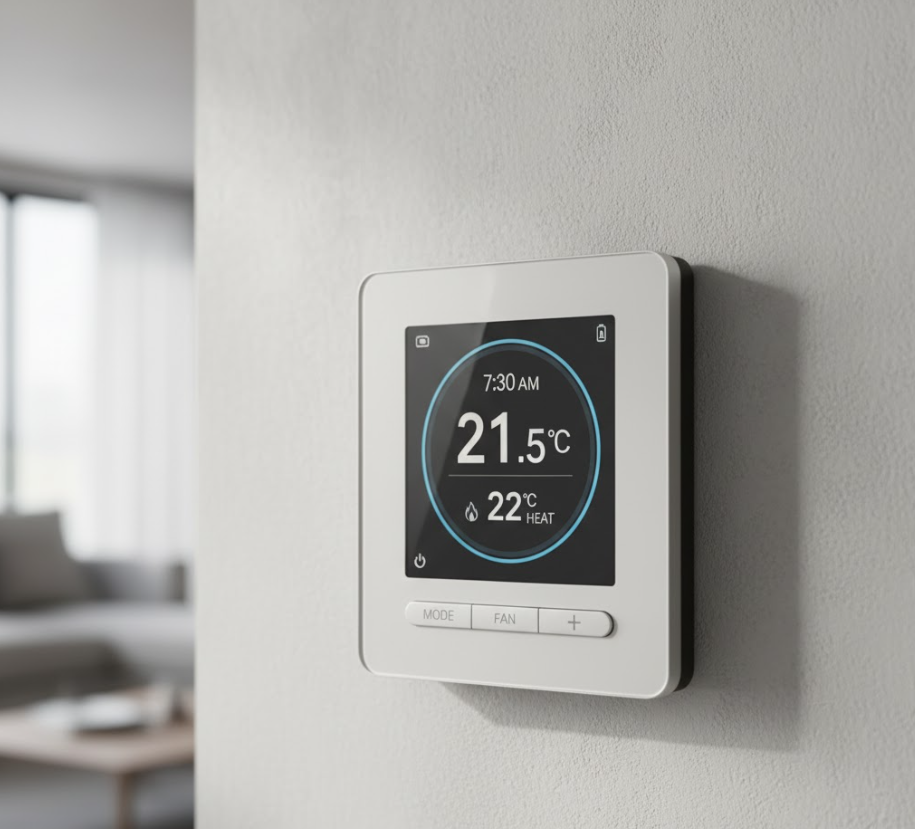
Why should you consider ways to optimize heating in your home for each season?
Many homeowners overlook the importance of adjusting their heating strategies to match seasonal changes, which can lead to inefficient energy use and rising costs. By understanding how to optimize your heating in both summer and winter, you can create a comfortable living environment while saving money. This guide will provide you with practical tips to enhance your heating system’s performance, ensuring you maintain an ideal temperature in your home throughout the year.
Adapting Your Thermostat for Seasonal Efficiency
Adjusting your thermostat settings can lead to significant energy savings and enhanced comfort throughout the year. In winter, aim for a setting of 68°F during the day and lower it at night to about 60-65°F. In summer, a setting of 75-78°F strikes a balance between comfort and efficiency. Additionally, utilizing a programmable or smart thermostat can automate these adjustments and ensure your home maintains optimal temperatures when you need them the most.
Smart Thermostat Features
Smart thermostats come equipped with features that enhance seasonal efficiency, including learning algorithms that adapt to your schedule and preferences. They can provide insights into energy usage patterns, allowing you to make informed adjustments. Remote access via smartphone apps enables you to modify settings on the go, ensuring you’re always in control of your home’s climate, even when you’re away.
Manual Adjustment Techniques
Manual adjustments play a vital role in maintaining energy efficiency throughout different seasons. By manually modifying your thermostat settings based on your daily routine, you can maximize comfort while minimizing energy waste. Consider scheduling your heating or cooling to align with when you’re home, and utilize setbacks during off-peak hours and nights.
Adjusting your thermostat manually involves being attentive to your daily schedule and preferences. For instance, if you typically leave home for long hours during the week, set your thermostat lower in winter or higher in summer. During weekends or when entertaining guests, increase the temperature to ensure comfort. This mindful approach to temperature settings can lead to savings of up to 10% annually on heating and cooling costs, making a significant impact on your energy bills while still keeping your living space comfortable.
Insulation Strategies: Keeping the Heat In (and Out)
Effective insulation plays a vital role in managing indoor temperatures across seasons. During winter, quality insulation retains warmth, while summer insulation reflects heat away from your living spaces. Identify areas in your home that require attention, focusing on attics, walls, and basements to maximize energy efficiency and comfort.
Seasonal Insulation Maintenance
Periodically inspecting and maintaining your insulation is vital to preserving its effectiveness. Look for gaps, wear, or moisture damage, particularly after extreme weather changes. Seal any cracks or openings with appropriate materials, and consider upgrading older insulation to keep your home energy-efficient year-round.
Choosing the Right Materials
Your choice of insulation materials significantly impacts performance. Common options include fiberglass, cellulose, and spray foam, each offering different R-values, moisture resistance, and installation methods. Consider local climate conditions and your specific insulation needs to select the most suitable material.
Fiberglass insulation remains a popular choice due to its affordability and durability, providing R-values ranging between 2.9 to 4.3 per inch. Cellulose, made from recycled paper, is eco-friendly and boasts effective soundproofing capabilities, with R-values around 3.1 to 3.8. Spray foam insulation, while more expensive, offers superior air sealing and a high R-value (approximately 6.5 to 7 per inch), making it ideal for those prioritizing energy efficiency and indoor air quality. Assessing your budget, desired insulation properties, and local regulations will guide your decision-making process.
Climate-Sensitive Heating Practices
Integrating climate-sensitive heating practices ensures that you maximize comfort while minimizing energy consumption. By understanding the distinct demands of summer and winter, you can tailor your heating strategies effectively. This approach not only promotes efficiency but also aligns with eco-friendly initiatives, reducing your carbon footprint. You can make informed adjustments based on local climate patterns, humidity levels, and seasonal trends.
Best Practices for Cold Weather
During cold weather, sealing drafts, utilizing thermal curtains, and employing zoned heating can significantly enhance warmth in your home. Consider using programmable thermostats to automatically lower the heat when you’re away and warm up shortly before you return. Keeping radiators clear of obstructions and maintaining your heating system regularly ensures optimal performance, allowing your space to remain cozy without excessive energy use.
Energy-Saving Tips for Hot Weather
To combat rising temperatures, develop a proactive cooling strategy that minimizes the use of your heating system. Opt for ceiling fans to circulate air, block direct sunlight with window treatments, and embrace natural ventilation during cooler evenings. Setting your thermostat a few degrees higher and using energy-efficient appliances can help to save significantly on cooling costs. Knowing how to effectively manage your indoor temperature makes a substantial difference.
- Use fans in addition to your air conditioning system for better airflow.
- Seal any gaps or cracks to prevent hot air from entering your home.
- Schedule regular maintenance for cooling systems to ensure efficiency.
- Leverage energy-efficient lighting to reduce heat generation indoors.
By incorporating these strategies, you can effectively lower your energy consumption during hot weather. Simple adjustments, such as using exhaust fans in kitchens and bathrooms, can help maintain a cooler indoor environment. Timing your laundry and dishwashing for cooler evening hours also minimizes heat buildup in your home. Knowing these tips allows you to create a more comfortable living space while keeping energy costs down.
- Consider using outdoor shading structures to block sun exposure.
- Invest in smart thermostats that learn your preferences over time.
- Choose natural materials for flooring and furnishings to reduce heat retention.
- Install solar screens on windows to mitigate heat gain.
The Financial Impact of Seasonal Optimization
Optimizing your heating system for seasonal changes can substantially affect your budget. By strategically managing heating efficiency, you reduce energy consumption, leading to lower utility bills. The initial investment in upgrades may be offset by long-term savings, boosting your overall financial health while enhancing comfort in your home.
Cost-Benefit Analysis for Upgrades
When evaluating upgrades, a cost-benefit analysis helps you weigh the upfront costs against potential savings. For instance, installing a programmable thermostat may cost around $100, but it can save you 10-20% on your heating bill annually, translating to $150-$300 in savings, making the upgrade worthwhile in the long term.
Long-term Savings Strategies
Implementing long-term savings strategies involves more than just upgrades; it requires ongoing adjustments and maintenance. Regularly servicing your heating system, improving insulation, and utilizing smart technology can create cumulative savings, effectively decreasing your energy bills season after season.
To maximize your long-term savings, consider scheduling regular maintenance for your heating system. Clean filters and tuned-up units function more efficiently, directly impacting energy consumption. Pair this with home improvements like adding insulation or sealing drafts, which can save you an additional 15% on your heating costs. Investing in a smart thermostat also allows you to adapt temperature settings automatically, ensuring that your system runs only when needed, leading to significant cumulative savings over time. Balancing these strategies will reinforce your financial outlook while ensuring comfort throughout the year.
Staying Ahead: Future-Proofing Your Heating System
Investing in an adaptable heating system ensures long-term efficiency and reliability. Regularly assess your setup for potential upgrades, such as smart thermostats or advanced insulation materials, which can optimize performance irrespective of seasonal shifts. Planning for energy-efficient systems that can accommodate renewable energy sources will also provide cost savings and environmental benefits down the line.
Innovative Technologies on the Horizon
Emerging technologies promise significant advancements in heating efficiency. For instance, systems utilizing artificial intelligence can learn your heating preferences, automatically adjusting settings to enhance comfort while conserving energy. Additionally, developments in geothermal heating and solar-assisted systems enhance sustainability and reduce reliance on traditional fuel sources.
Preparing for Climate Variability
Anticipating changes in climate patterns requires a proactive heating strategy. Unpredictable temperature fluctuations may necessitate systems capable of swift adjustments. Choosing adaptable solutions, like variable-speed furnaces, allows your heating system to optimize performance and efficiency while responding to varying conditions.
Consider local climate forecasts and trends when updating your system. For instance, regions experiencing increased heating demands due to harsher winters may benefit from investing in more robust insulation and high-efficiency systems. Additionally, keeping abreast of climate models aids in predicting energy demands, enabling you to proactively upgrade components to meet future use without compromising on comfort or efficiency.
To wrap up
Now that you understand the importance of adjusting your heating for seasonal changes, you can optimize your energy usage effectively. In winter, ensure your insulation is adequate and utilize programmable thermostats to maintain comfort while conserving energy. In summer, consider using fans and maintaining your HVAC system to enhance cooling efficiency. By making these adjustments, you can create a more comfortable living environment while reducing your energy costs throughout the year.